![NextMinute_Primary_White.svg]](https://support.nextminute.com/hubfs/NextMinute_Primary_White.svg)
🔸 Part A: Getting Started 🔸
Step 1. Navigate to 'Admin', then go into the 'Suppliers' tab and you will now find a new section called 'Supplier Invoice Import Defaults'
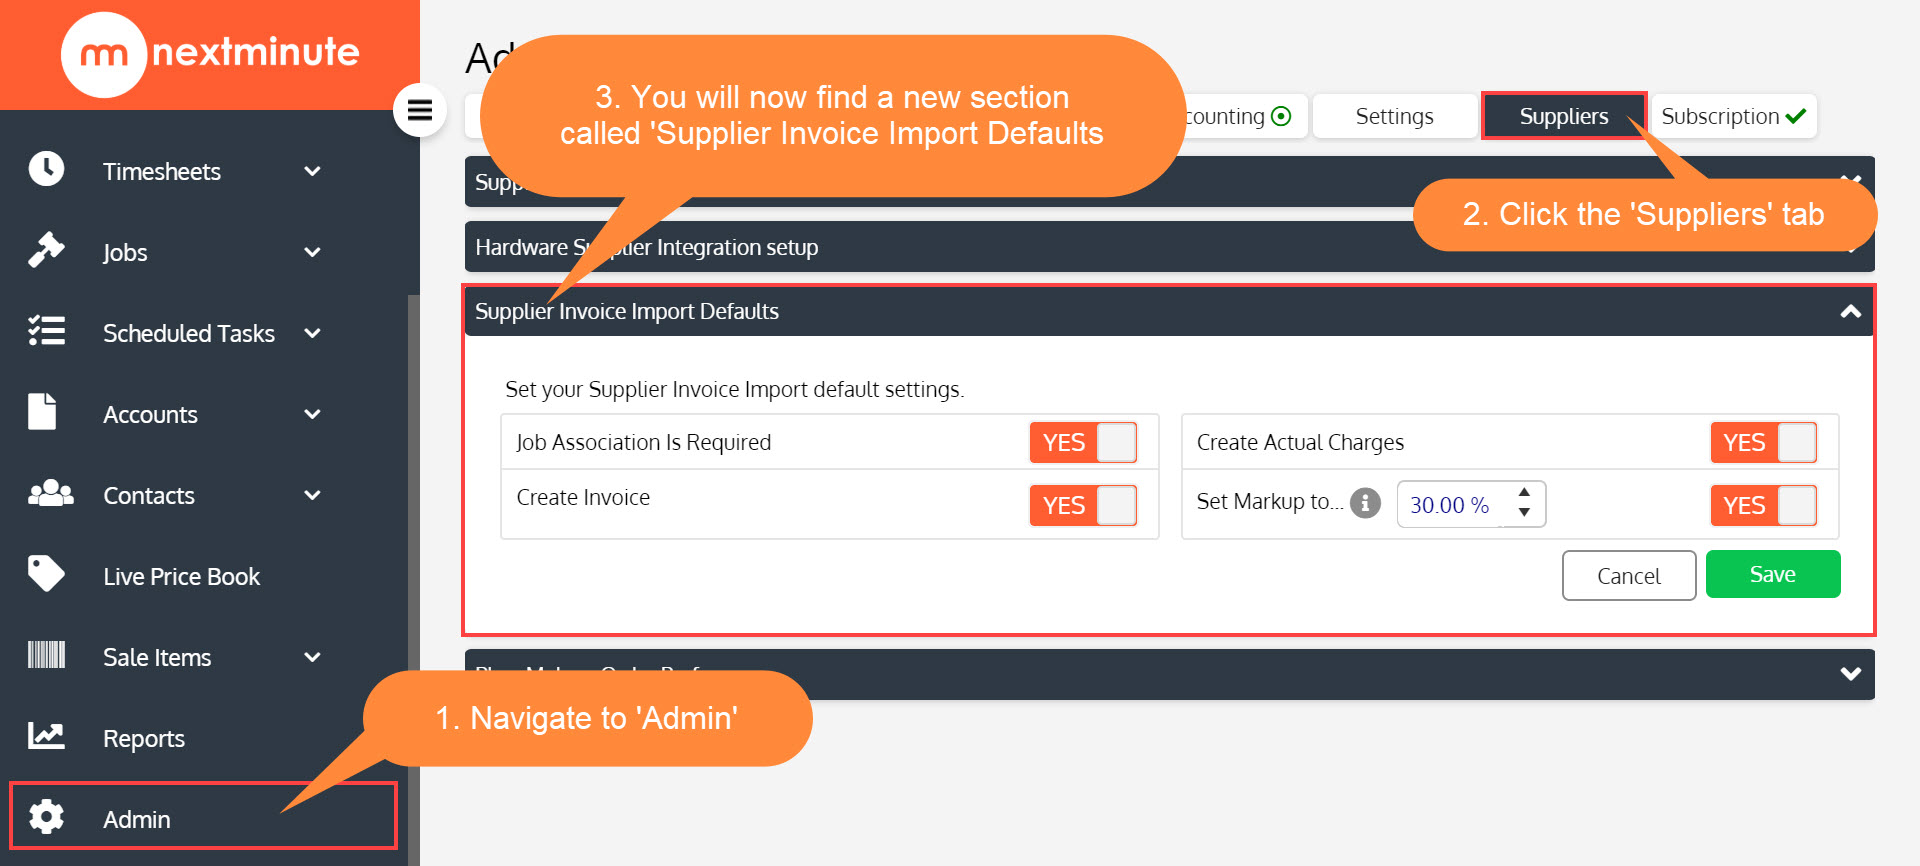
You can pick and choose which settings you want turned on or off, along with setting the default 'Markup' that you would like applied to these Supplier Invoices when they are imported into nextminute from your Xero. When you've done this, hit 'Save'! Please note: If you tick 'Create Invoice', this will use the 'Bill' and create a standard invoice.

🔸 Part B: How to import Xero Bills into NextMinute 🔸
Notes
1. 'Xero Bills' are called 'Supplier Invoices' in NextMinute.
2. You can import more than one 'Bill' at a time, this enables bulk processing of 'Supplier Invoices'.
3. There's currently a limit of 100 Bills that can be 'returned' from Xero at a time. This means if you have over 100 Bills in Xero for the month or time period you are filtering by, some may not show. If this is the case, just click 'Filter' at the top right of the Bills Import screen and change the 'Date Range'.
4. The option 'Create Actual Charges' means that when the Bills are imported into NextMinute from Xero that you can then add these charges to your Job and pass them on to your customer.
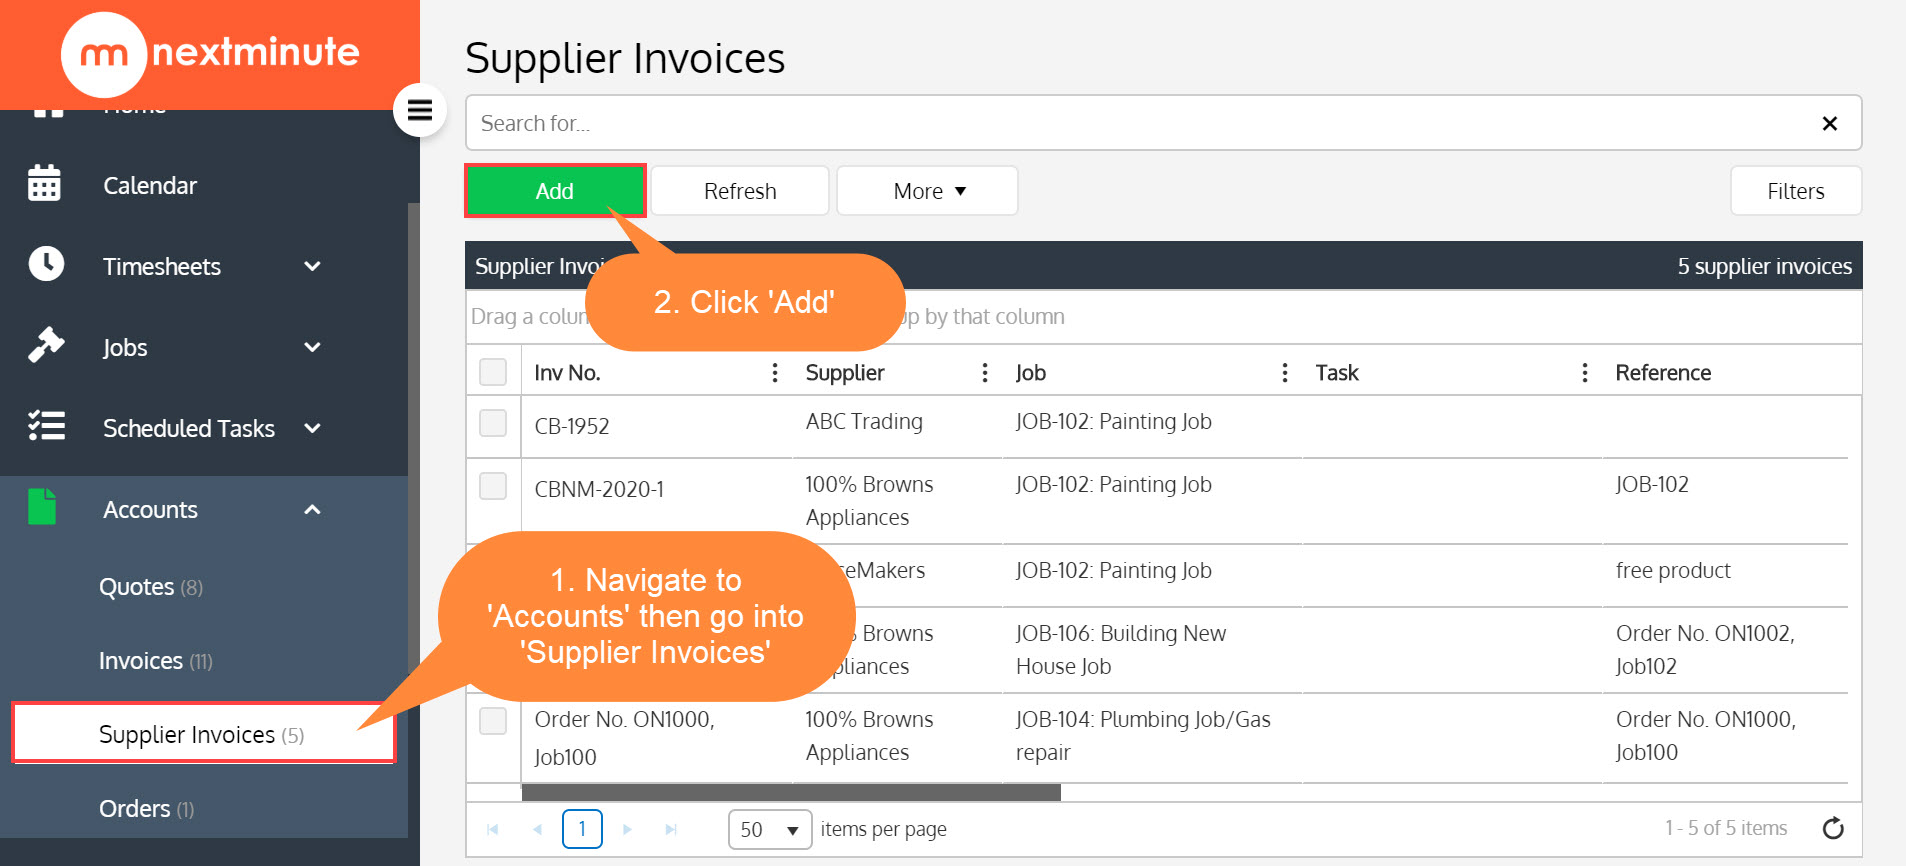
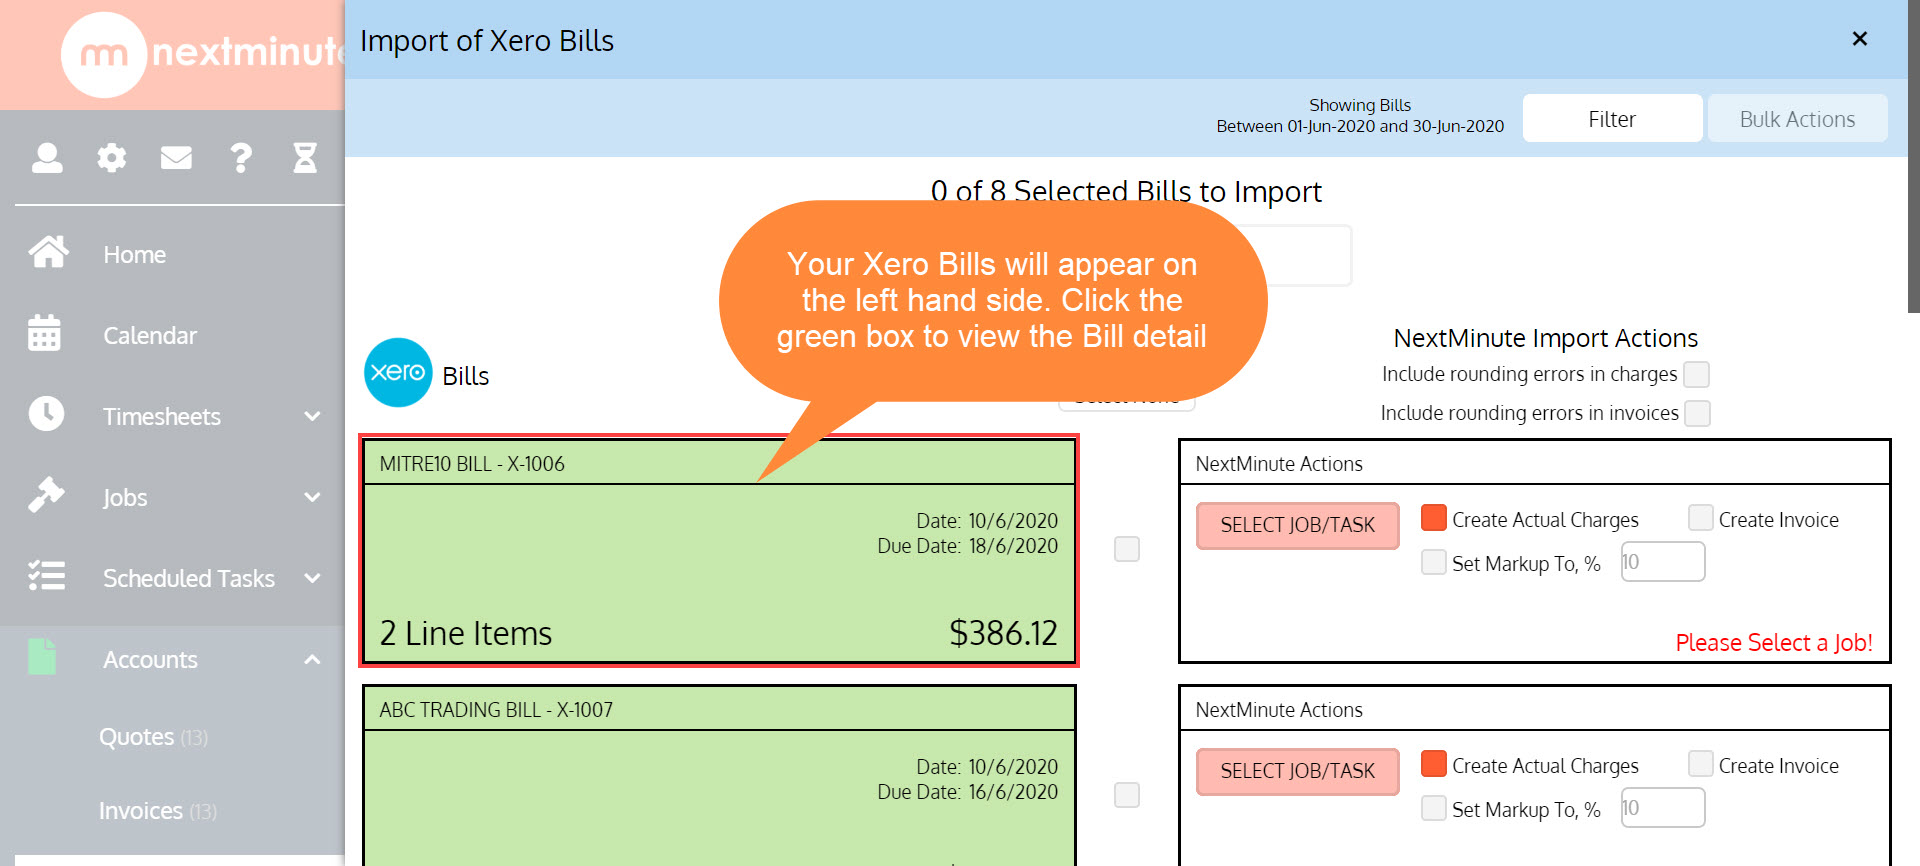
Step 1. Navigate to 'Accounts' then 'Supplier Invoices', now click 'Add'
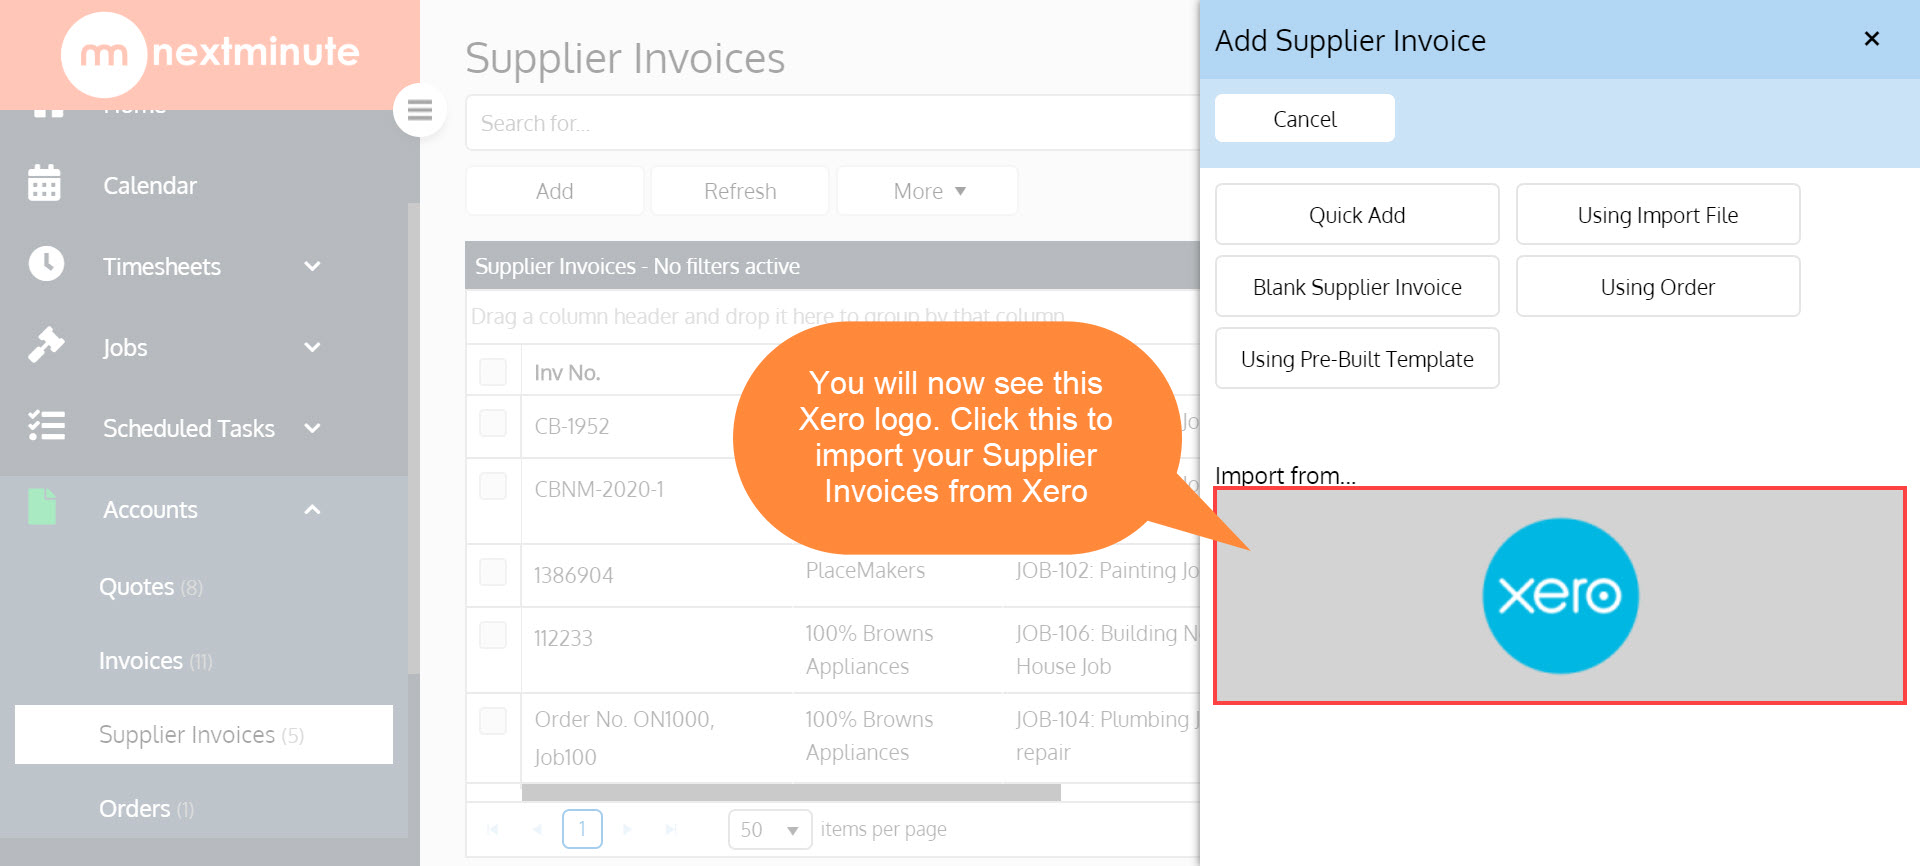
Step 2. Click the Xero logo to import Supplier Invoices from your Xero account into nextminute.
Step 3. Your 'Xero Bills' will show on the left, click to view to bill before importing
🔸 Please note: currently a limit of 100 Bills can be 'returned' from Xero at a time. This means if you have over 100 Bills in Xero for the month or time period you are filtering by, some may not show. If this is the case, just click 'Filter' at the top right of the Bills Import screen and change the 'Date Range'. 🔸
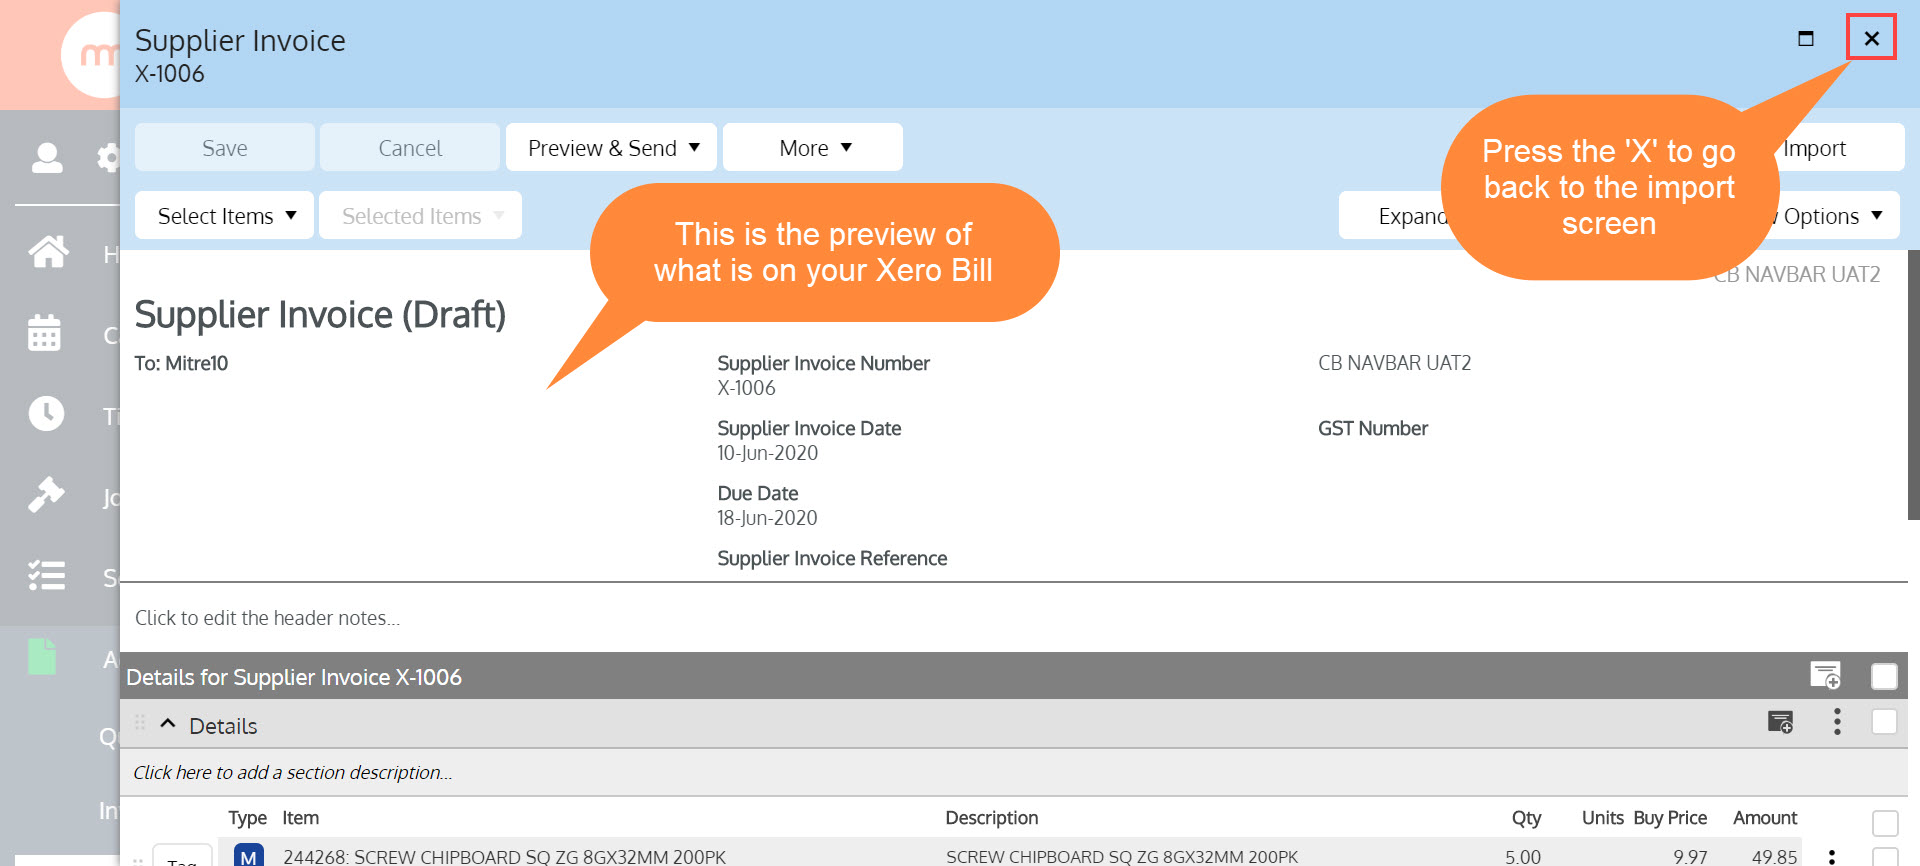
🔸 This is an example of what a preview of your Xero Bill will look like 🔸
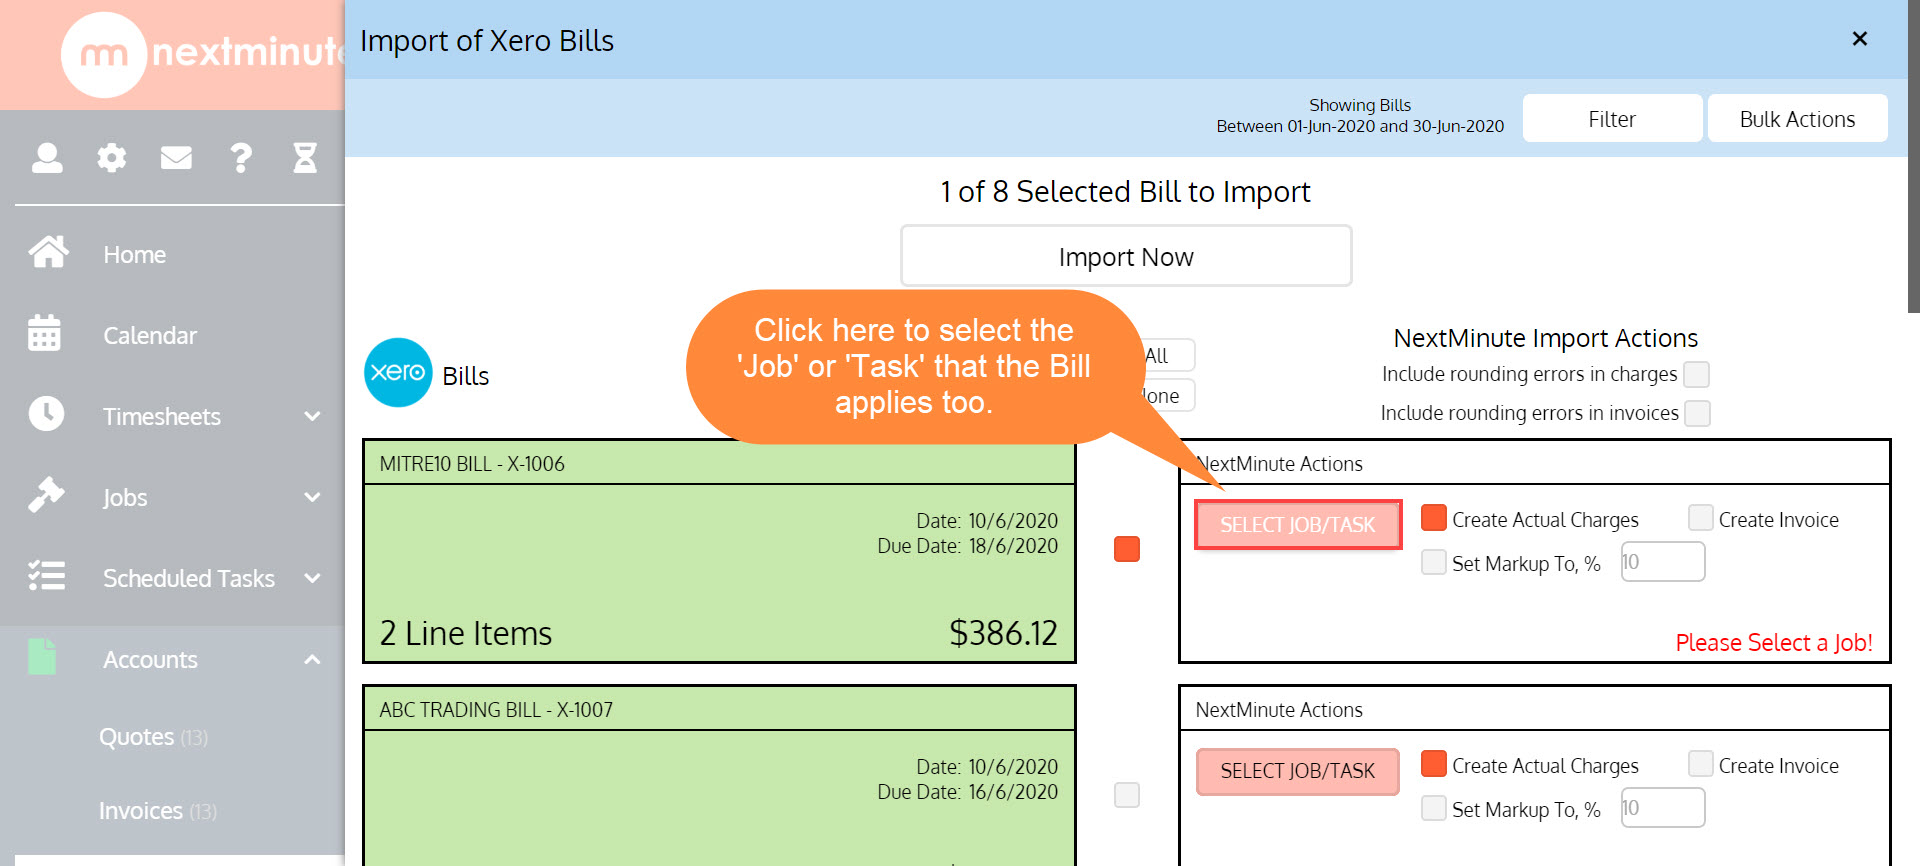
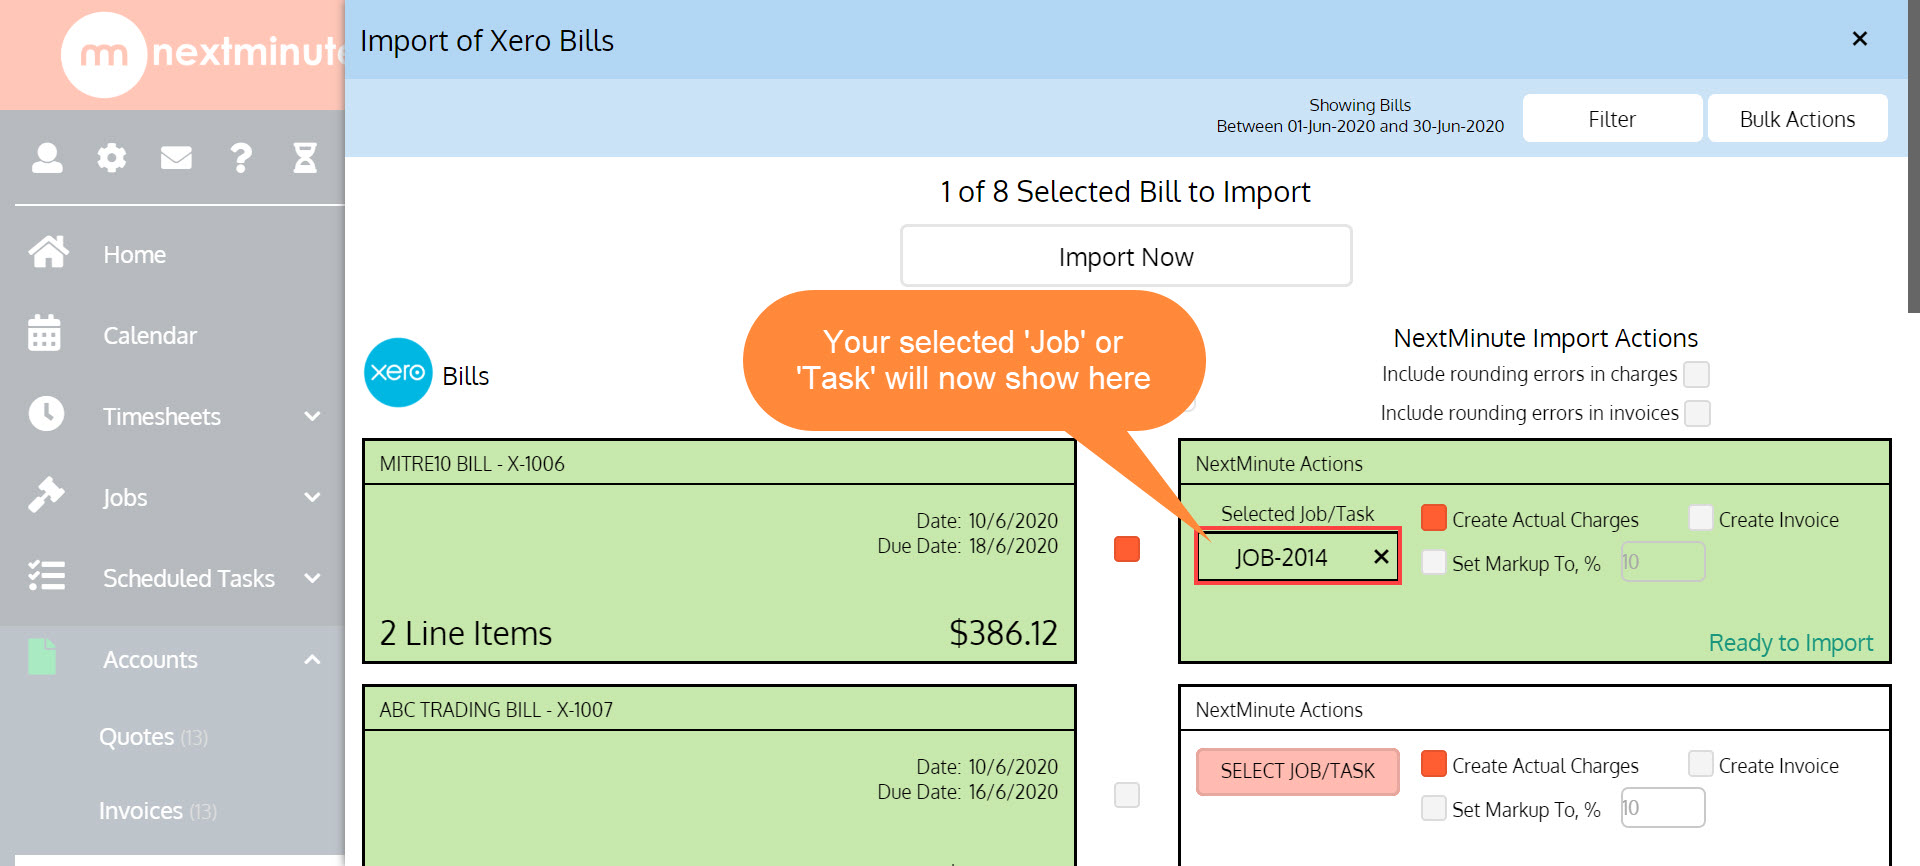
Step 4. Now select the 'Job' or 'Task' that the Bill applies too.
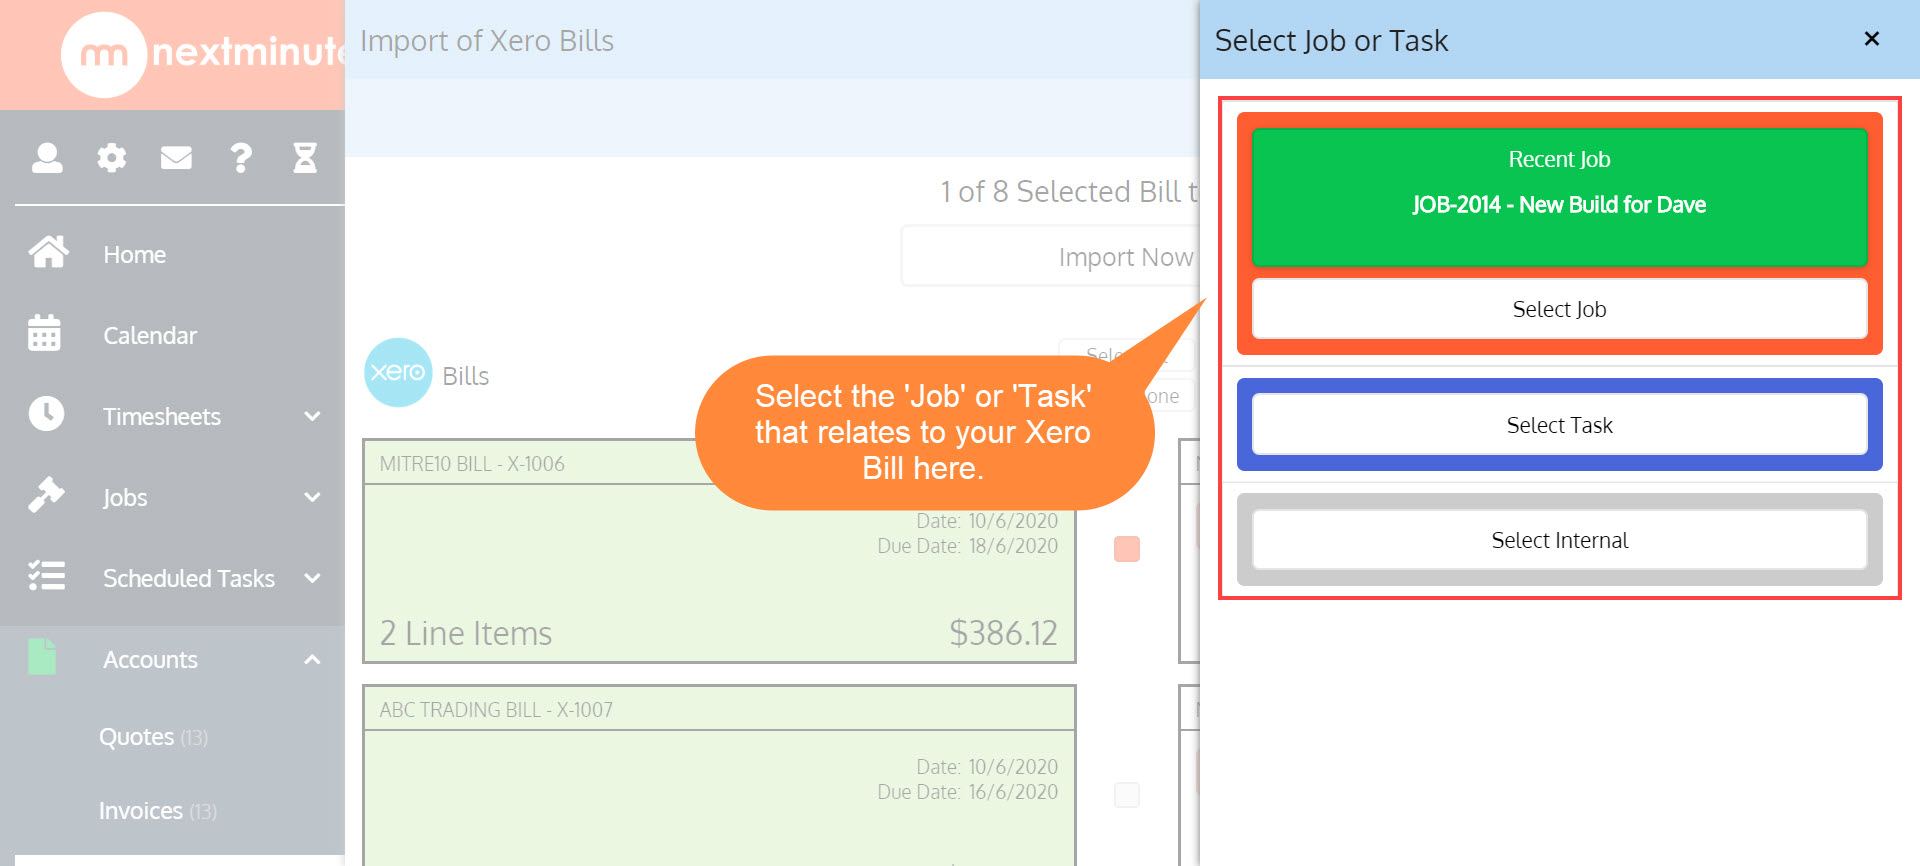
🔸 This is the 'flyout' that will appear for you to choose the 'Job' or 'Task' that the Bill applies too 🔸
🔸 Here you will now see the 'Job' or 'Task' that you selected shown on the import screen as seen below 🔸
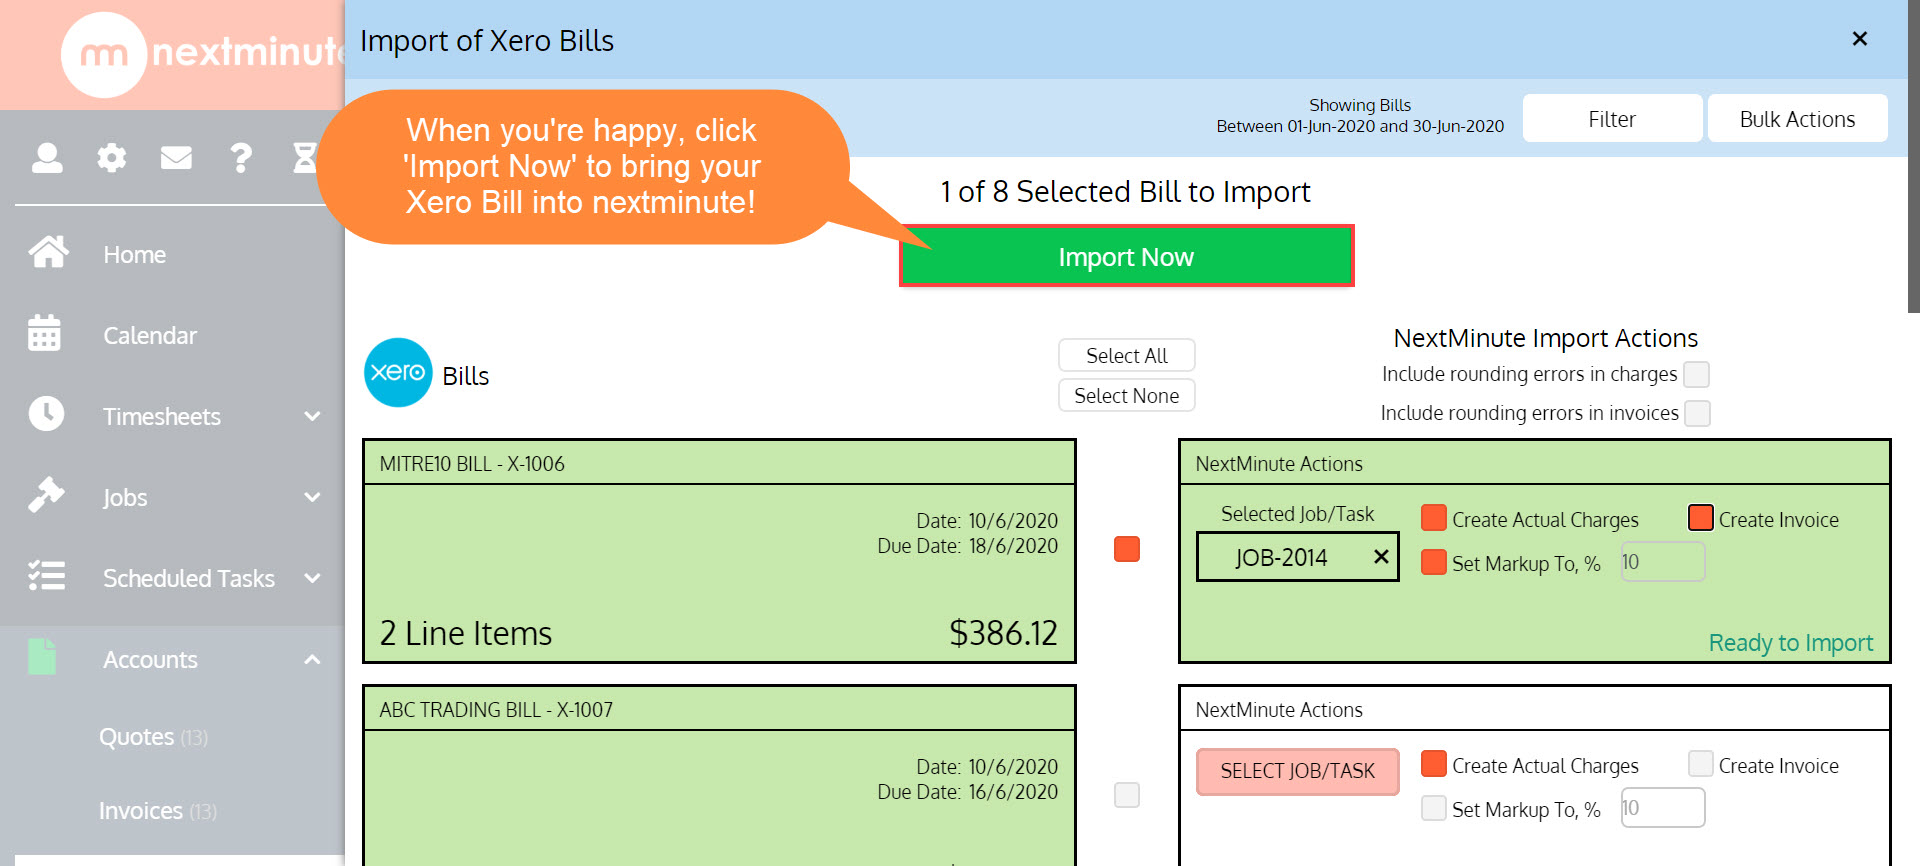
Step 5. Set other required actions as shown below. In this example we will choose to create 'Actual Charges' and 'Create Invoice' with a 10% Markup

Step 6. Now we're ready to import your Xero Bill into NextMinute - Hit 'Import Now'!
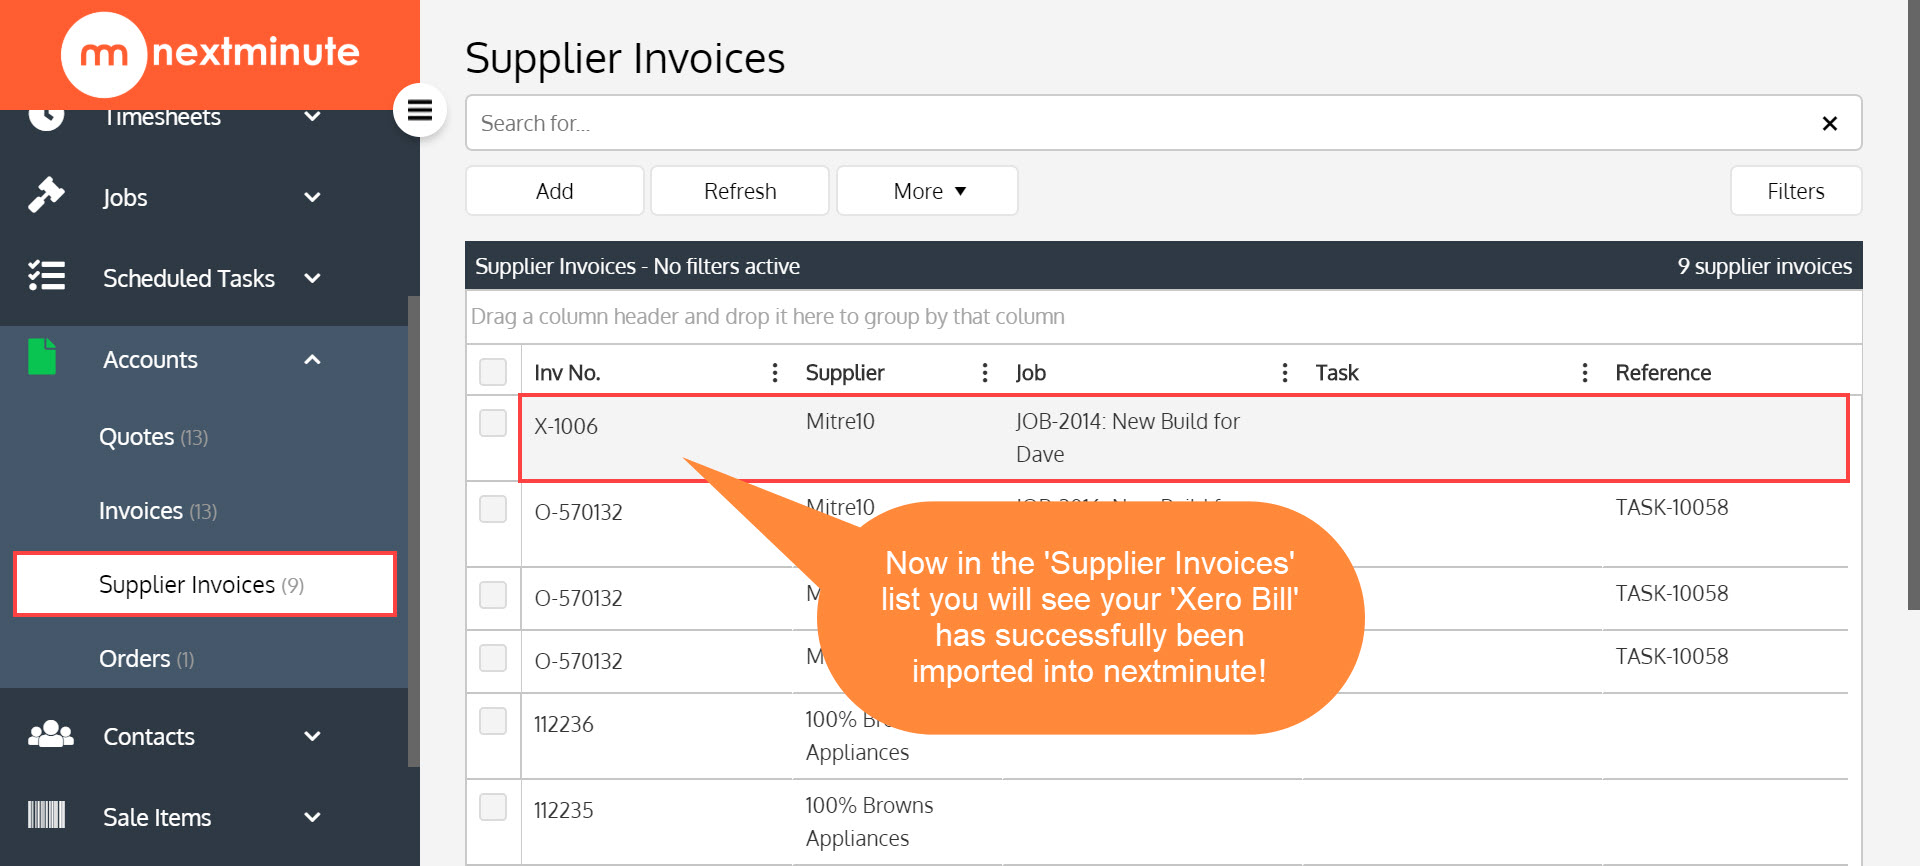
Step 7. Now when we go back into our 'Supplier Invoices' list, we will see our newly imported 'Xero Bill'! Easy as! 🎉