![NextMinute_Primary_White.svg]](https://support.nextminute.com/hubfs/NextMinute_Primary_White.svg)
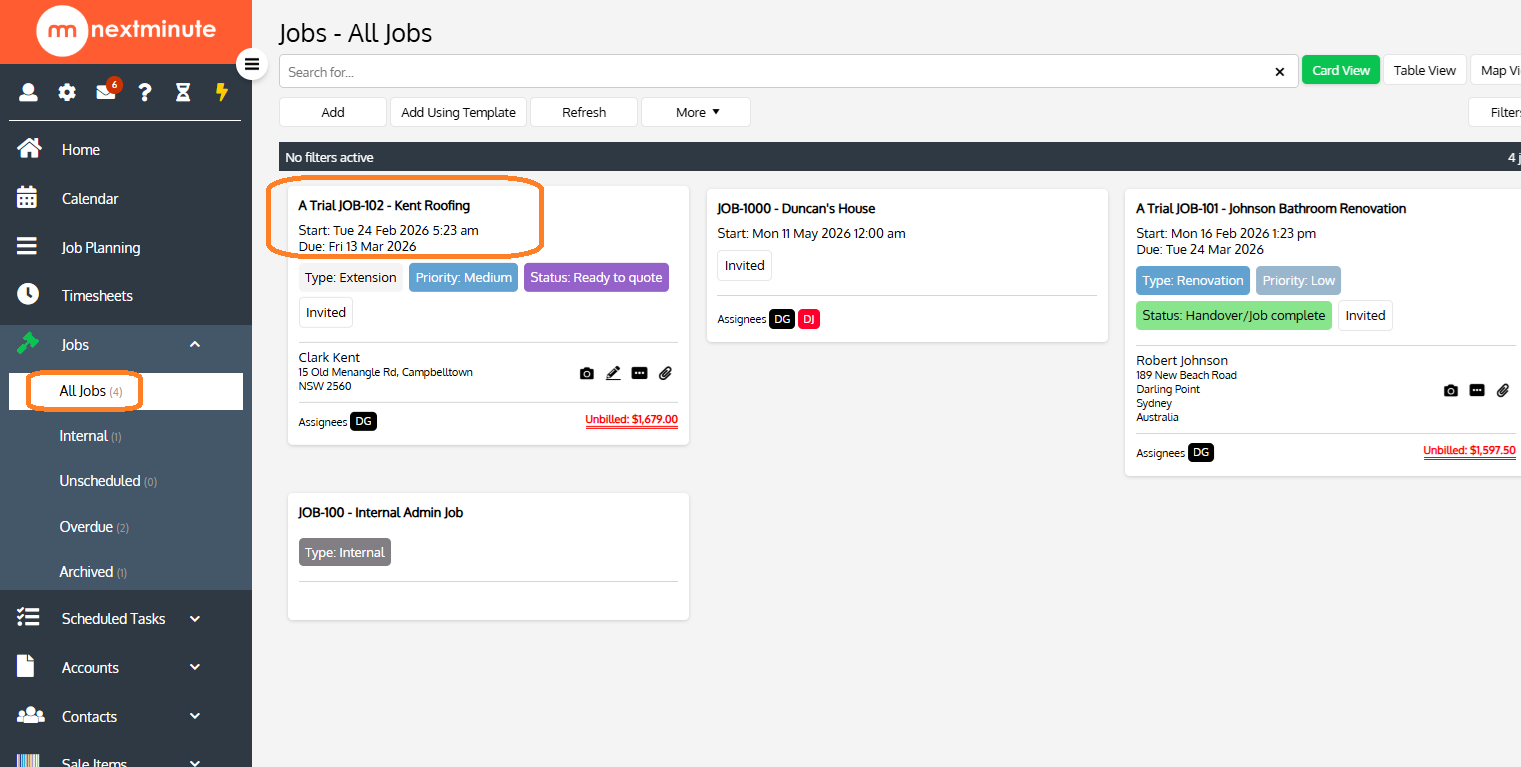
Step 1: Navigate to a Job
- Select Jobs
- Click on All Jobs
- Choose a Job
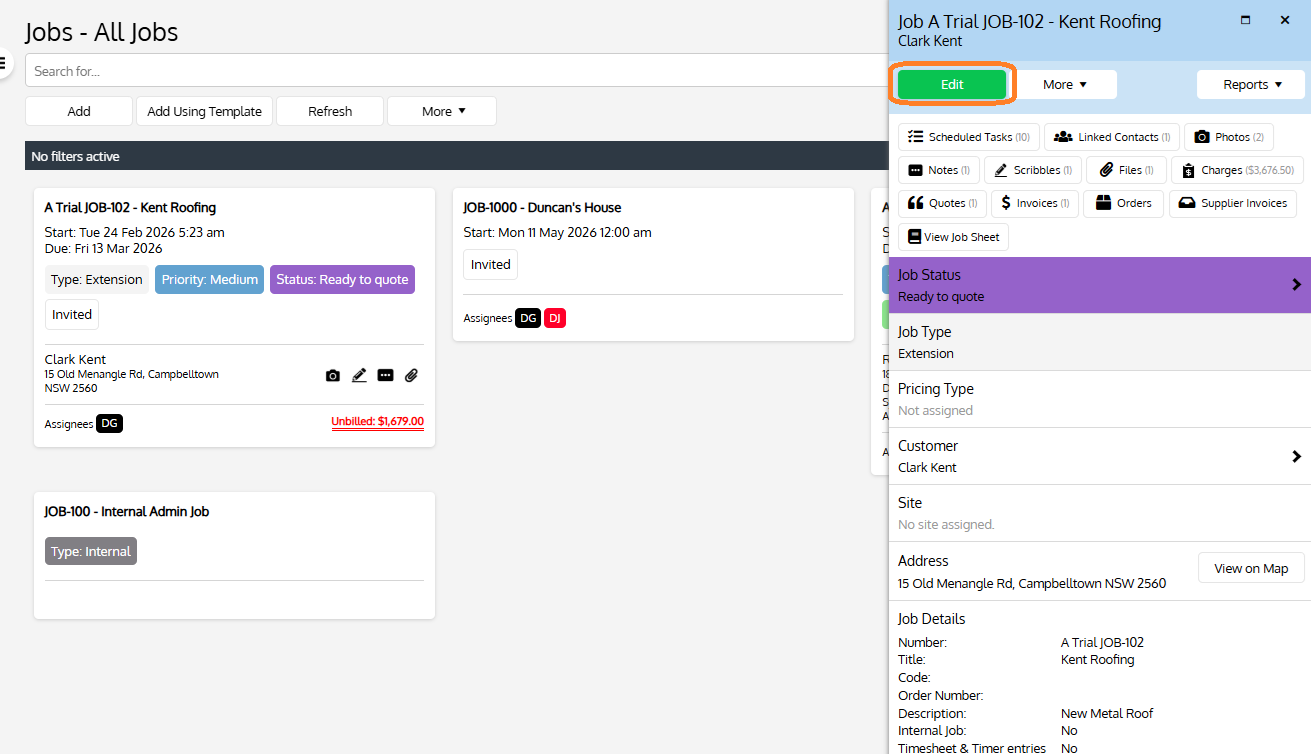
Step 2: Select Edit from the Job flyout
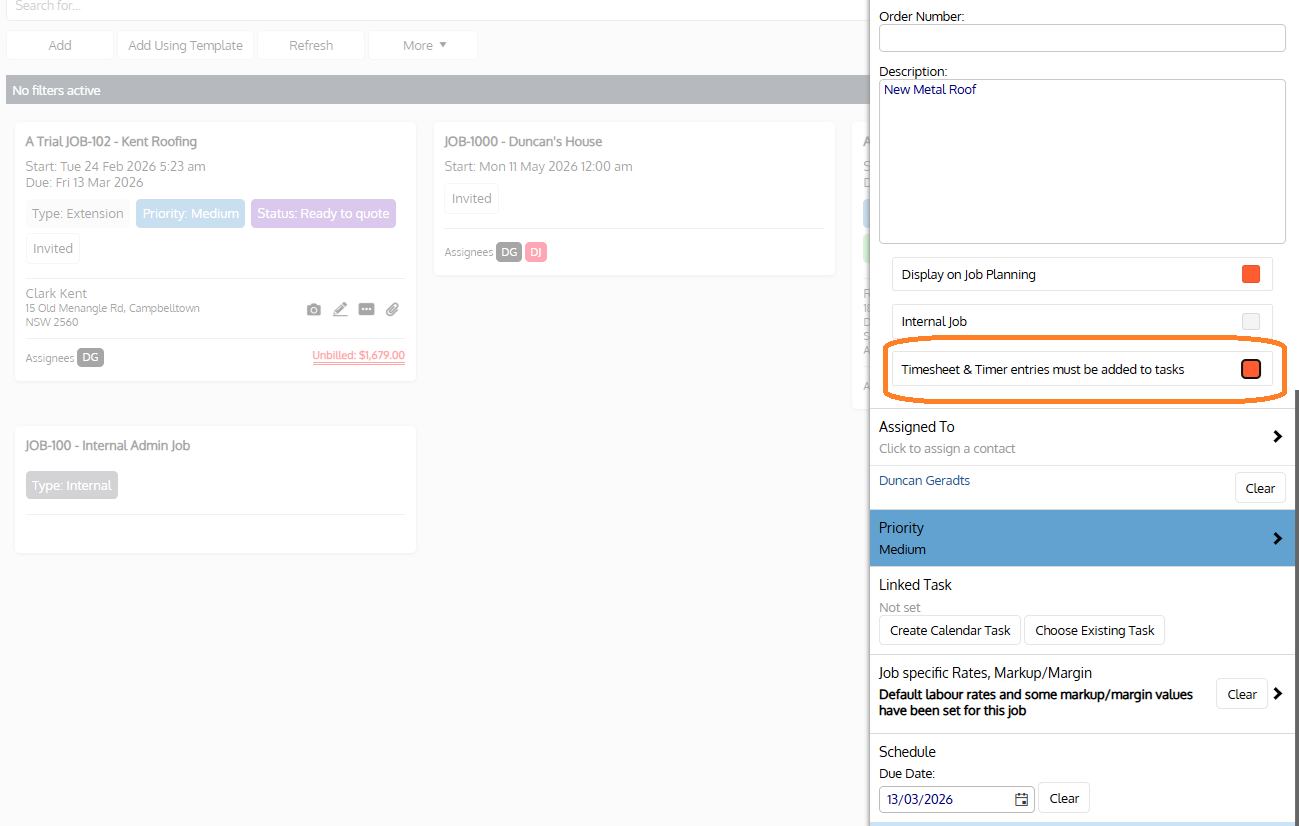
Step 3: Tick User timesheets must be entered against tasks and then hit Save
- Scroll down to find the Timesheet and Timer entries must be added to a Task setting
- Turn it on
- If no tasks are assigned to the job the following message will appear:
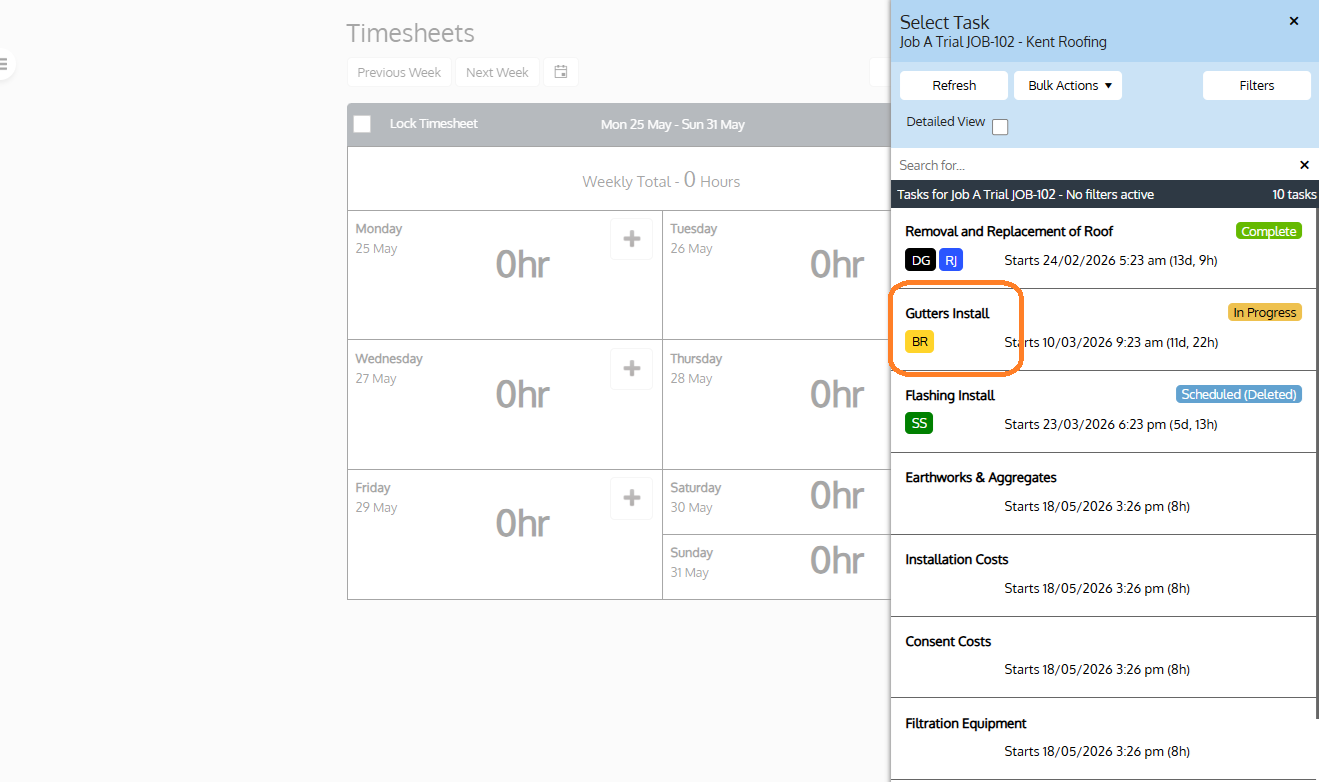
This is what your staff will now see when entering in their timesheets.
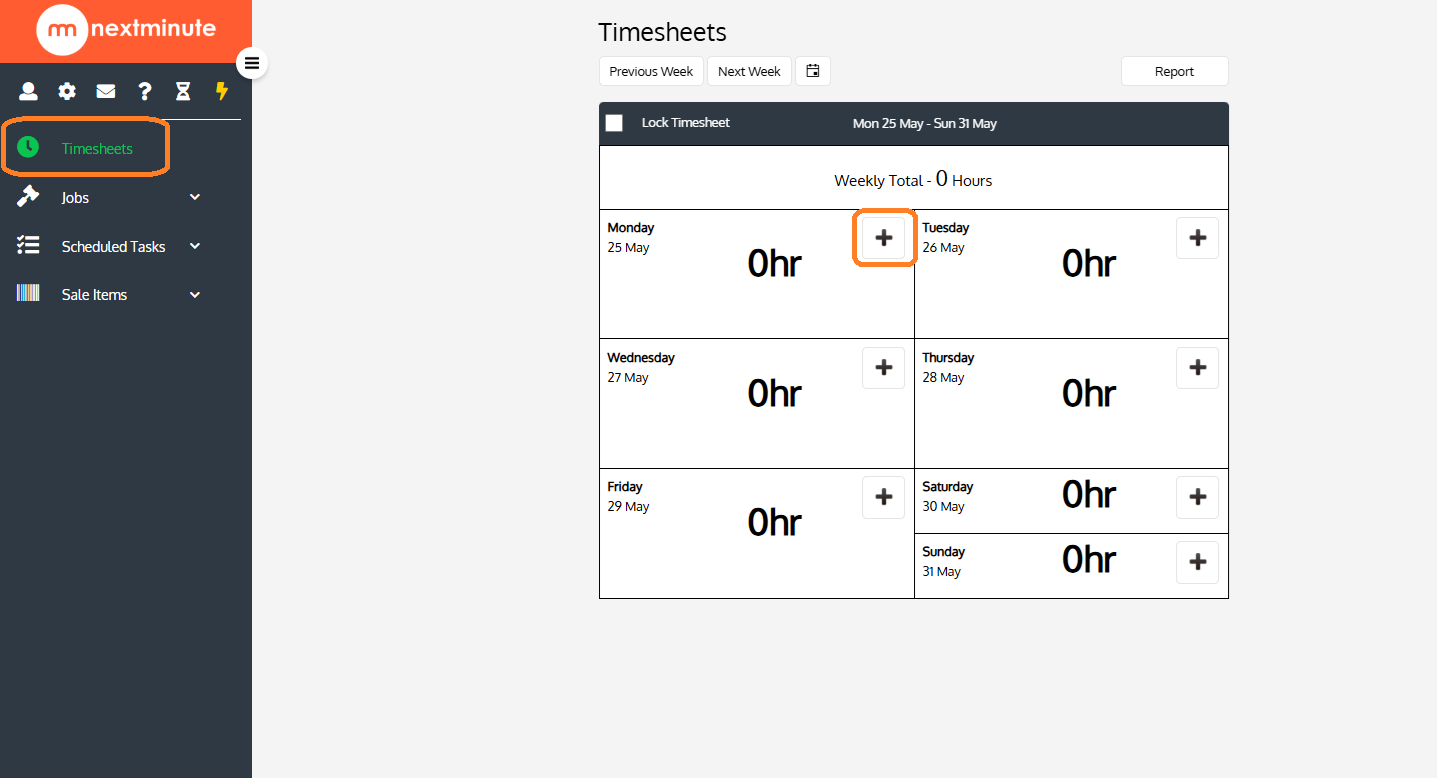
Step 1: Select Timesheets and + to make a Timesheet entry against that day
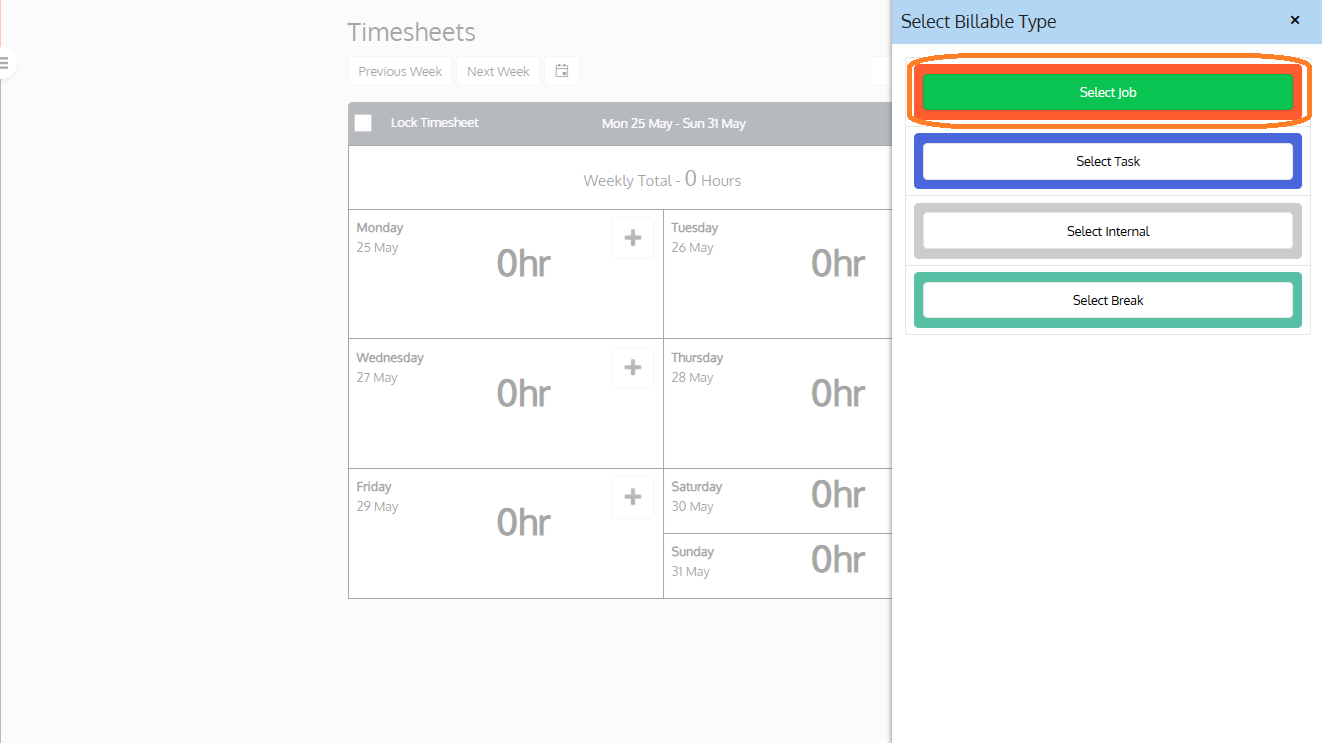
Step 2: Select 'Select Job'
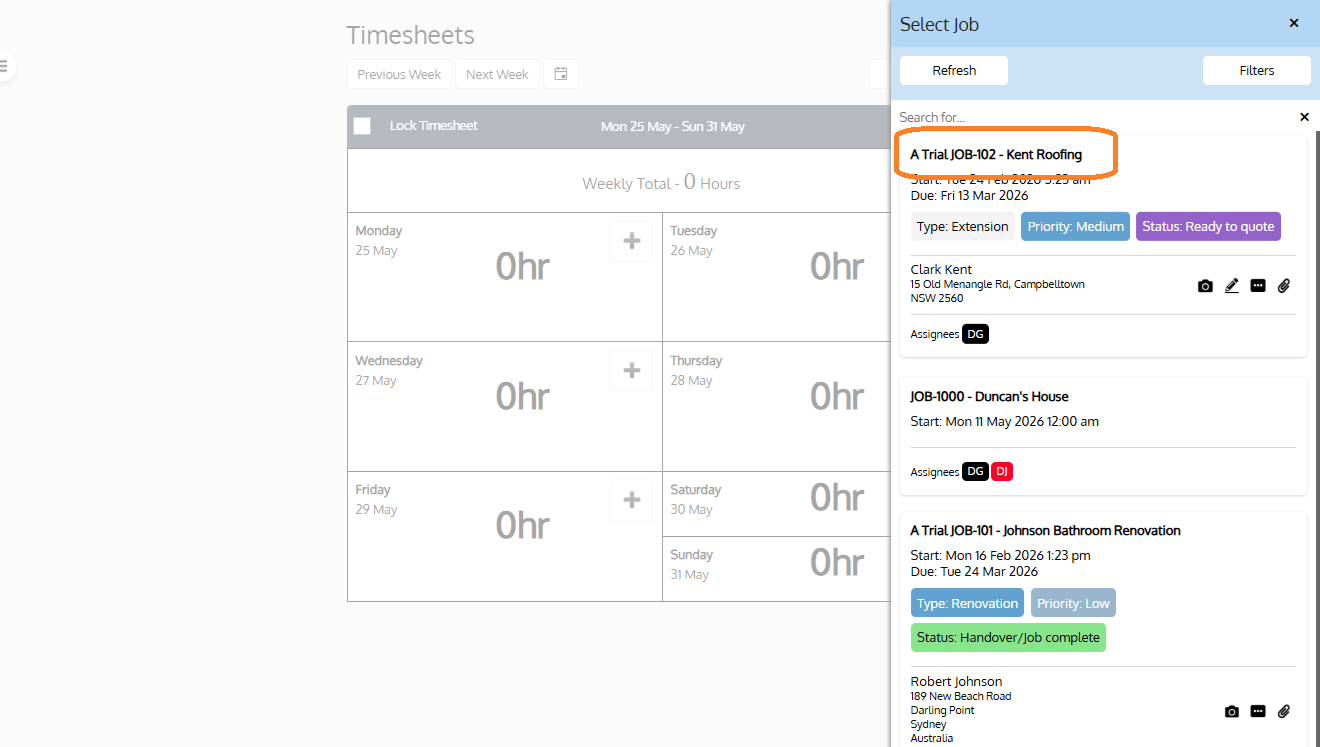
Step 3: Select the Job you wish to add time to
As you can see below, you will now have to select a Task from the list of tasks associated with that Job to make a timesheet entry.