![NextMinute_Primary_White.svg]](https://support.nextminute.com/hubfs/NextMinute_Primary_White.svg)
Before you start: Your team members need to be set up as users with Labour Rates configured before they can log time. See the articles on inviting users and setting up Labour Rates if you haven't done this yet.
Adding Time to a Timesheet
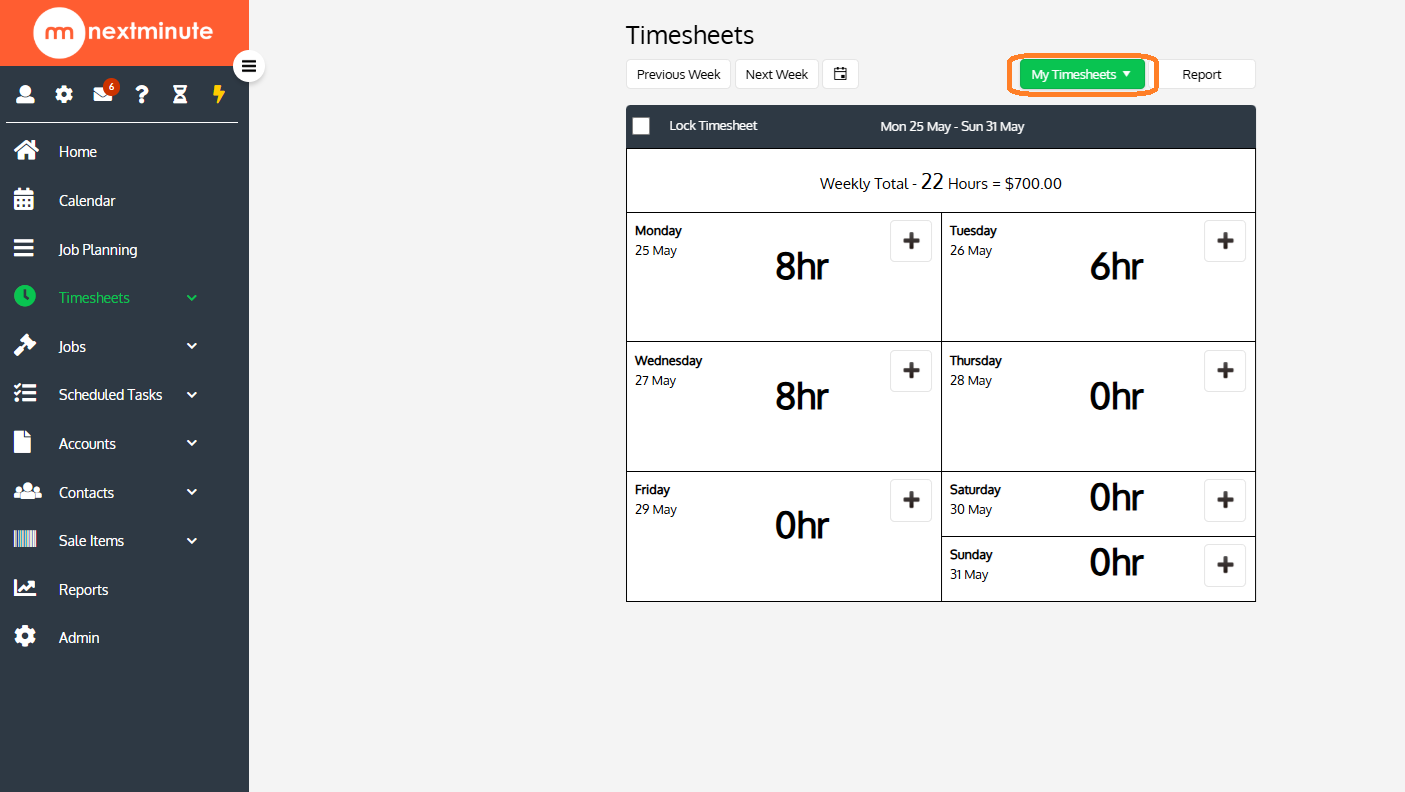
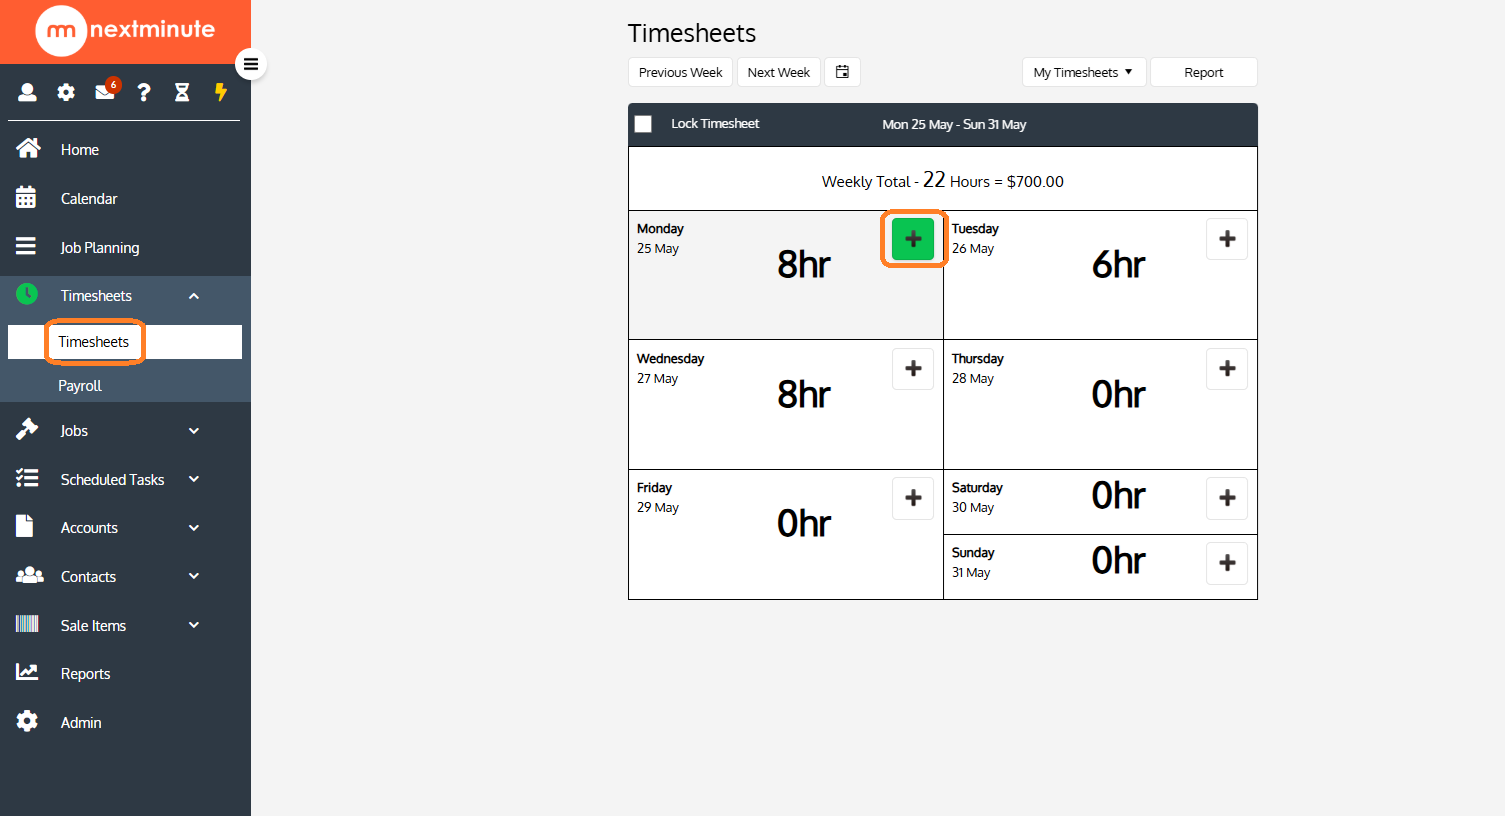
Step 1: Navigate to Timesheets
Select Timesheets from the left-hand menu. To quickly add time to a day, select the + in the top right corner of that day.
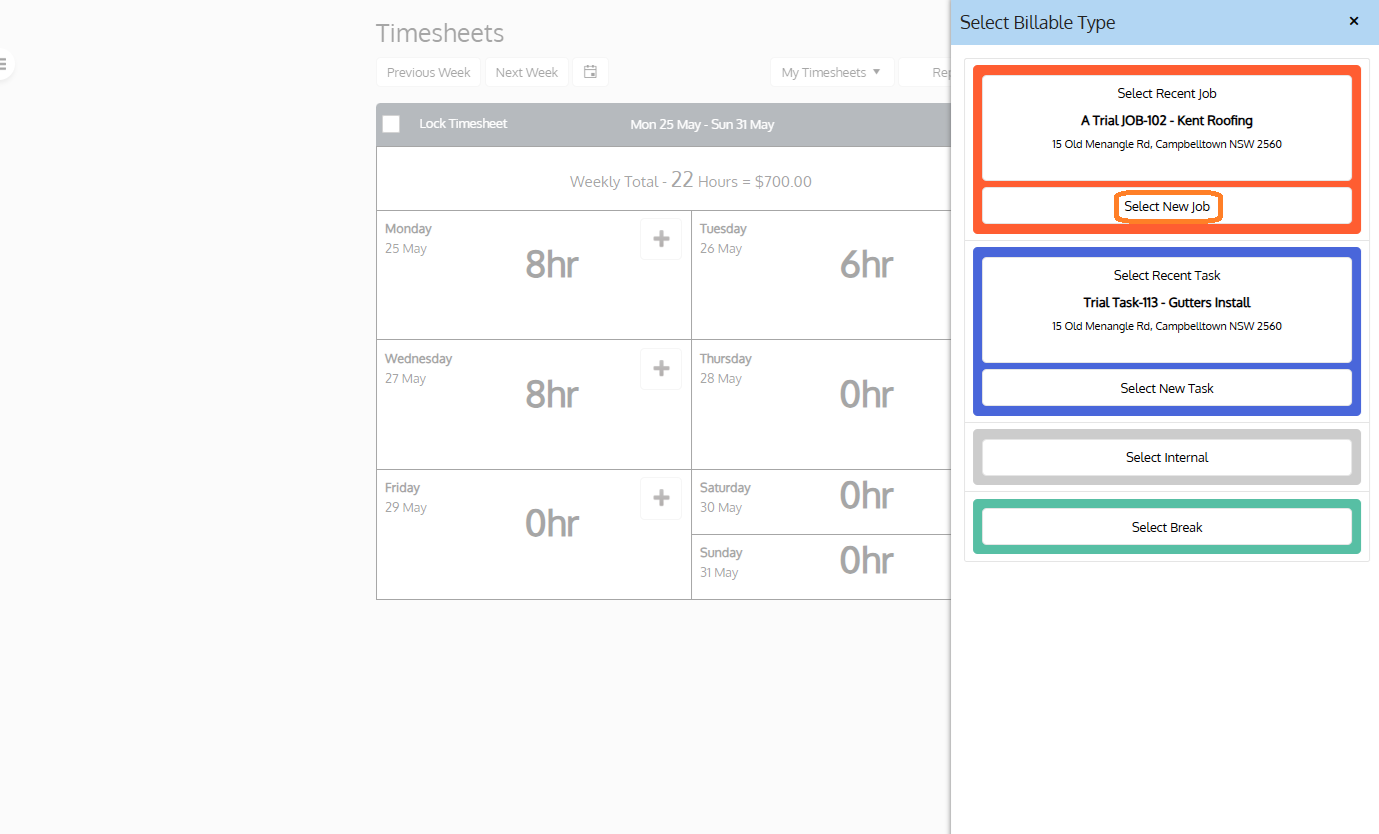
Step 2: Select the Job, Task, or Internal Job
Choose what you'd like to log time against. In this example, we're adding time to a Task — select the task from your list.
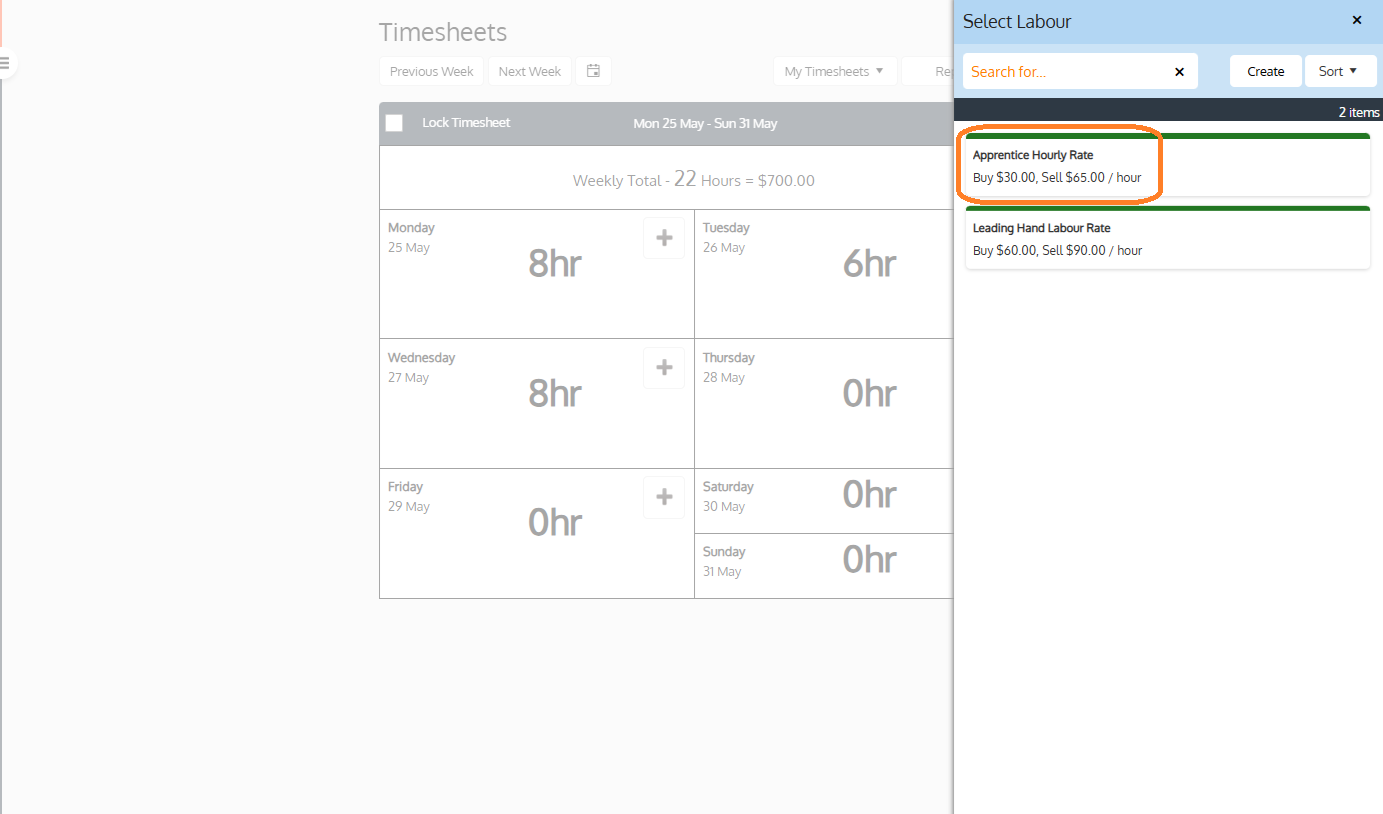
Step 3: Select the Labour Rate
Choose the applicable labour rate for this timesheet entry.
Step 4: Enter the hours
Enter either the total hours or a time rang.
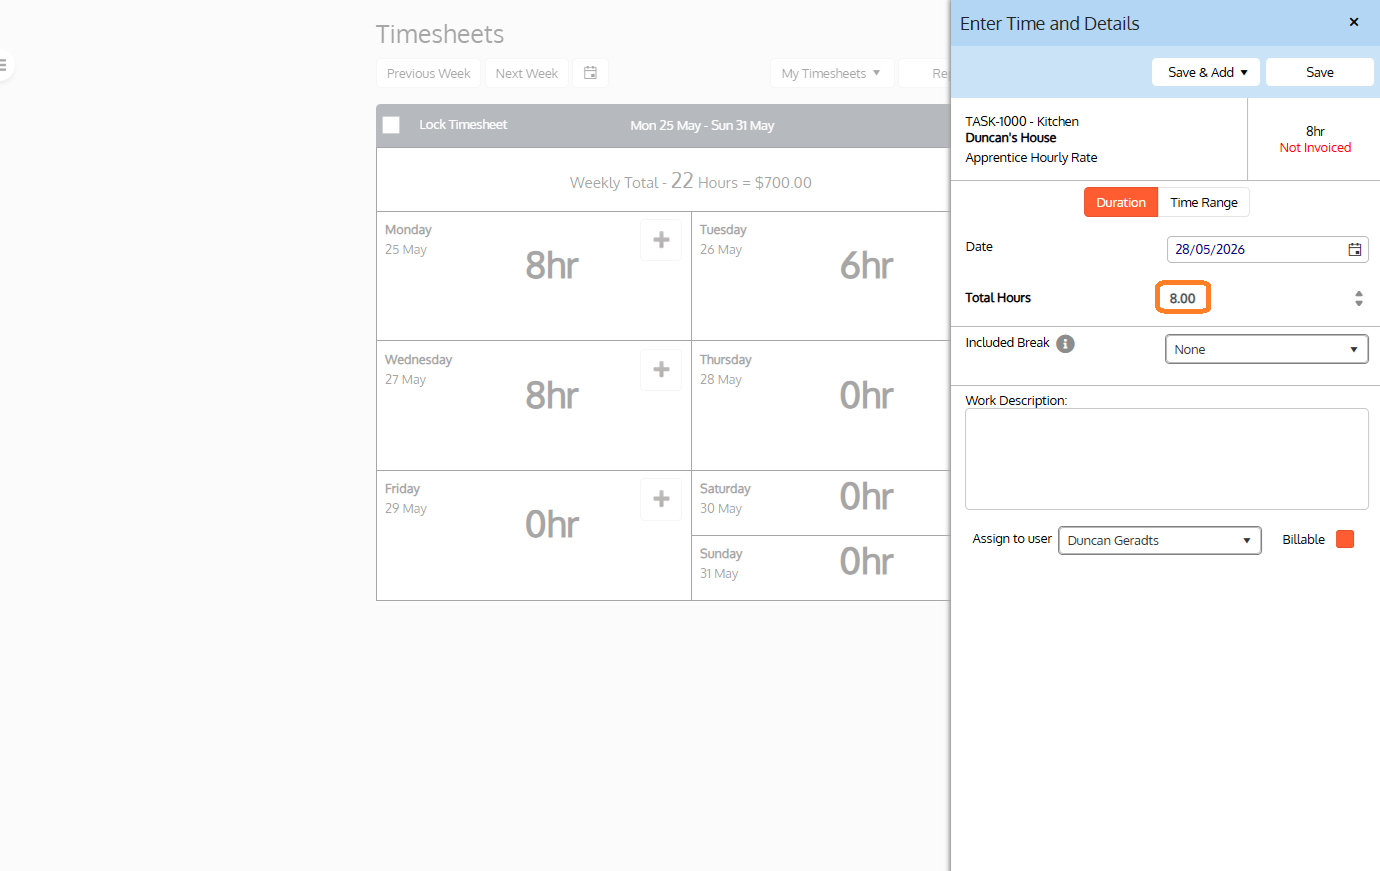
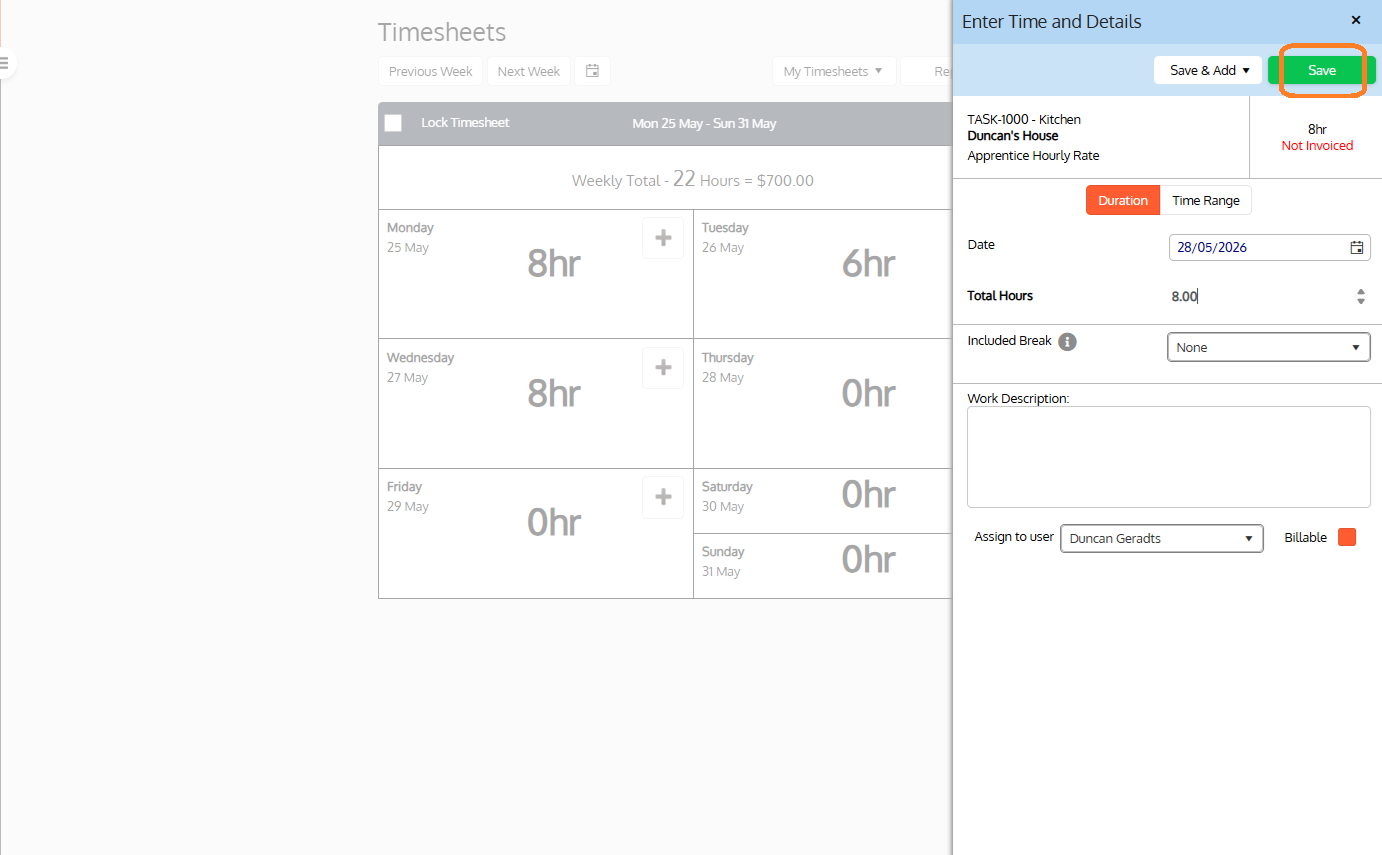
Step 5: Complete the entry and save
Fill in the timesheet entry details, select the assigned user, tick Billable if applicable, then select Save.
Tip: You can click into the Job or Task to view or change its details, and select the hours to amend an entry.
Viewing Weekly Timesheet Details
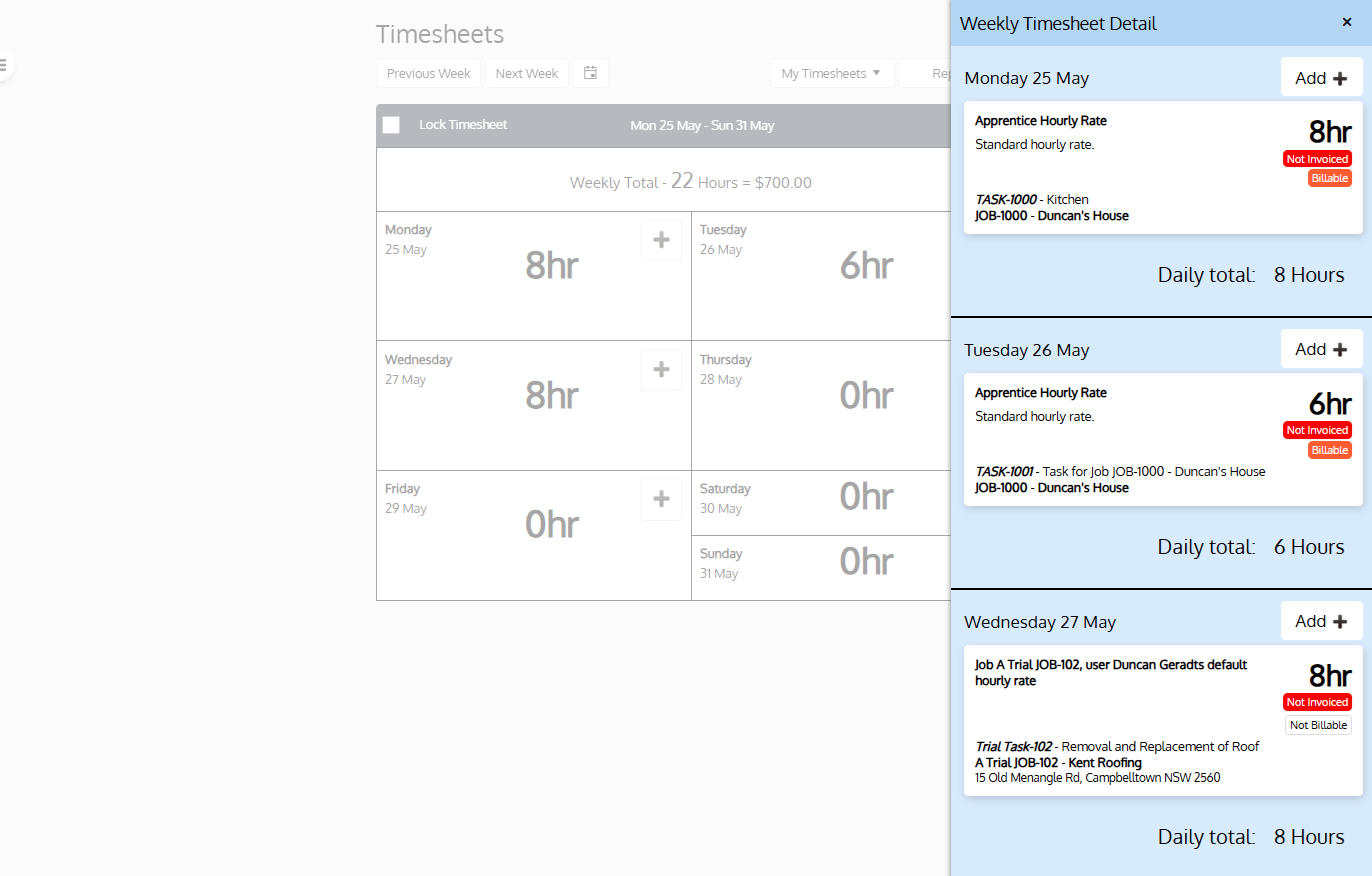
Step 1: Open the Weekly Timesheet Details flyout
Select any day to open the Weekly Timesheet Details flyout. Here you can:
- View hours assigned to jobs and tasks for each day
- Select an entry to edit it
- Select Add + to add a new entry to a day
Viewing Another User's Timesheet
Step 1: Switch user view
Select My Timesheets to open a flyout and switch to viewing another user's timesheet.