![NextMinute_Primary_White.svg]](https://support.nextminute.com/hubfs/NextMinute_Primary_White.svg)
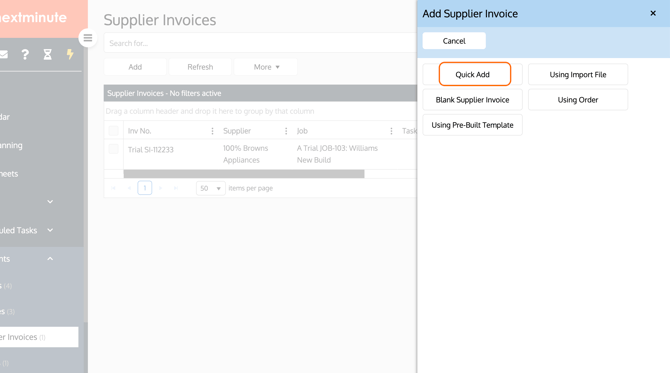
Step 1: Navigate to Supplier Invoices and select Add.

Step 2: Select Quick Add
-
Select Quick Add.
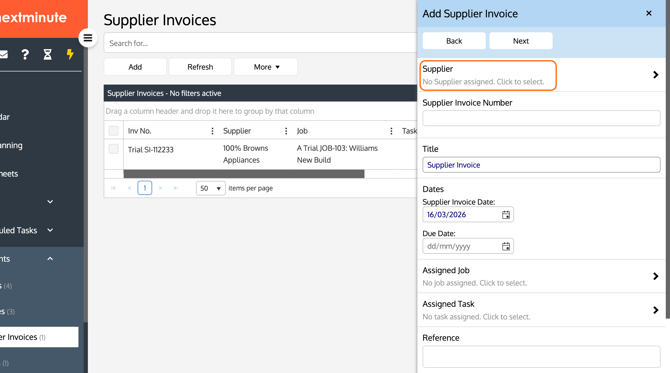
Step 3: Assign a Supplier
-
Search for the Supplier.
-
Select the supplier from the list.
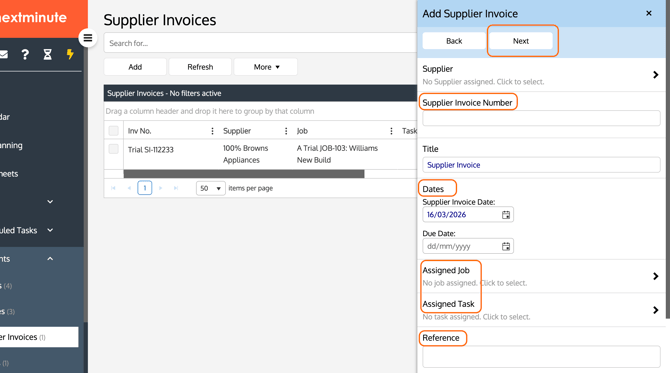
Step 4: Complete the Supplier Invoice Details
-
Enter the Supplier Invoice Number.
-
Set the Invoice Date.
-
Assign the invoice to a Job or Task if required.
-
Add a Reference or Private Notes if needed.
-
Select Next once the information is complete.
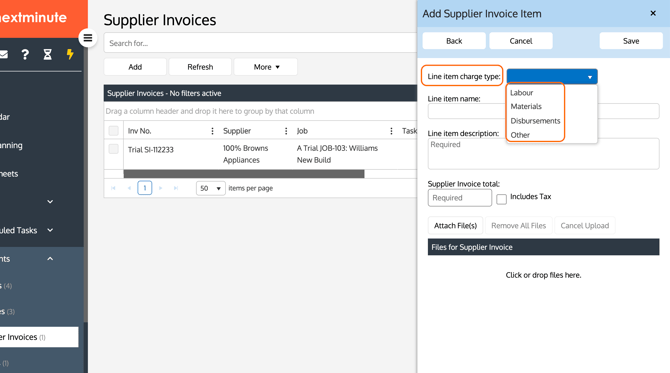
Step 5: Select the Charge Type
-
Select the Line Item Charge Type.
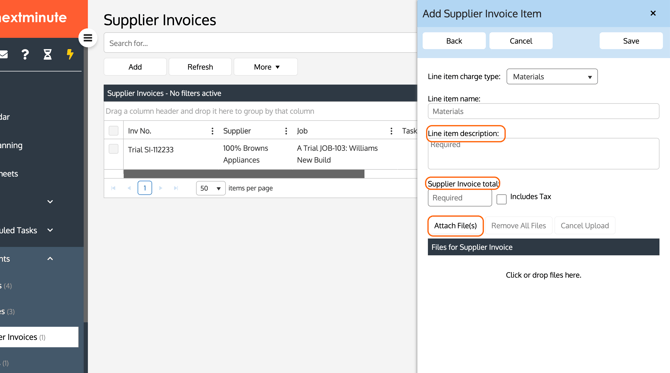
Step 6: Enter Line Item Information
-
Enter the Line Item Description.
-
Enter the Invoice Total.
You can also attach the supplier invoice document.
-
Drag and drop the file into Files for Supplier Invoice, or Select Attach File(s) and select the file from your computer.
-
Select Save once all information has been entered.
Step 7: Confirm the Supplier Invoice
After saving:
-
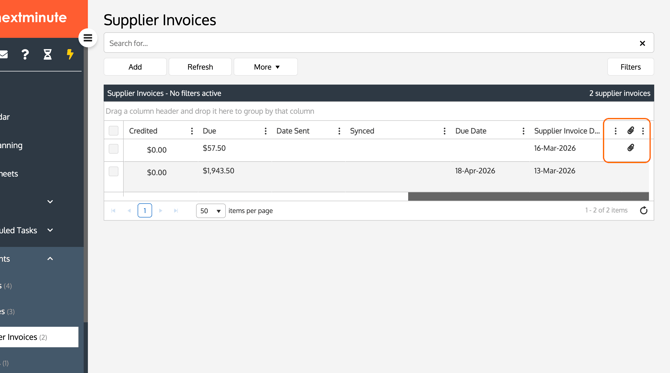
The Supplier Invoice will appear in the Supplier Invoices list.
-
A paperclip icon will indicate that a file is attached to the supplier invoice.