Prevent emails going to spam
There's nothing more frustrating than sending a quote or invoice to a client and getting radio silence, only to find out your email ended up in their spam folder. Follow the below instructions to help avoid this!
When you send emails from NextMinute, we send them on your behalf using the email address you’ve set in your account. If your clients are finding your invoices or quotes in their spam folder, it’s often because you’re using a free email service like Hotmail, Gmail, or Yahoo. These services don’t allow you to configure the domain settings we need to prove to mail servers that we’re authorised to send on your behalf.
The best way to fix this — and boost your business credibility — is to get your own domain name (e.g. www.bobsconcrete.com.au) and attach it to your preferred email provider. This way, you can update the domain settings (as shown below) to allow NextMinute to send emails securely on your behalf. This improves deliverability, helps avoid the spam folder, and gives your business a more professional image.
Related article: How to Get Your Own Domain Name (and Prevent Emails Going To Spam)
💡 You’ll need access to your domain DNS settings. That’s usually wherever you bought your domain name—like GoDaddy, Crazy Domains, VentraIP, etc.
What’s an SPF Record?
SPF stands for Sender Policy Framework. It’s a fancy way of saying, “Hey, this is a legit server that’s allowed to send emails on behalf of my domain.”
NextMinute uses the email service Amazon SES (Simple Email Service)—which powers yours emails out of NM—you need to tell the world, "Yep, amazonses.com is allowed to send emails for me."
1. Log in to your domain host
- Go to the website where you registered your domain (e.g., GoDaddy, VentraIP, NetRegistry).
2. Find your DNS or Zone Editor
-
Look for DNS Management, Zone Editor, or Domain Settings
-
You’re after a section where you can manage DNS records
3. Check if there’s already an SPF record
-
It’ll look like a TXT record for your domain that starts with:
v=spf1 -
If you find one, do NOT create a new one. You’ll need to add to the existing record which you can edit.
4. Edit your existing SPF record
-
Lets say you have a current SPF record that looks like the below:
v=spf1 include:mail.yourprovider.com ~all - The SPF record you are required to add is include:amazonses.com
-
You’ll need to add
include:amazonses.combefore the~all - End result =
v=spf1 include:amazonses.com ~all
4. Adding the Amazon SPF record
Here’s the SPF value Amazon requires you to add/replace
- include:amazonses.com
If you don’t have an SPF record yet
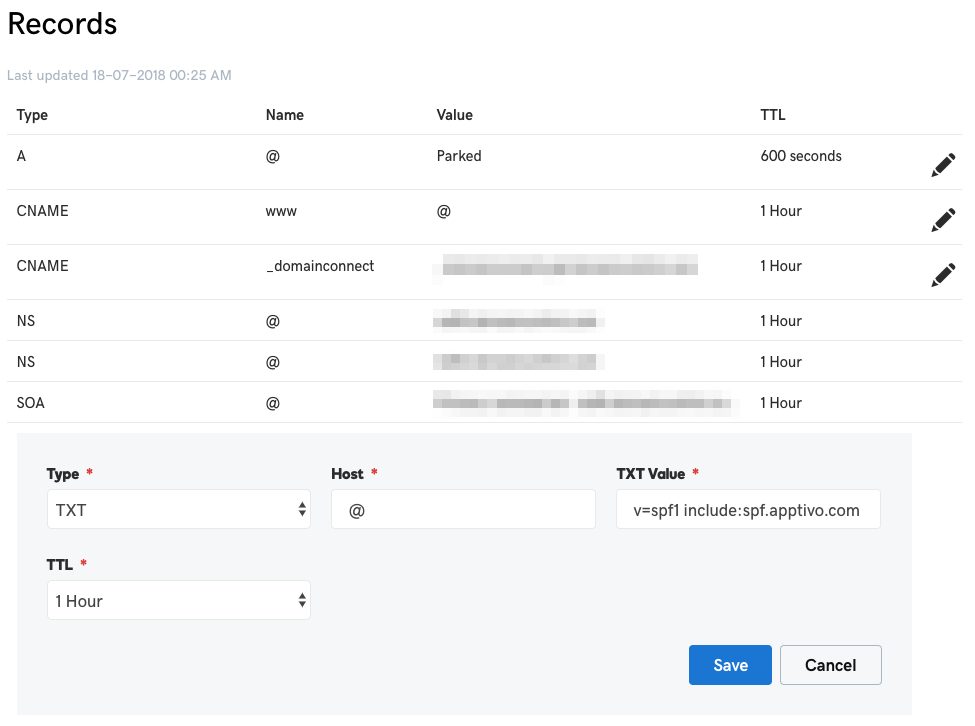
Create a new TXT record like this:
-
Type: TXT
-
Name / Host: @ (or leave blank depending on the provider)
-
Value:
Copy/Paste the below and select Savev=spf1 include:amazonses.com ~all
🧑🔧 Still need help?
If this sounds like too much mucking around, feel free to get in touch and we can help get everything set up and liaise with your web guys!
