Jobs and Tasks - how to add
The new Job Planning feature is a great extension to the NextMinute Jobs and Tasks management! Job Planning is a visual schedule/Gantt view of all, some or one Job and their associated tasks spread over a timeline.
🔸 Note: This feature is only available to Admin users. 🔸
How to add Jobs to the Job Planning Calendar
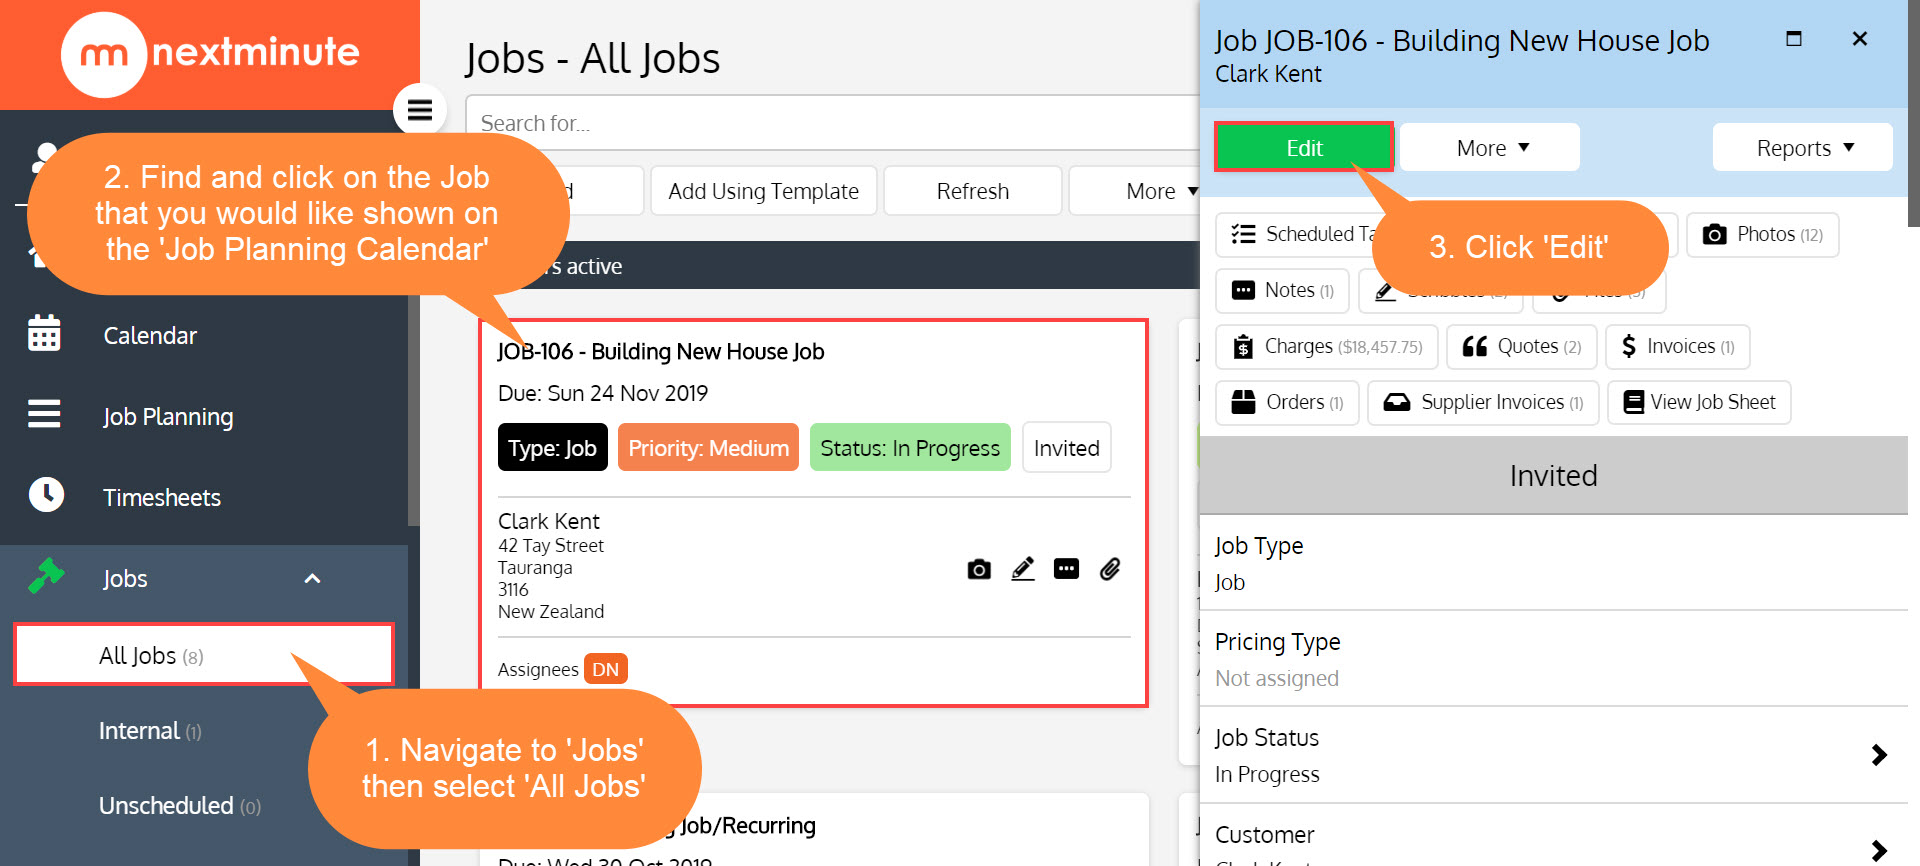
Step 1. Find and click into the Job you would like to add to the Job Planning Calendar and then click 'Edit'
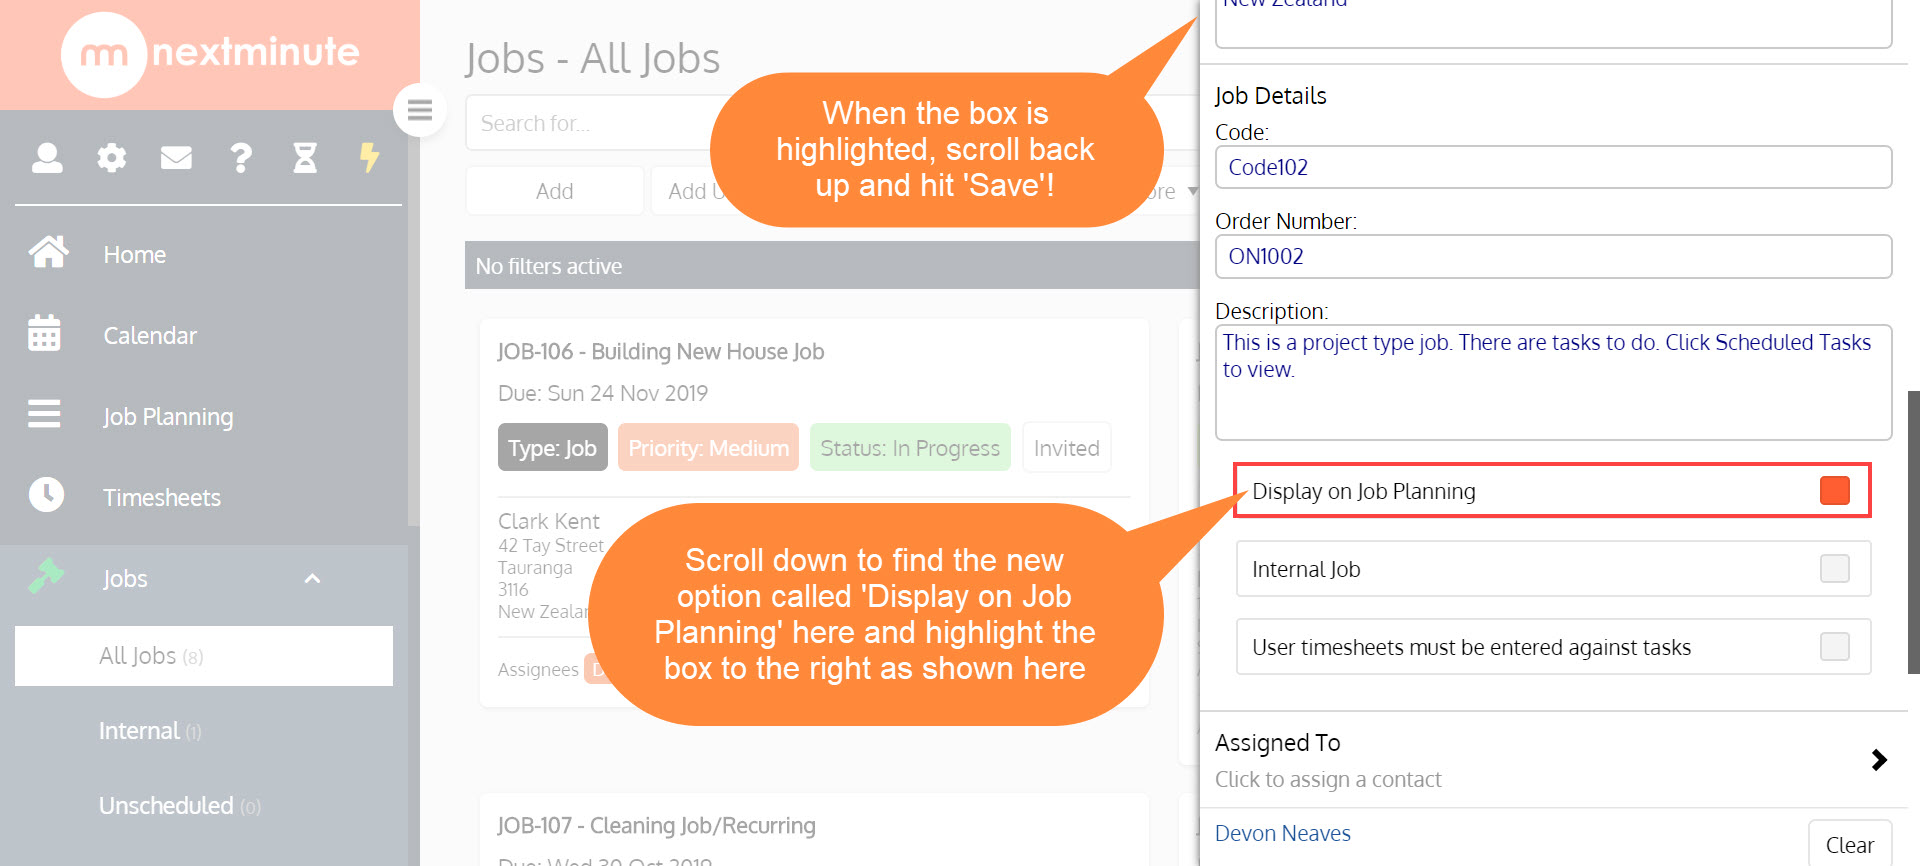
Step 2. Scroll down to find the 'Display on Job Planning' option and highlight it, then 'Save'.
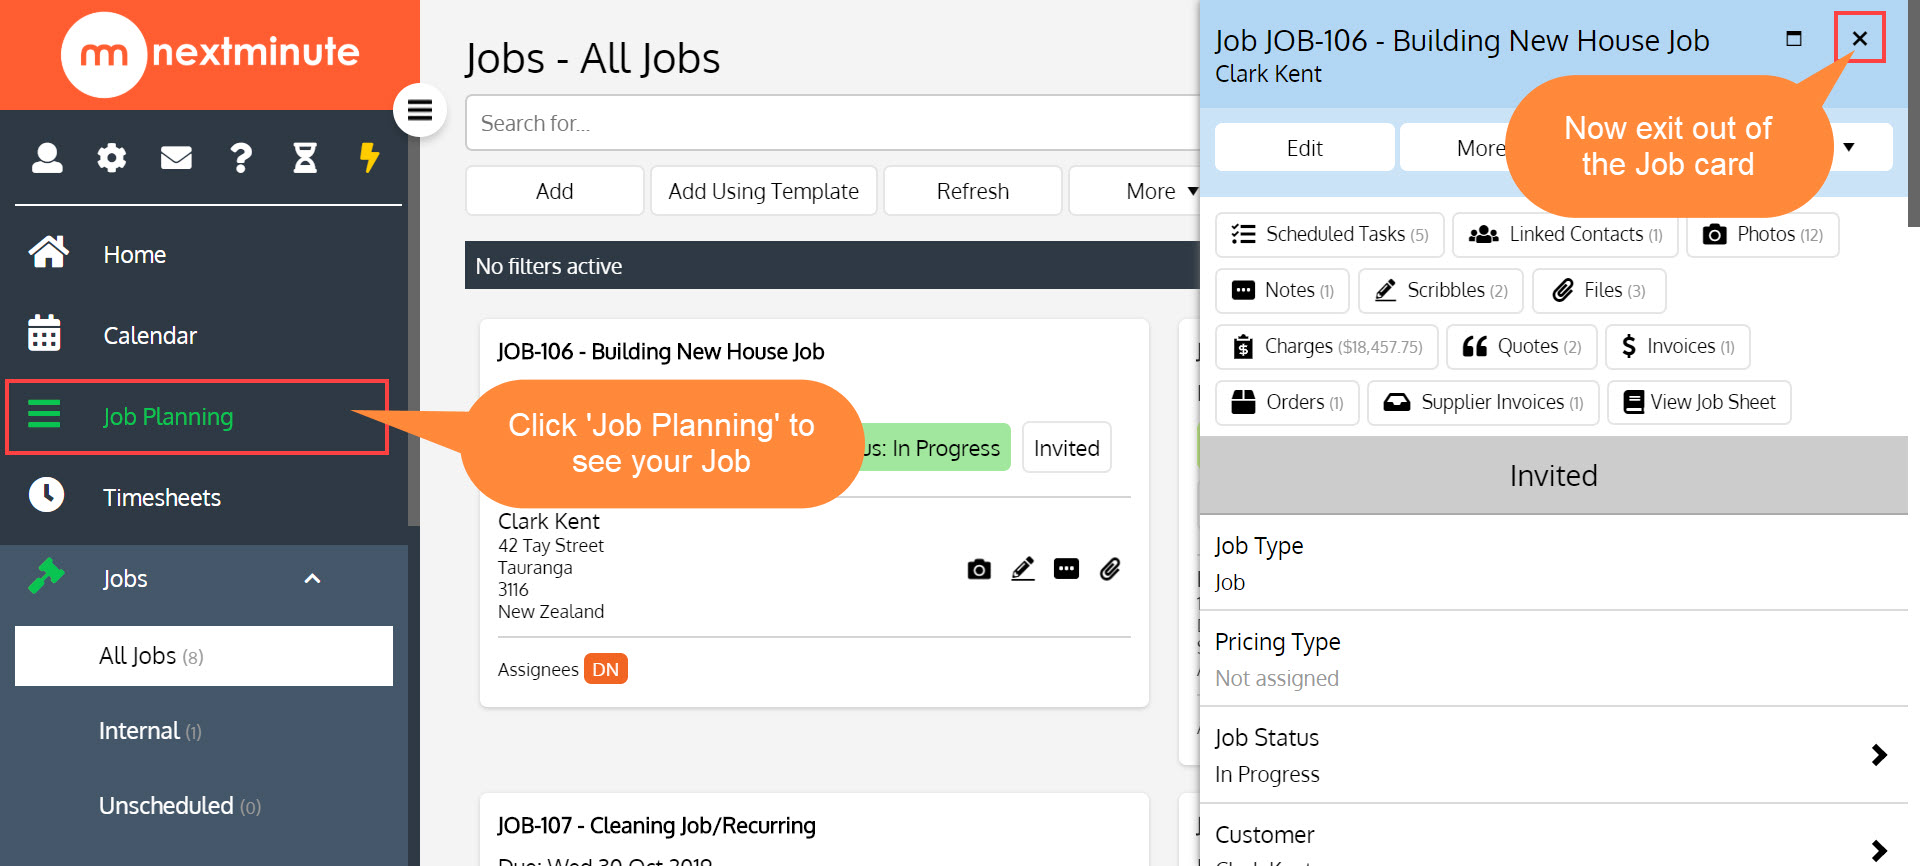
Step 3. Exit out of the Job card and click 'Job Planning'
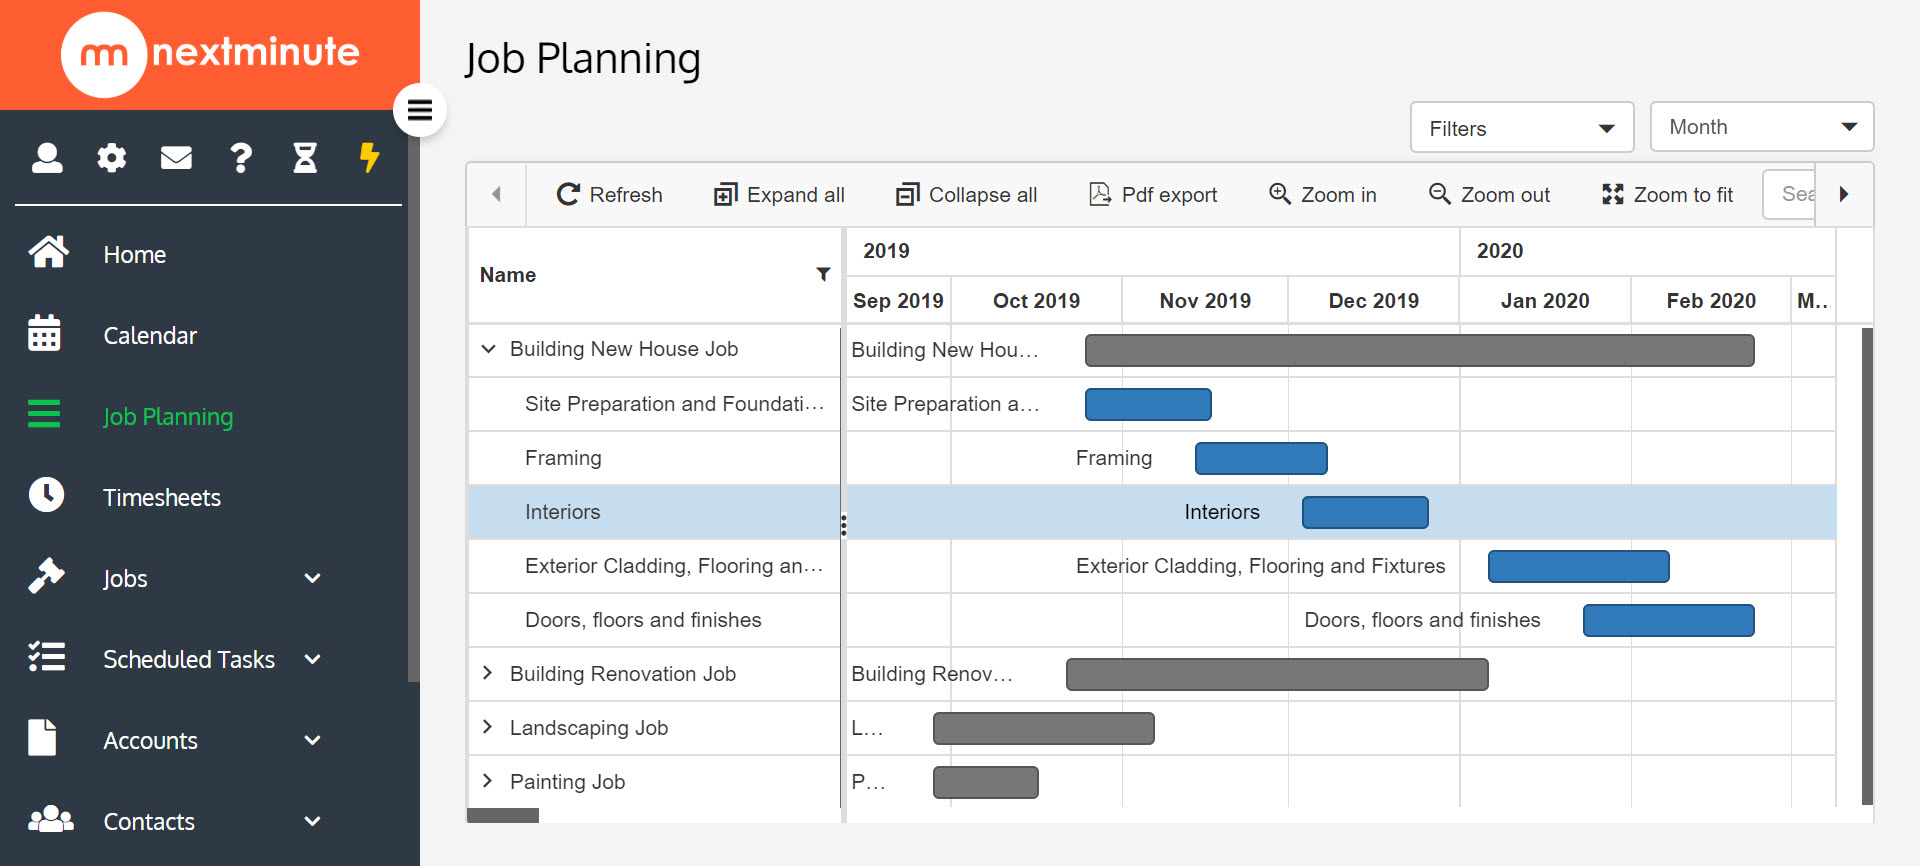
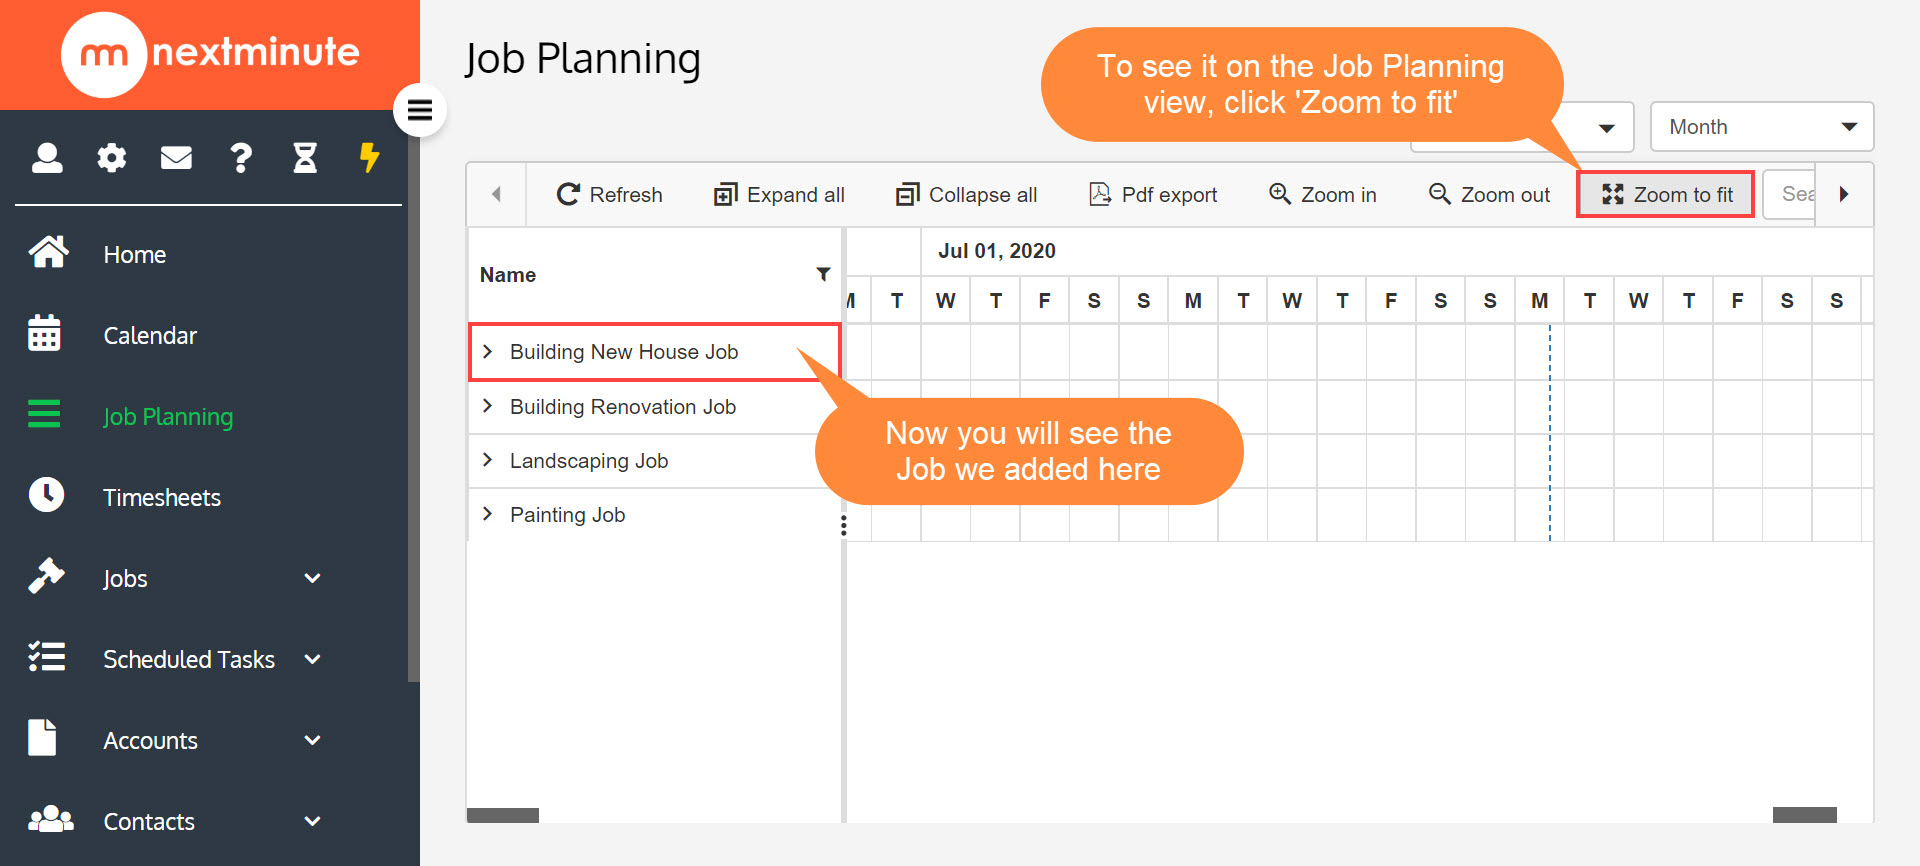
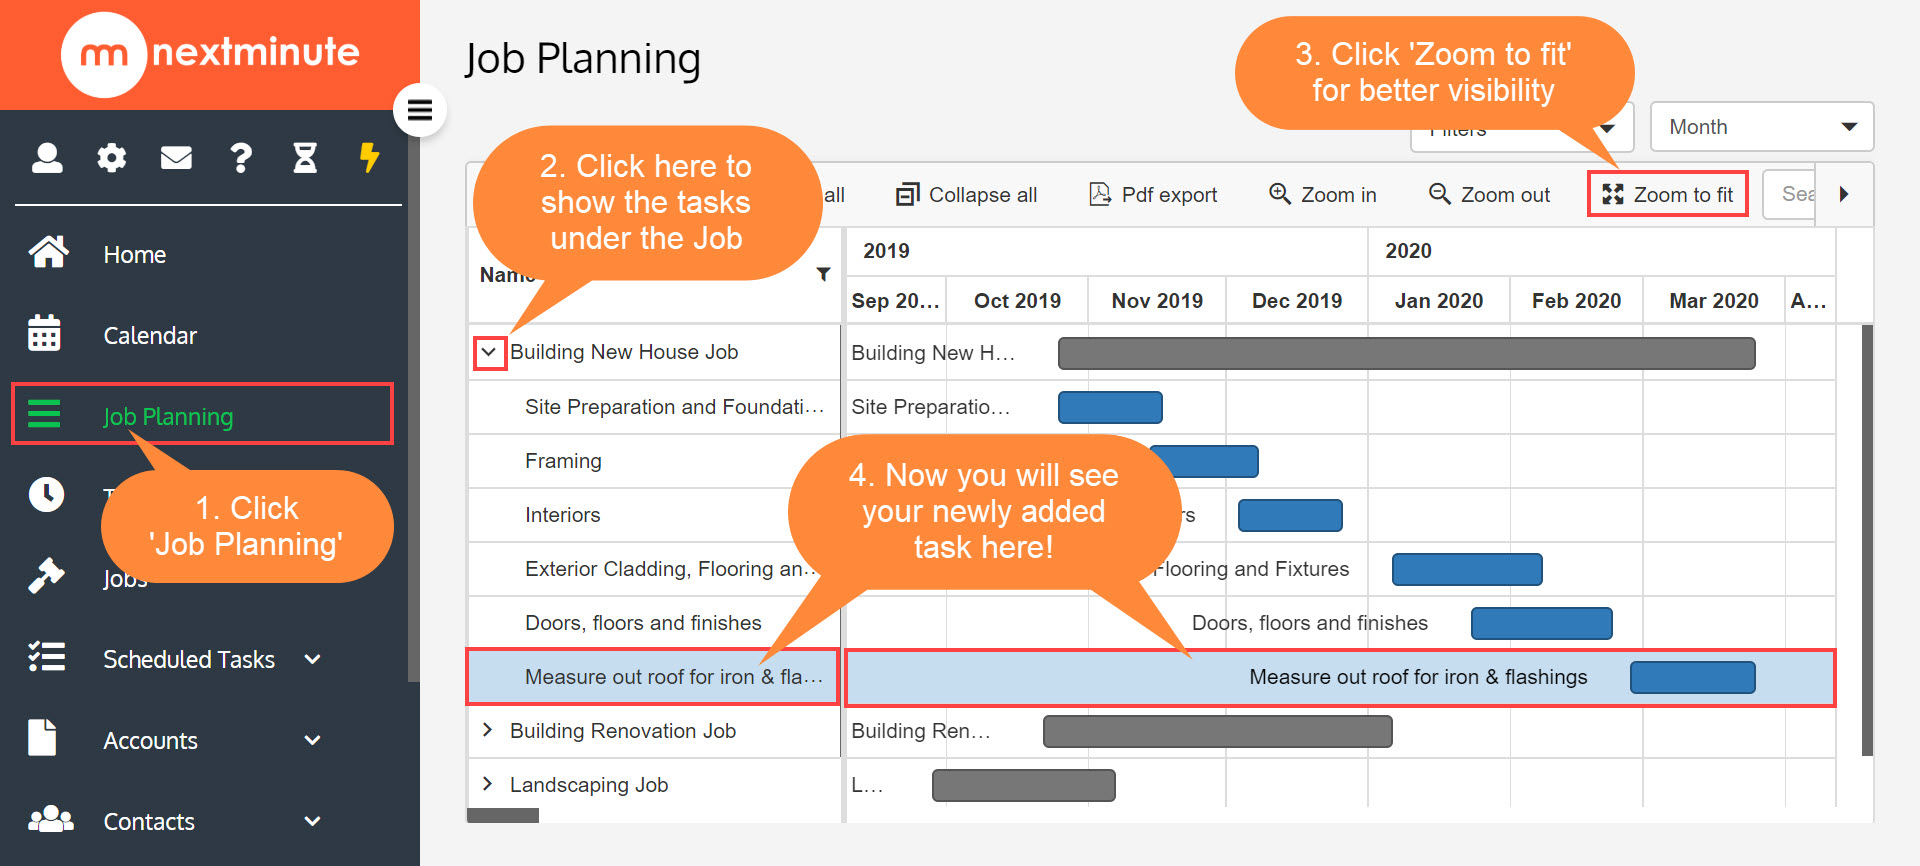
Step 4. Now you will see your Job in the Job Planning Calendar view. Click 'Zoom to fit' to see your Jobs
How to add Tasks to the Job Planning Calendar (two ways)
🔸 Note: Any new Tasks will automatically have the 'Display on Job Planning' option turned ON 🔸
🔸 Tasks will only show on the 'Job Planning' Calendar if they are assigned to a Job 🔸
First way - Add via Job
Step 1. Find and select the Job, then click 'Scheduled Tasks'
This is one of the two ways to 'Add' a Task to the Job Planner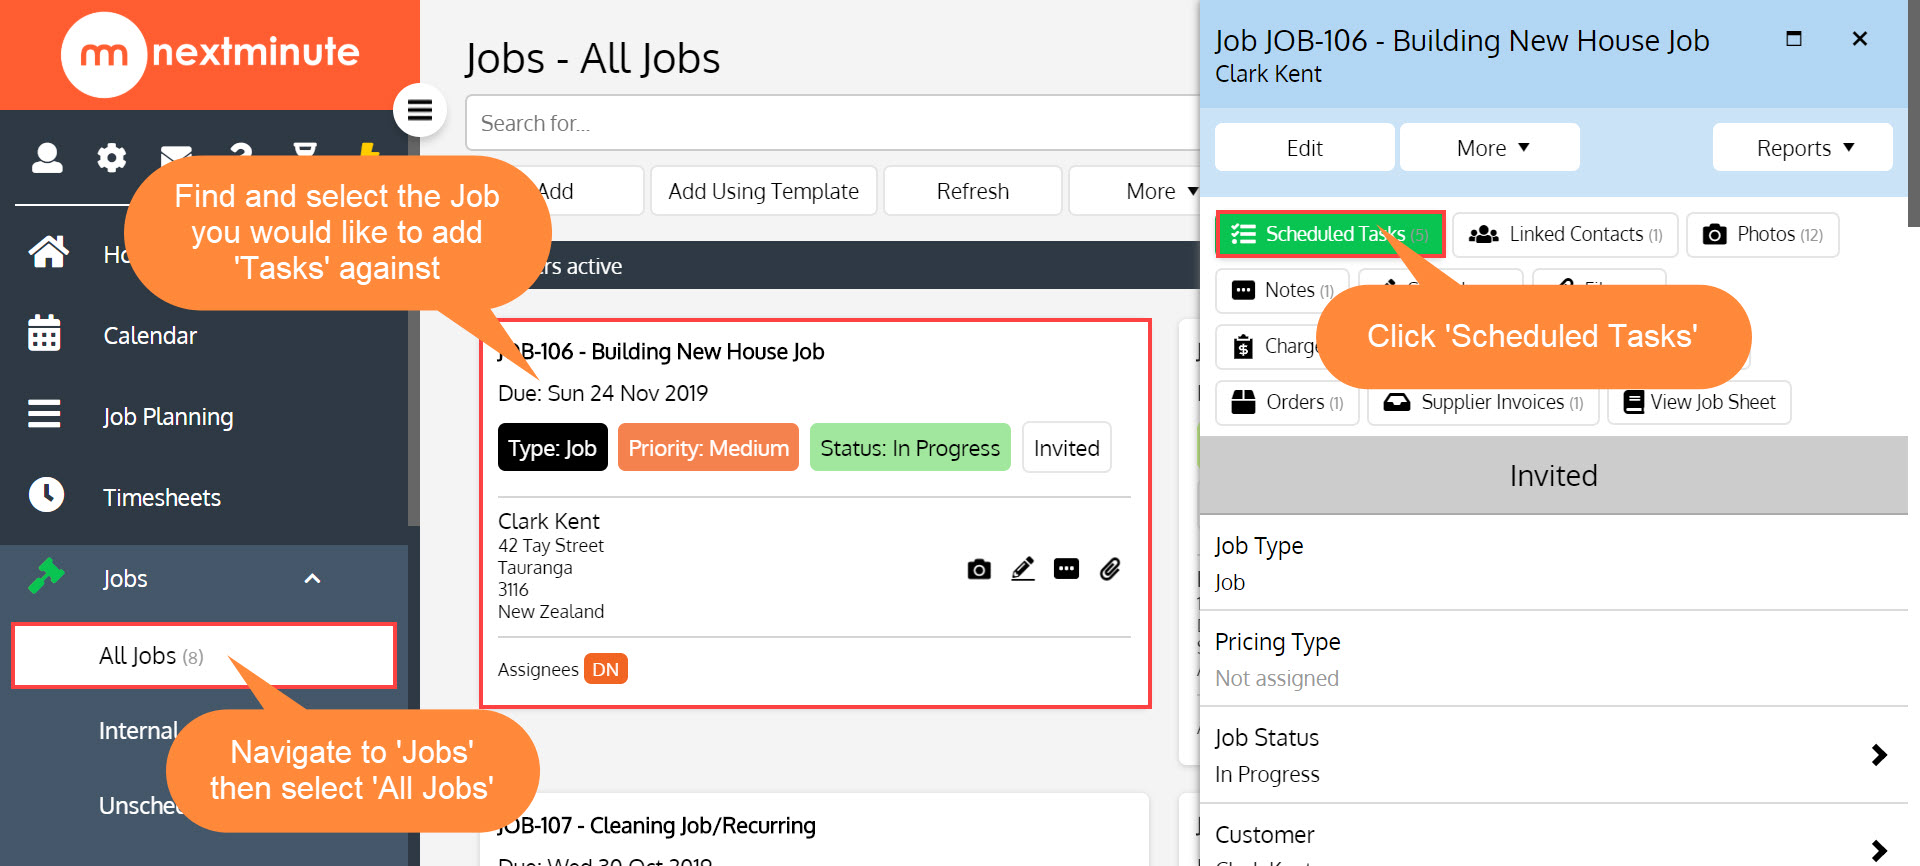
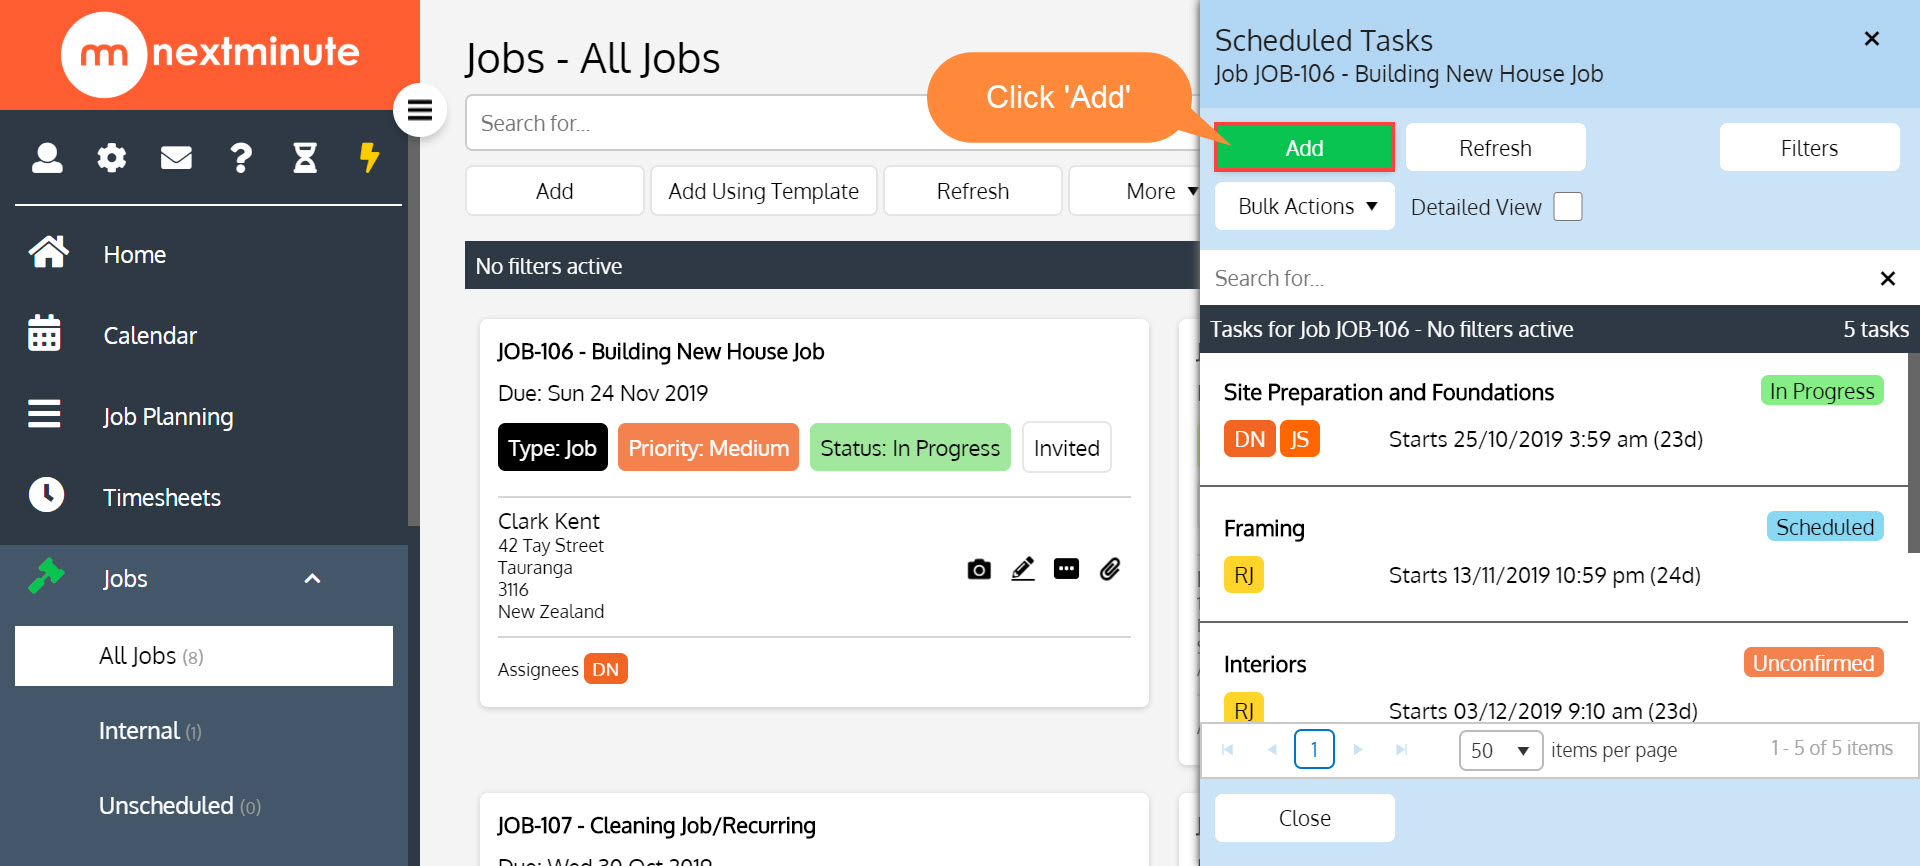
Step 2. Click 'Add' to add a new task
Step 3A. Update the 'Title' of the Task, the 'Start' and 'End' date/time of the Task
Add any additional details as per normal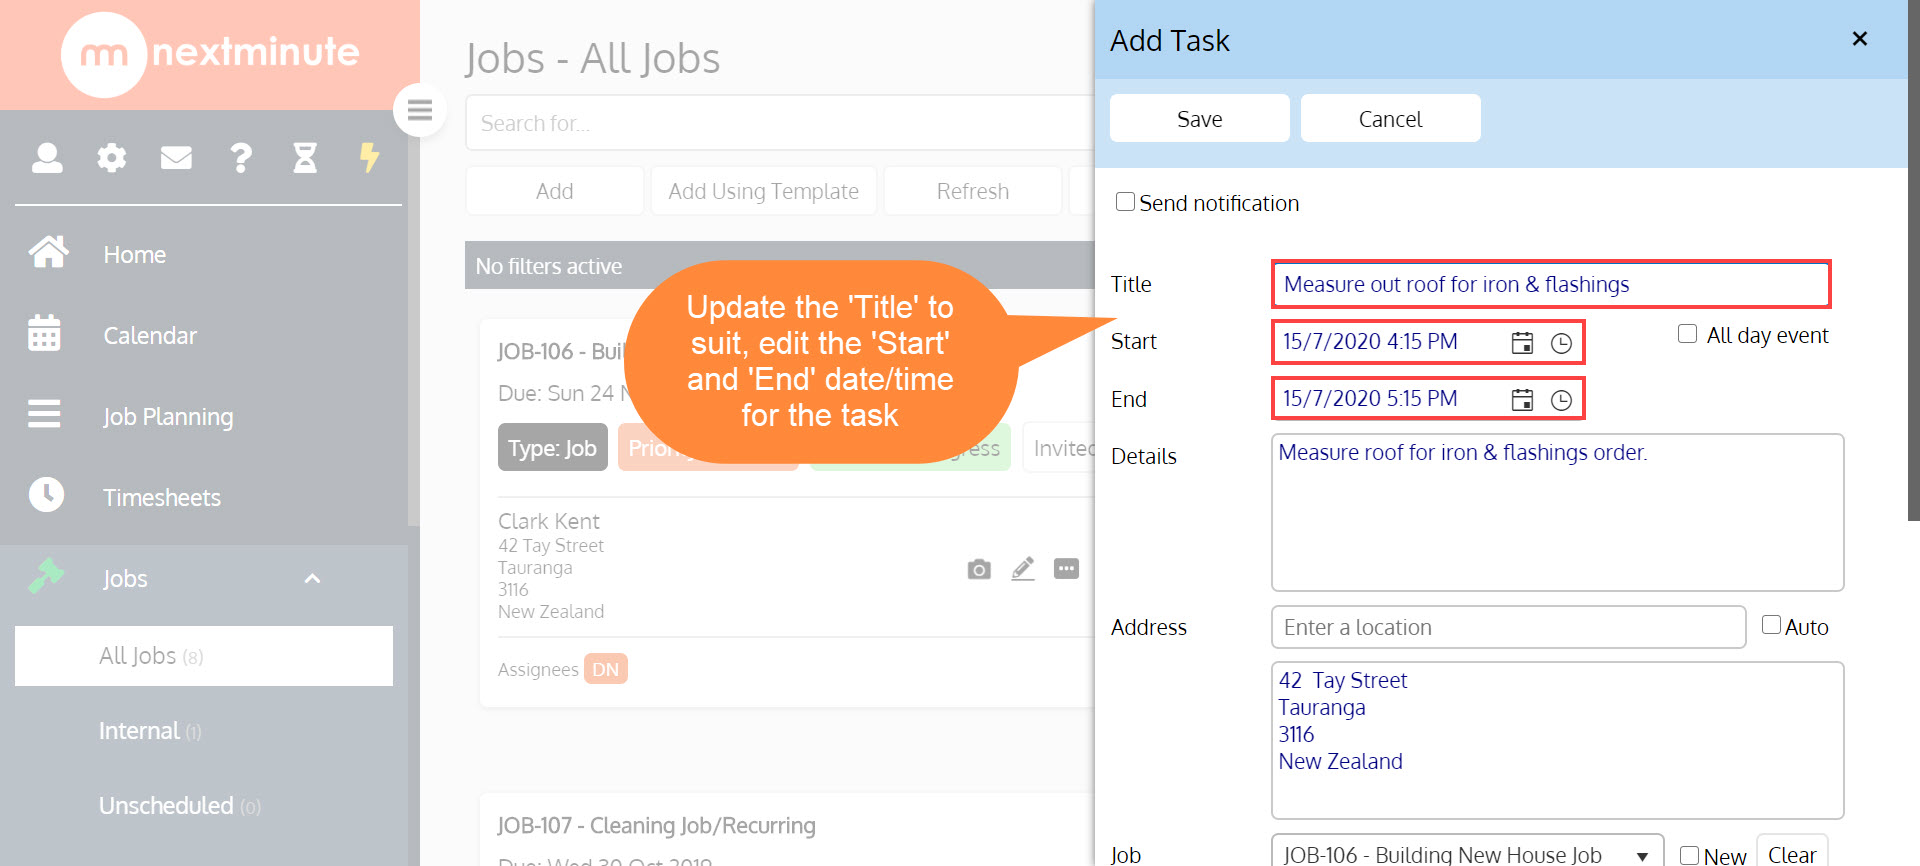
Step 3B. Here you will see the new option 'Display on Job Planning', ensure this is highlighted, then scroll to the top and hit 'Save'!
The 'Display on Job Planning' option needs to be highlighted (on) for the task to show on the 'Job Planning' view.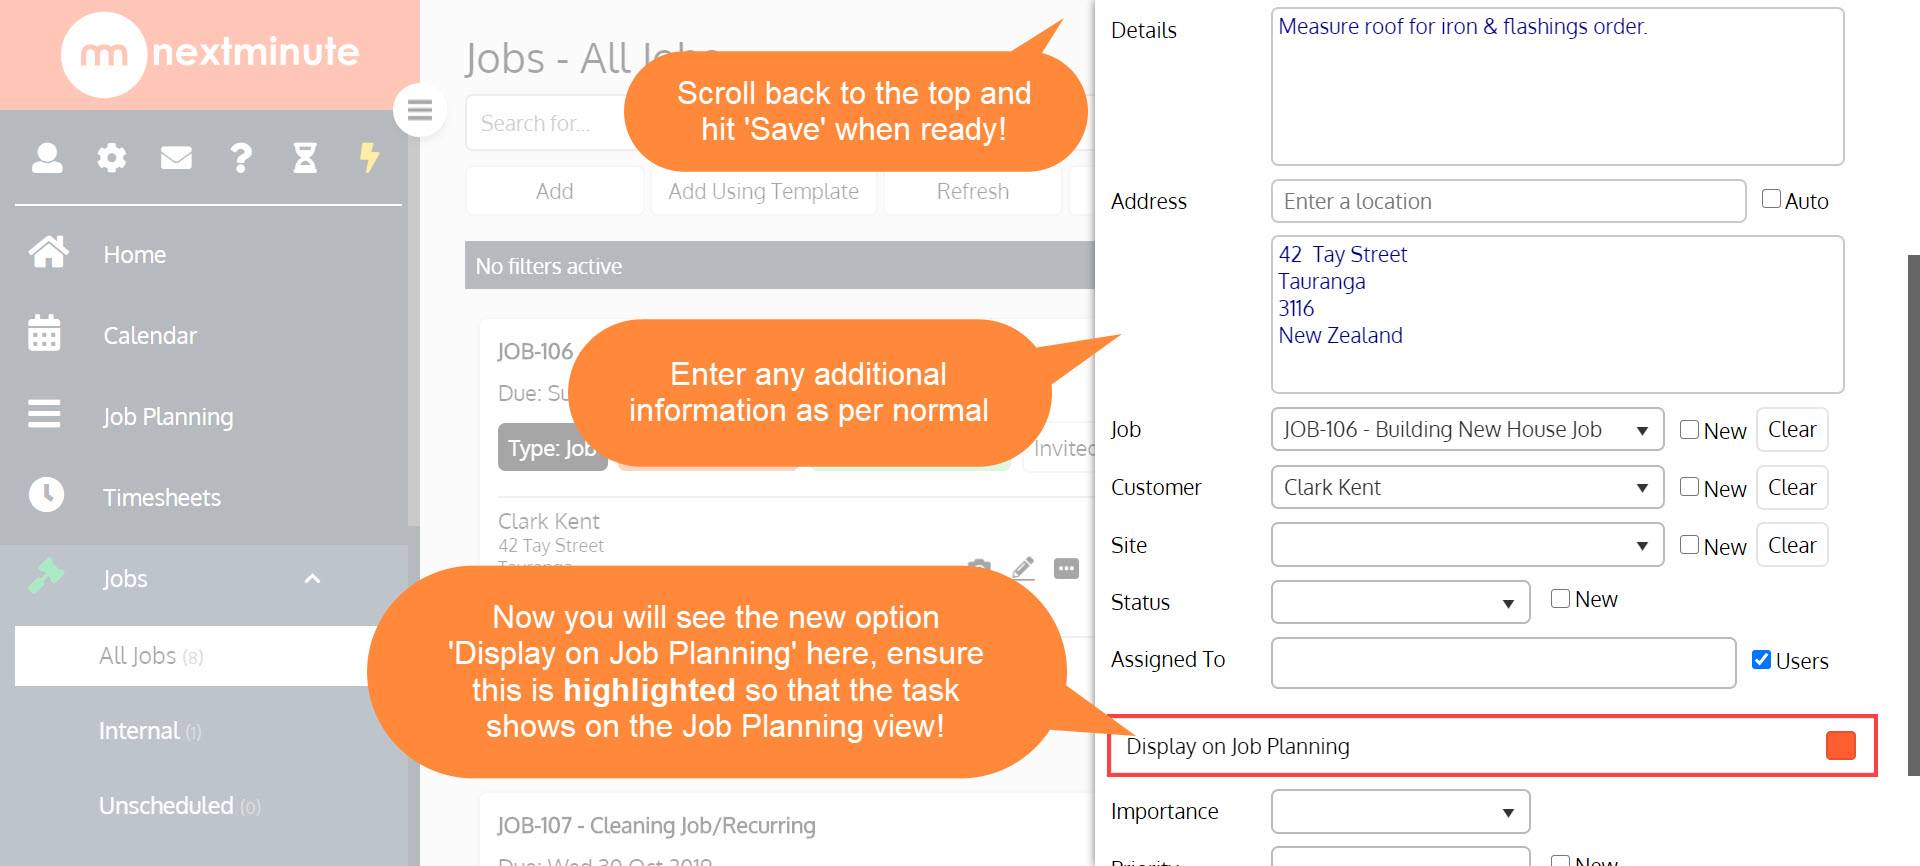
Step 4. Now go back into 'Job Planning' to view your newly added task!
Second way - Add via Job Planning Calendar
Step 1. On the Job Planning Calendar, right click on the left hand pane to create a Task
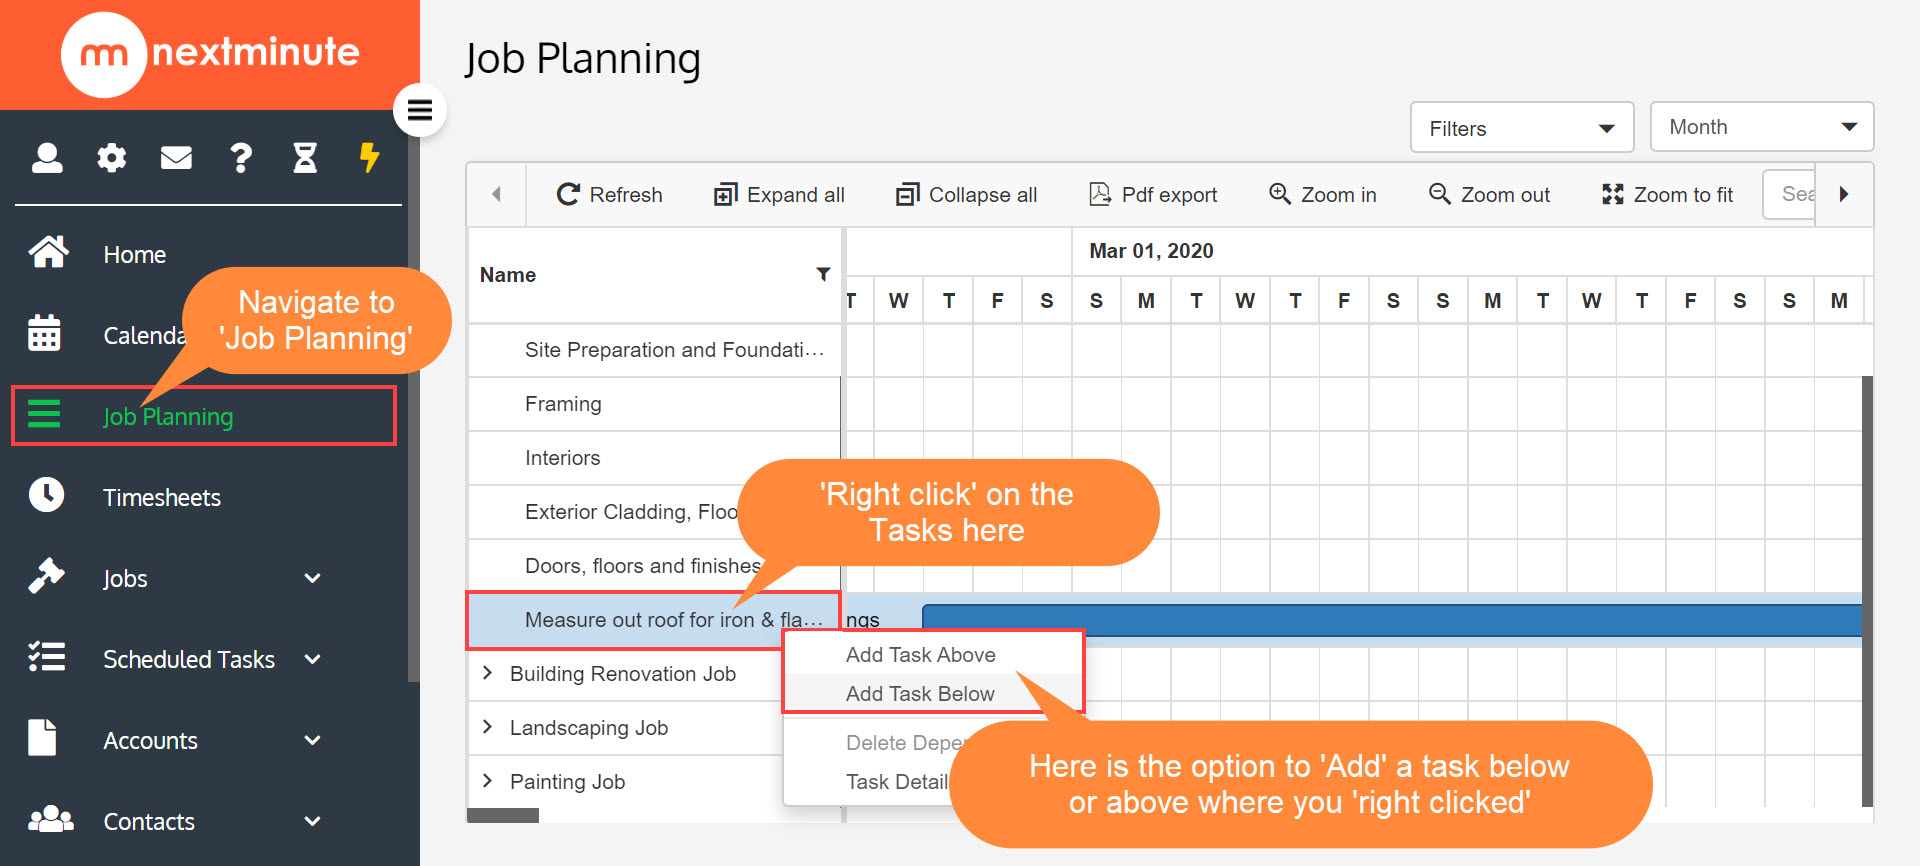
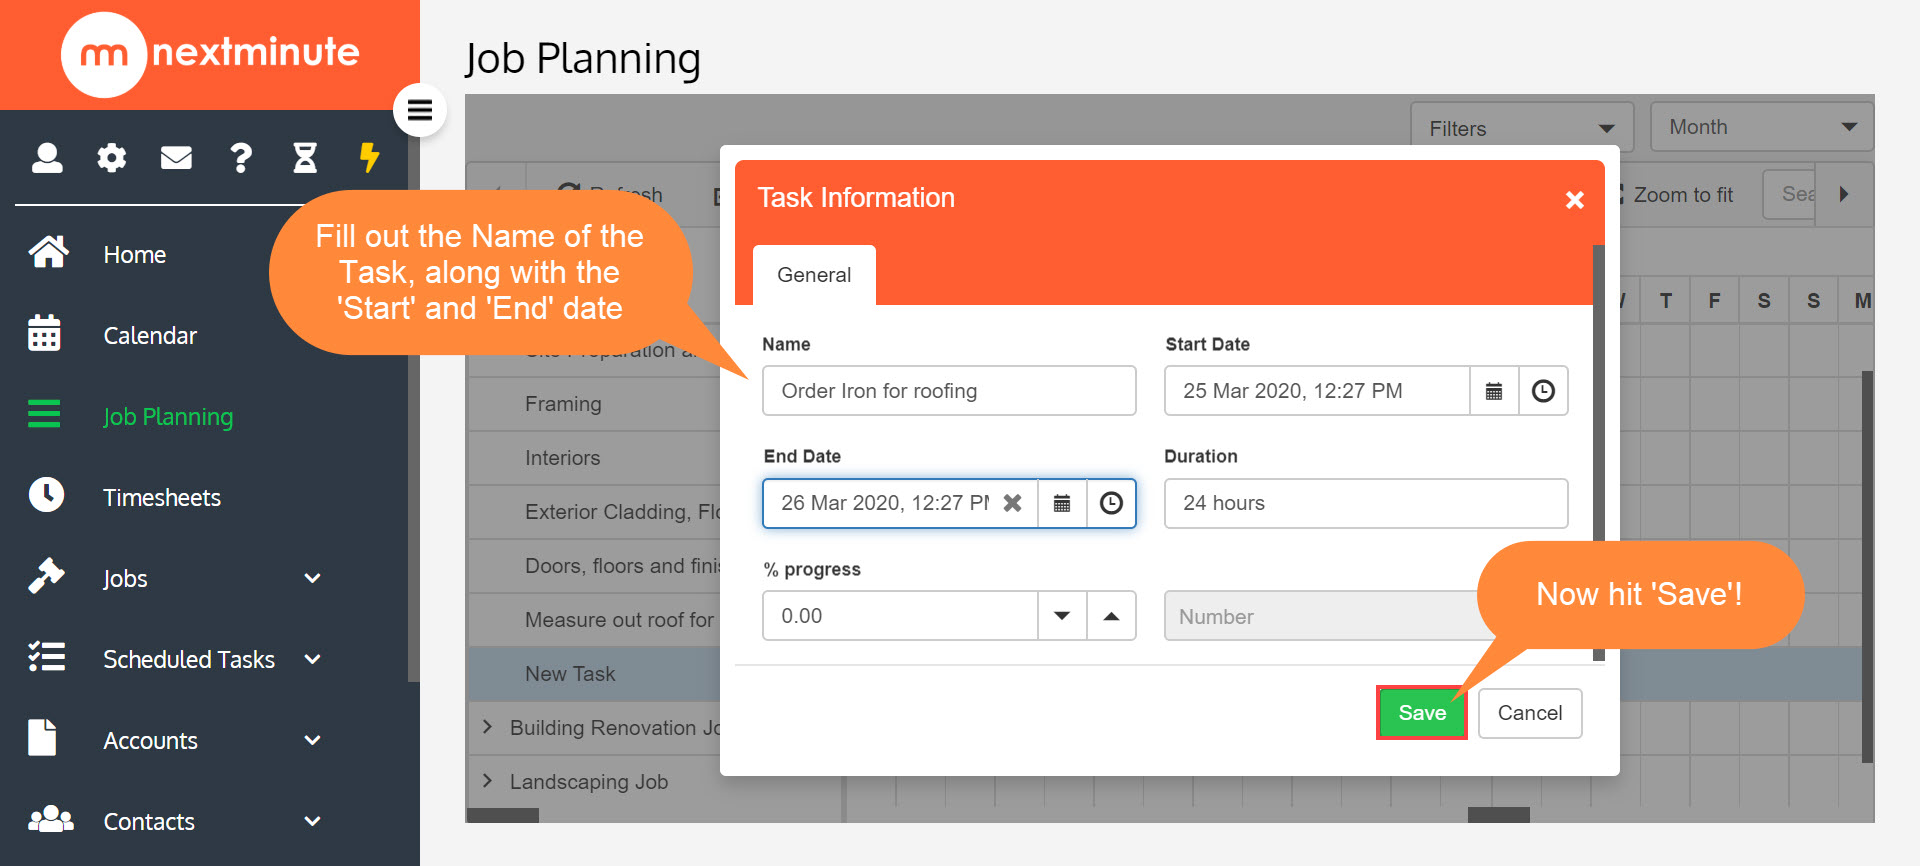
Step 2. Enter the Task details then hit 'Save'!
Step 3. Your Task will now show on the Job Planning Calendar as pictured below
