![NextMinute_Primary_White.svg]](https://support.nextminute.com/hubfs/NextMinute_Primary_White.svg)
🔸 Note: This feature is only available to Admin and Planner users. 🔸
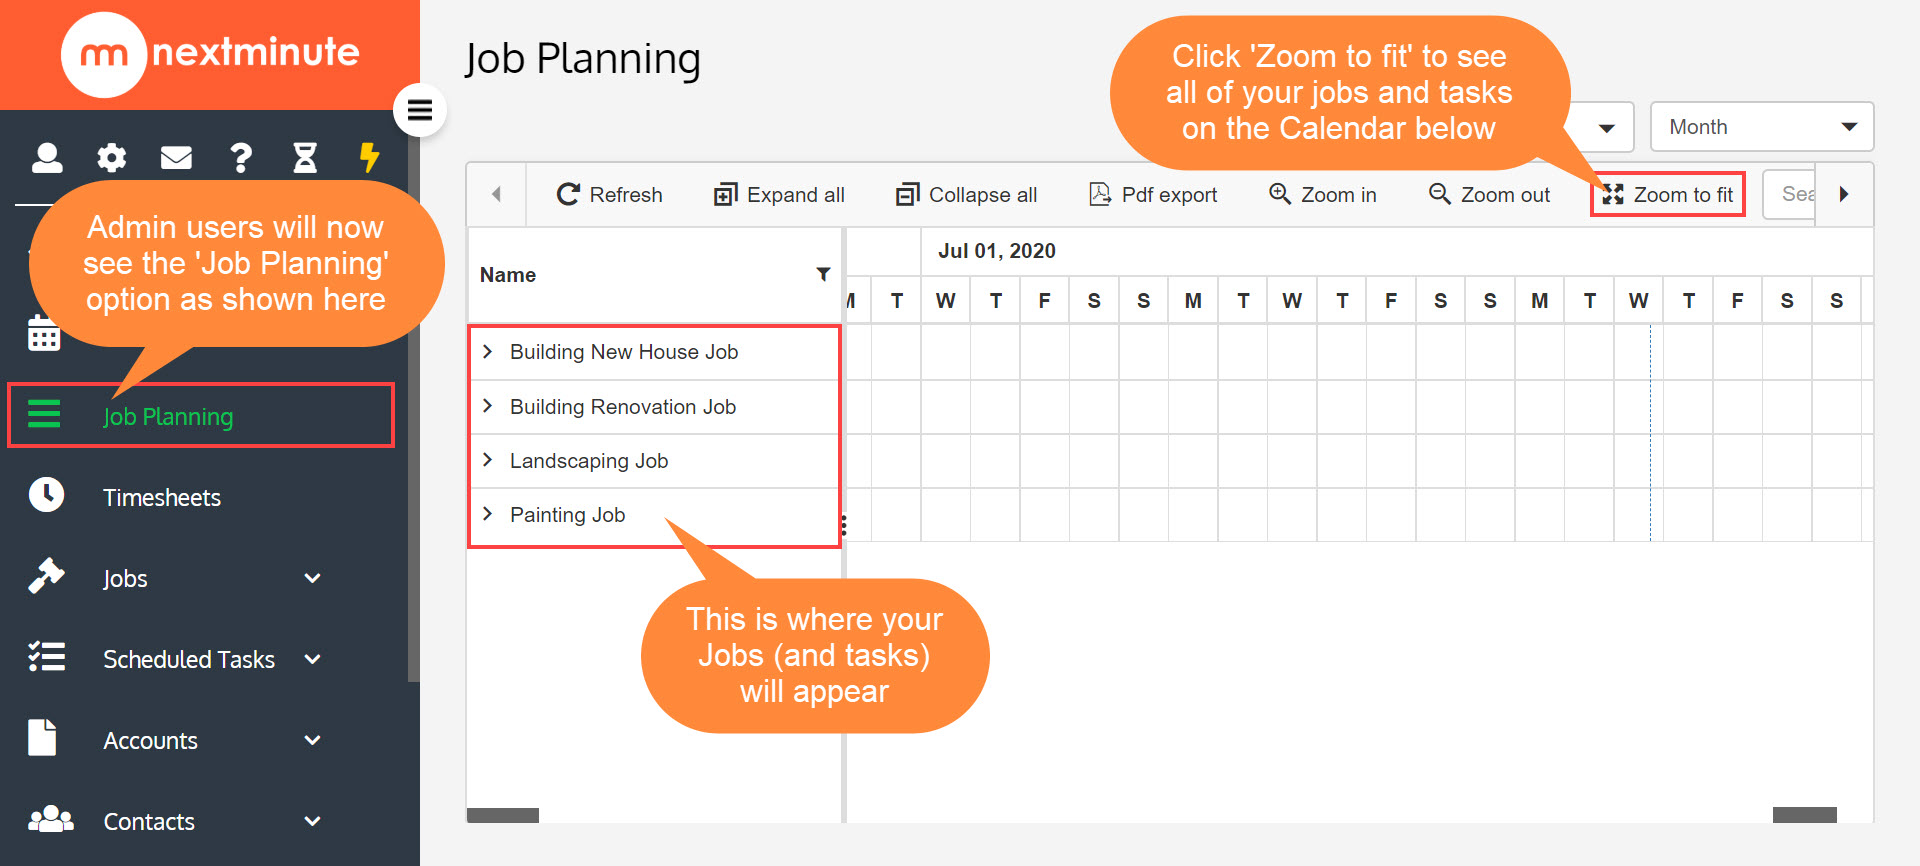
1A. Below is how the 'Job Planning' view will show upon opening it
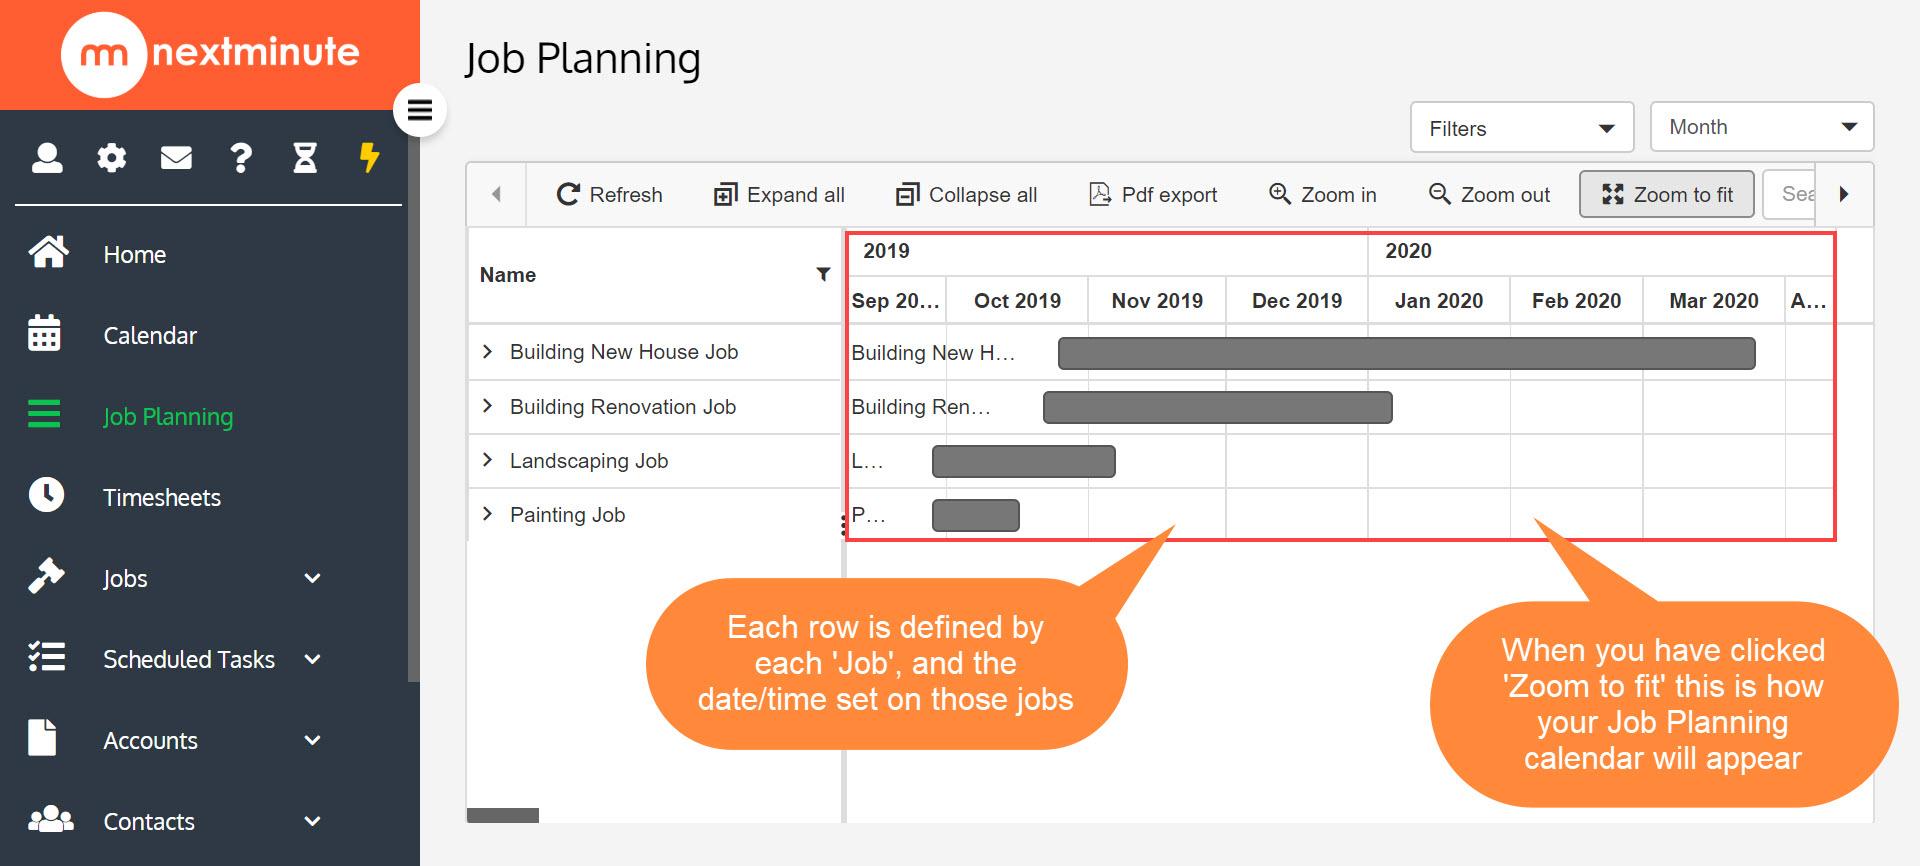
1B. Here is how it will appear once you have clicked 'Zoom to fit'
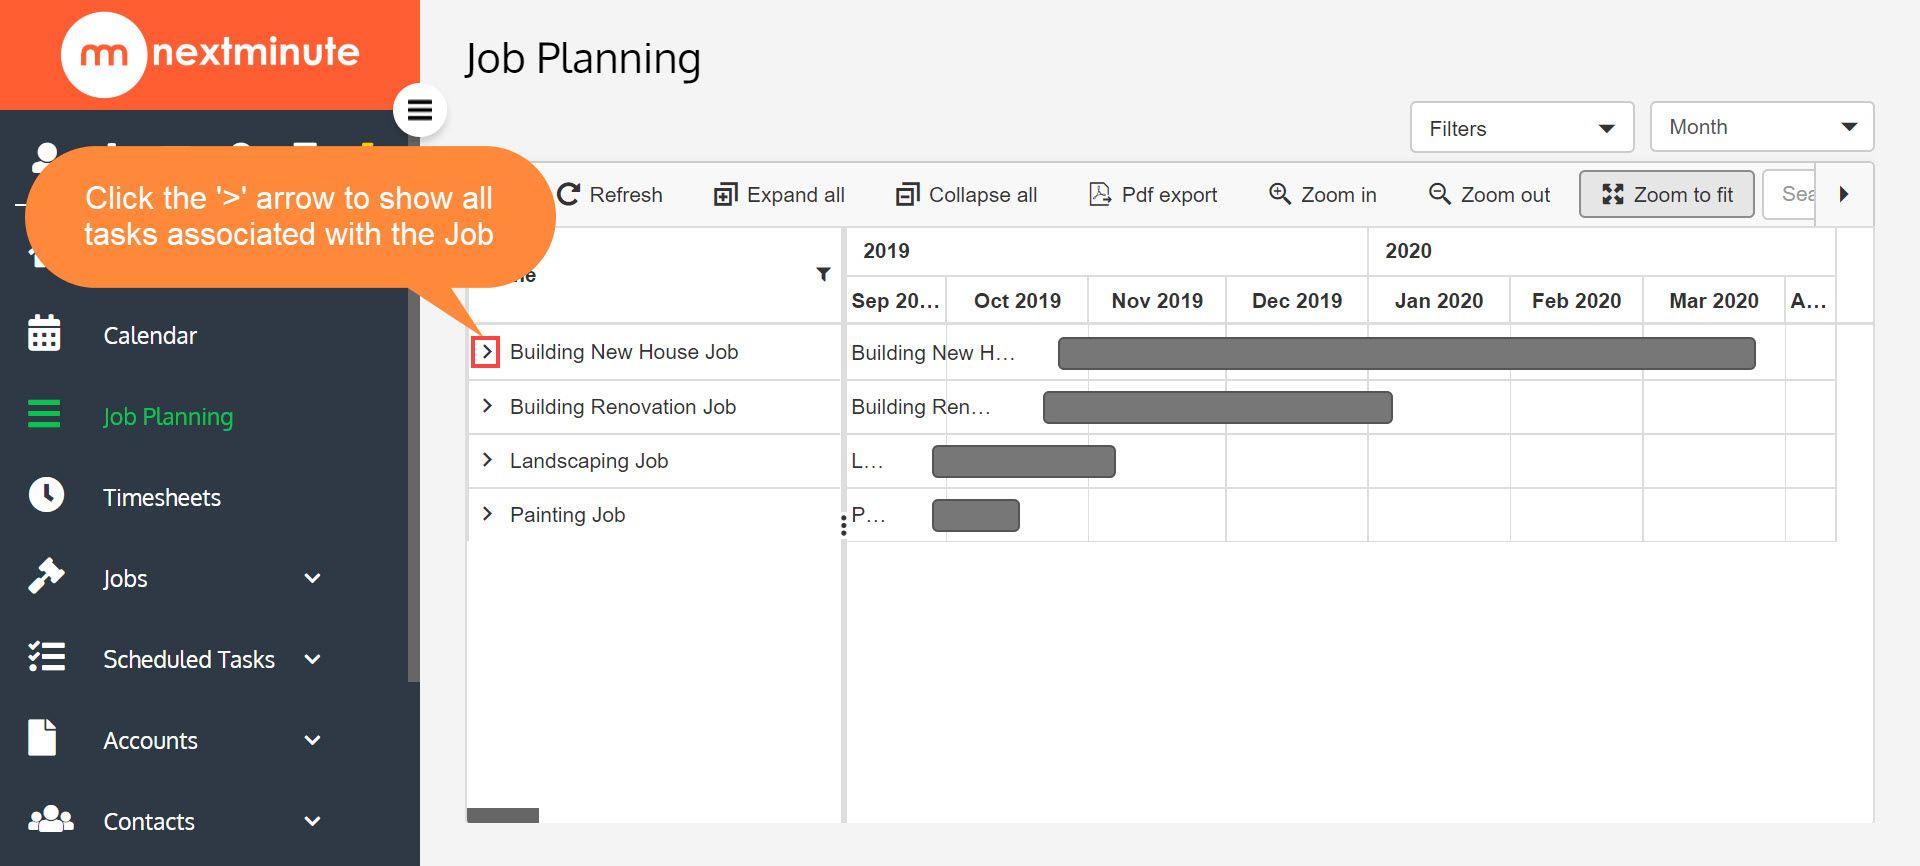
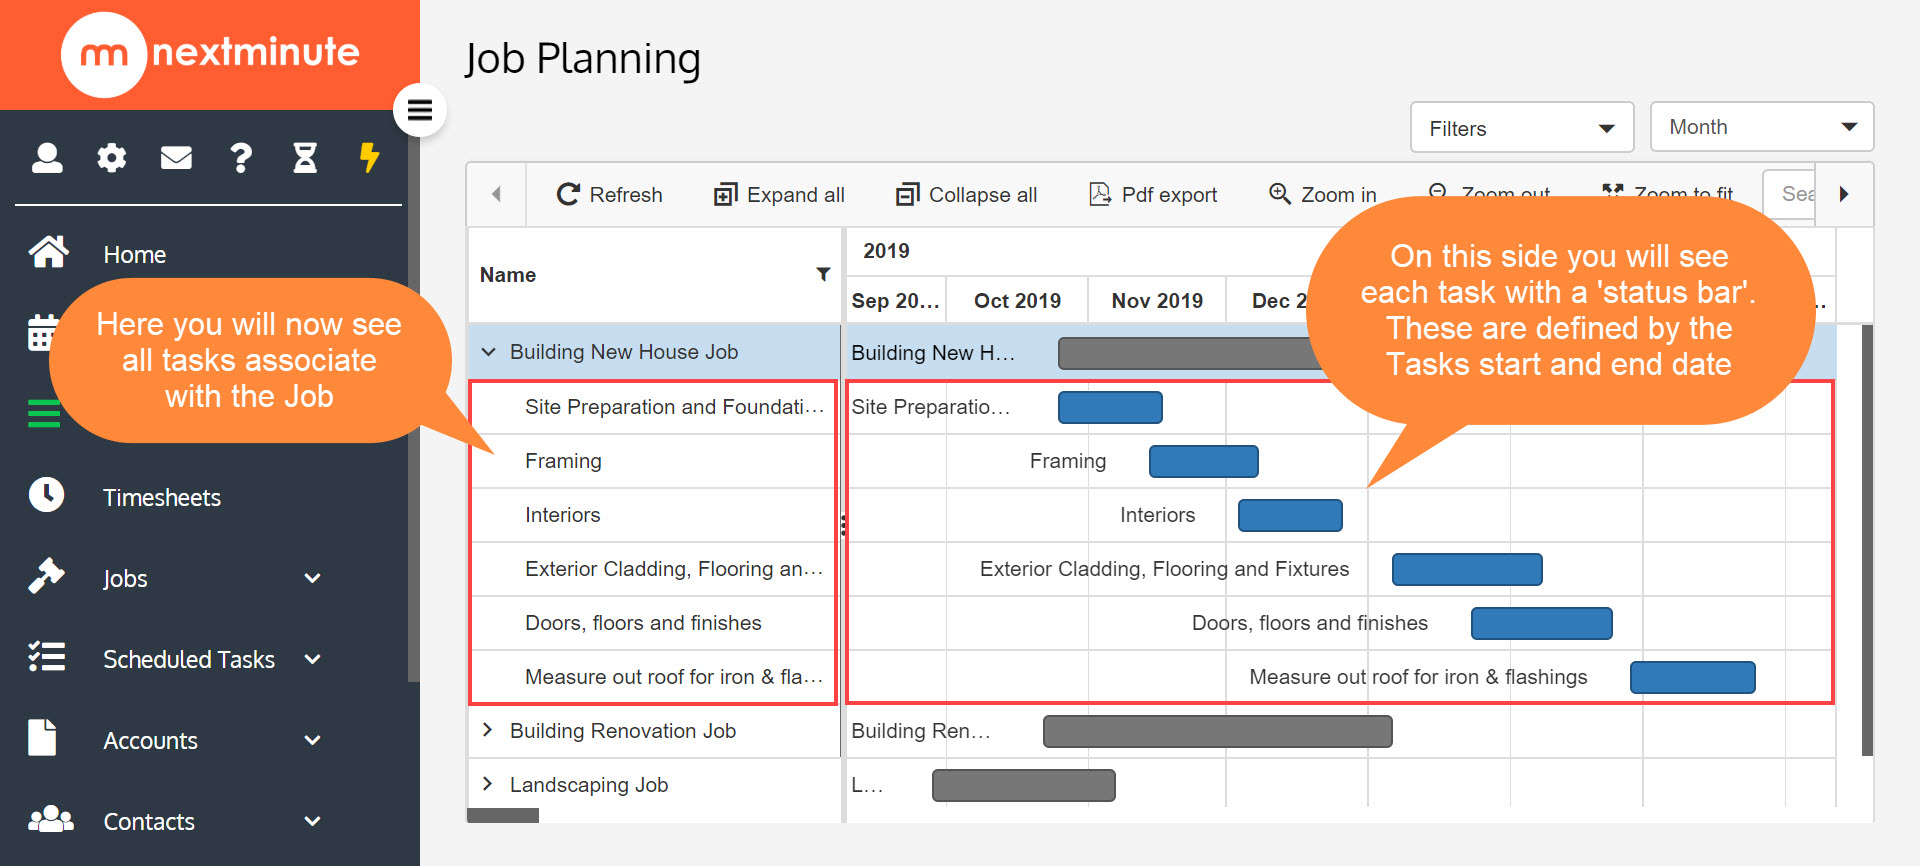
2A. If you would like to see your tasks attached to the job, simply click the '>' arrow to expand your view
2B. Here is how your tasks are shown, underneath the associated Job
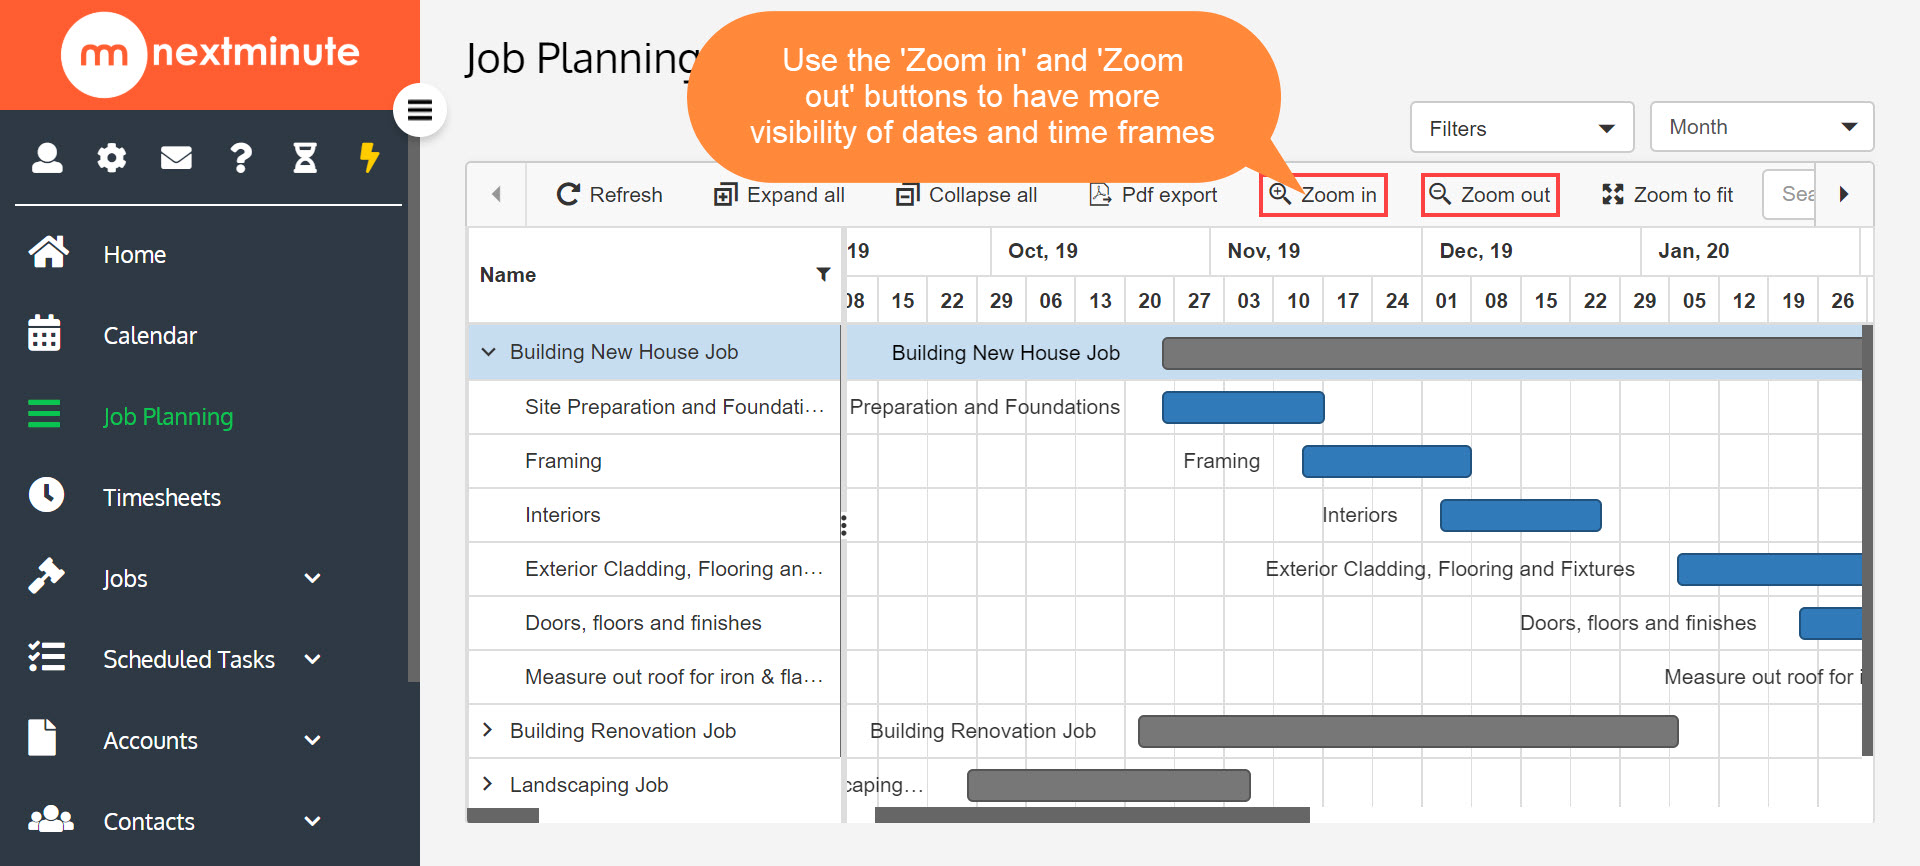
3. Use the 'Zoom in' and 'Zoom out' buttons for more visibility of 'dates' on the Product Planning Calendar
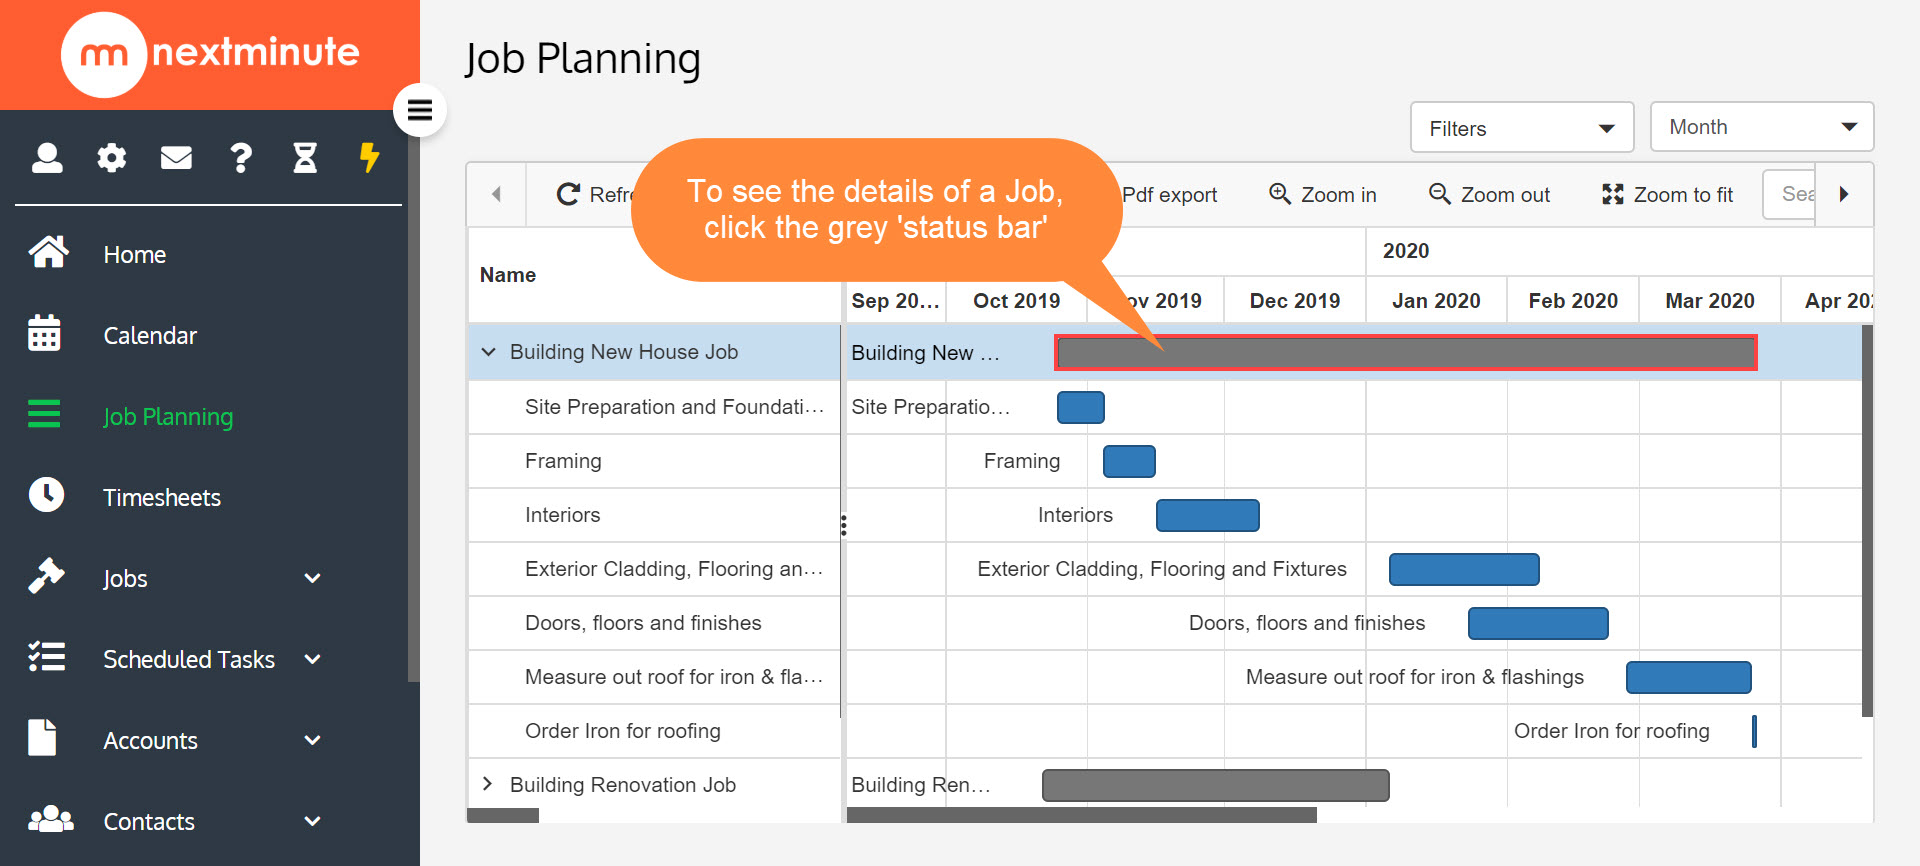
4A. To see the Details of a Job, click the grey 'status bar' as shown below
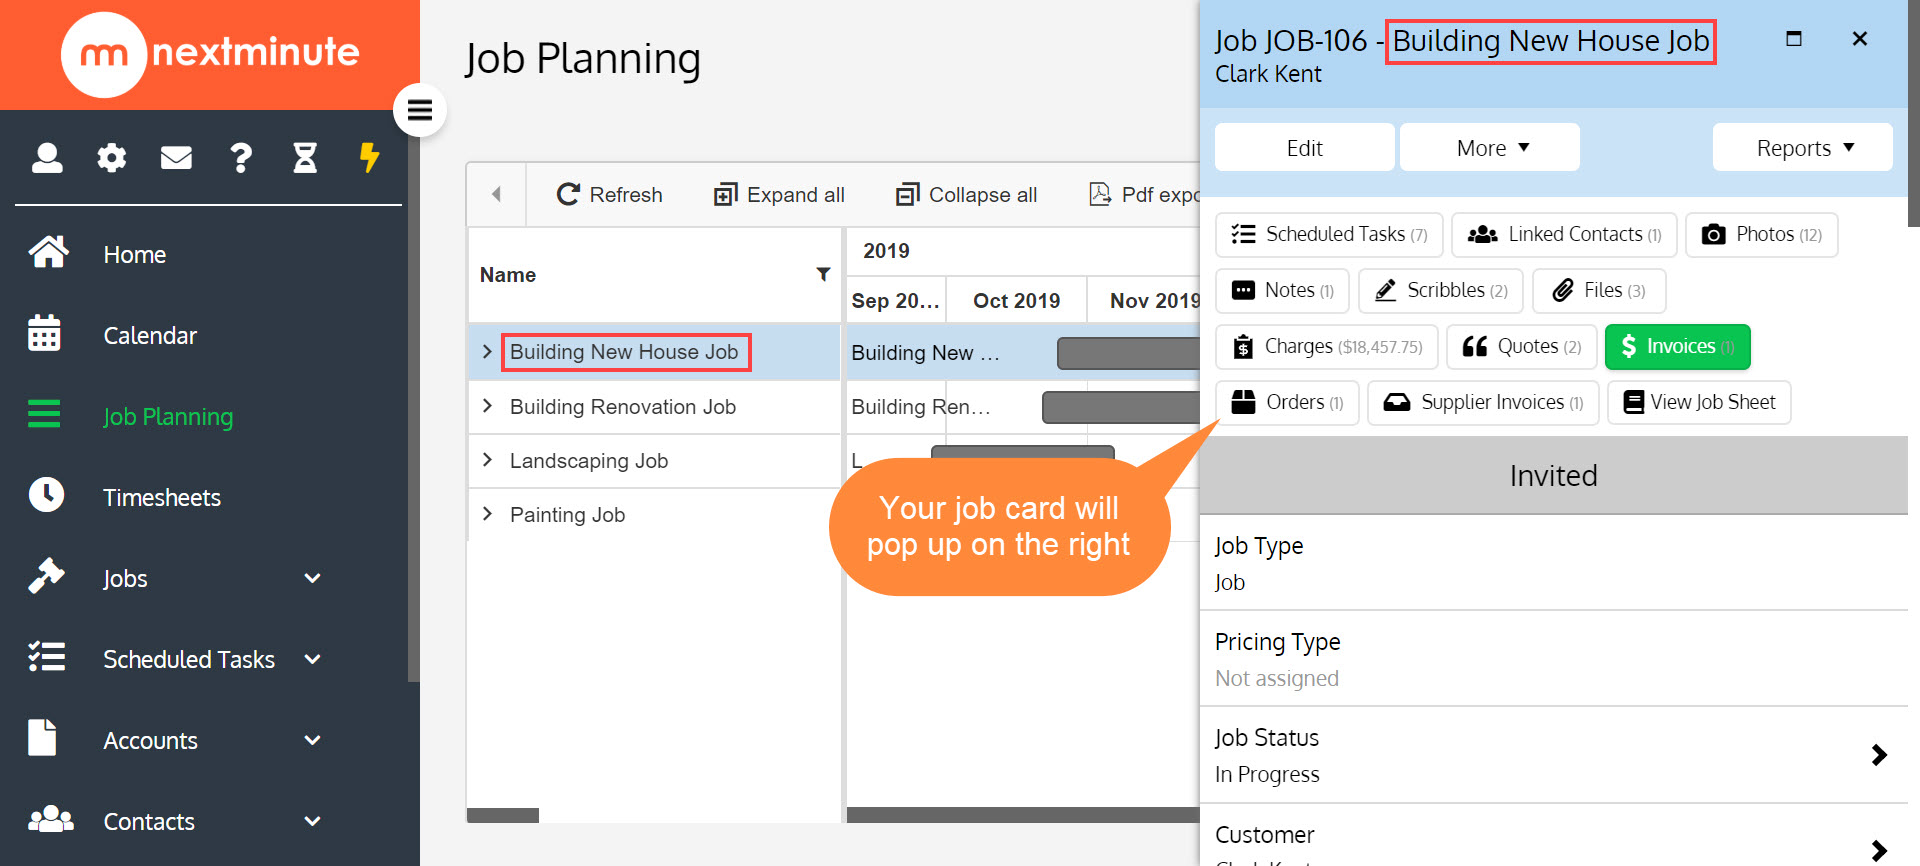
4B. Your Job card will now pop up on the right
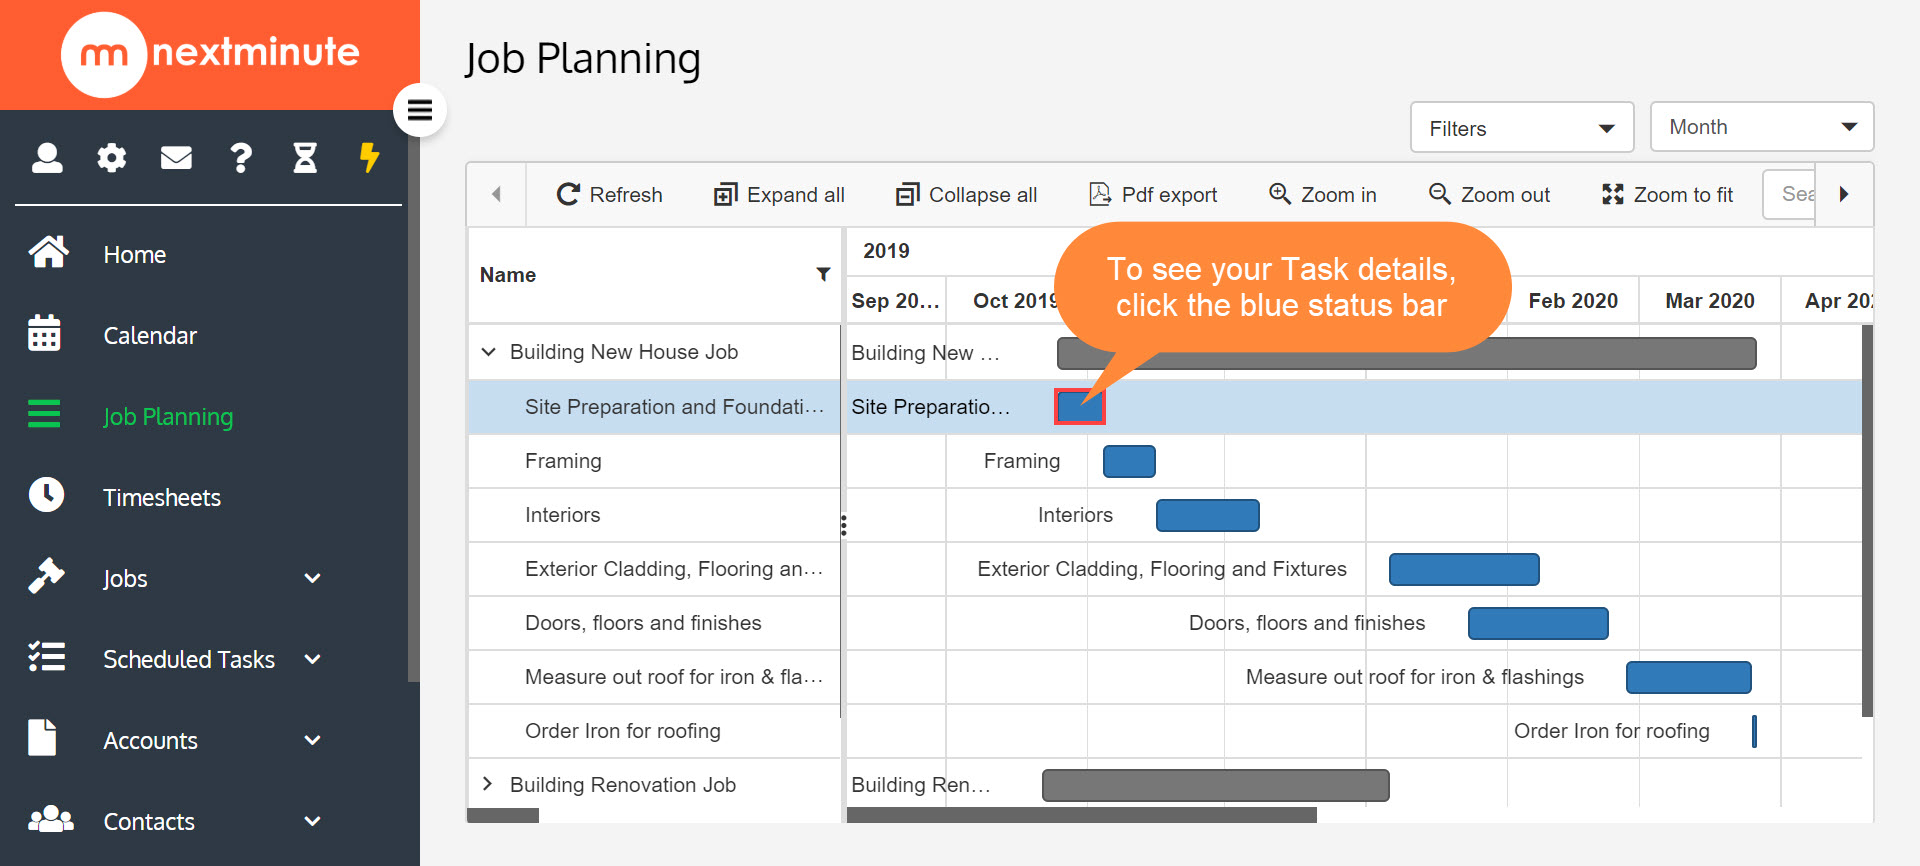
5A. To see your task details, click the Blue 'status bar' as shown below
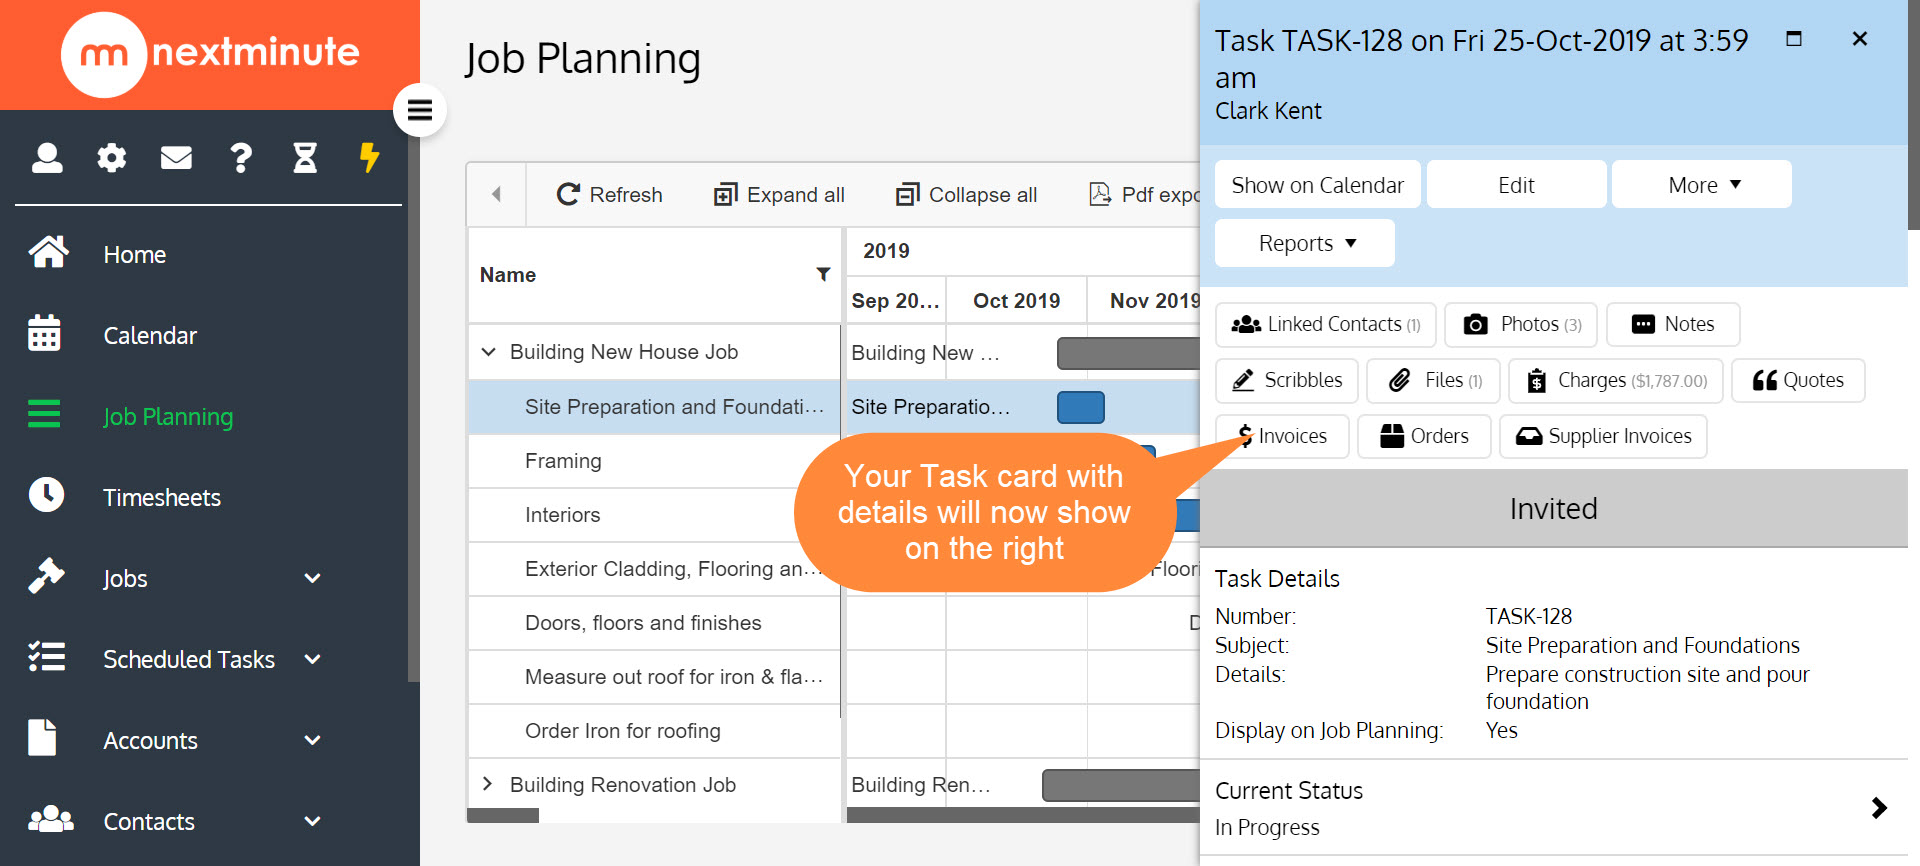
5B. Now you will see your Task details pop up on the right
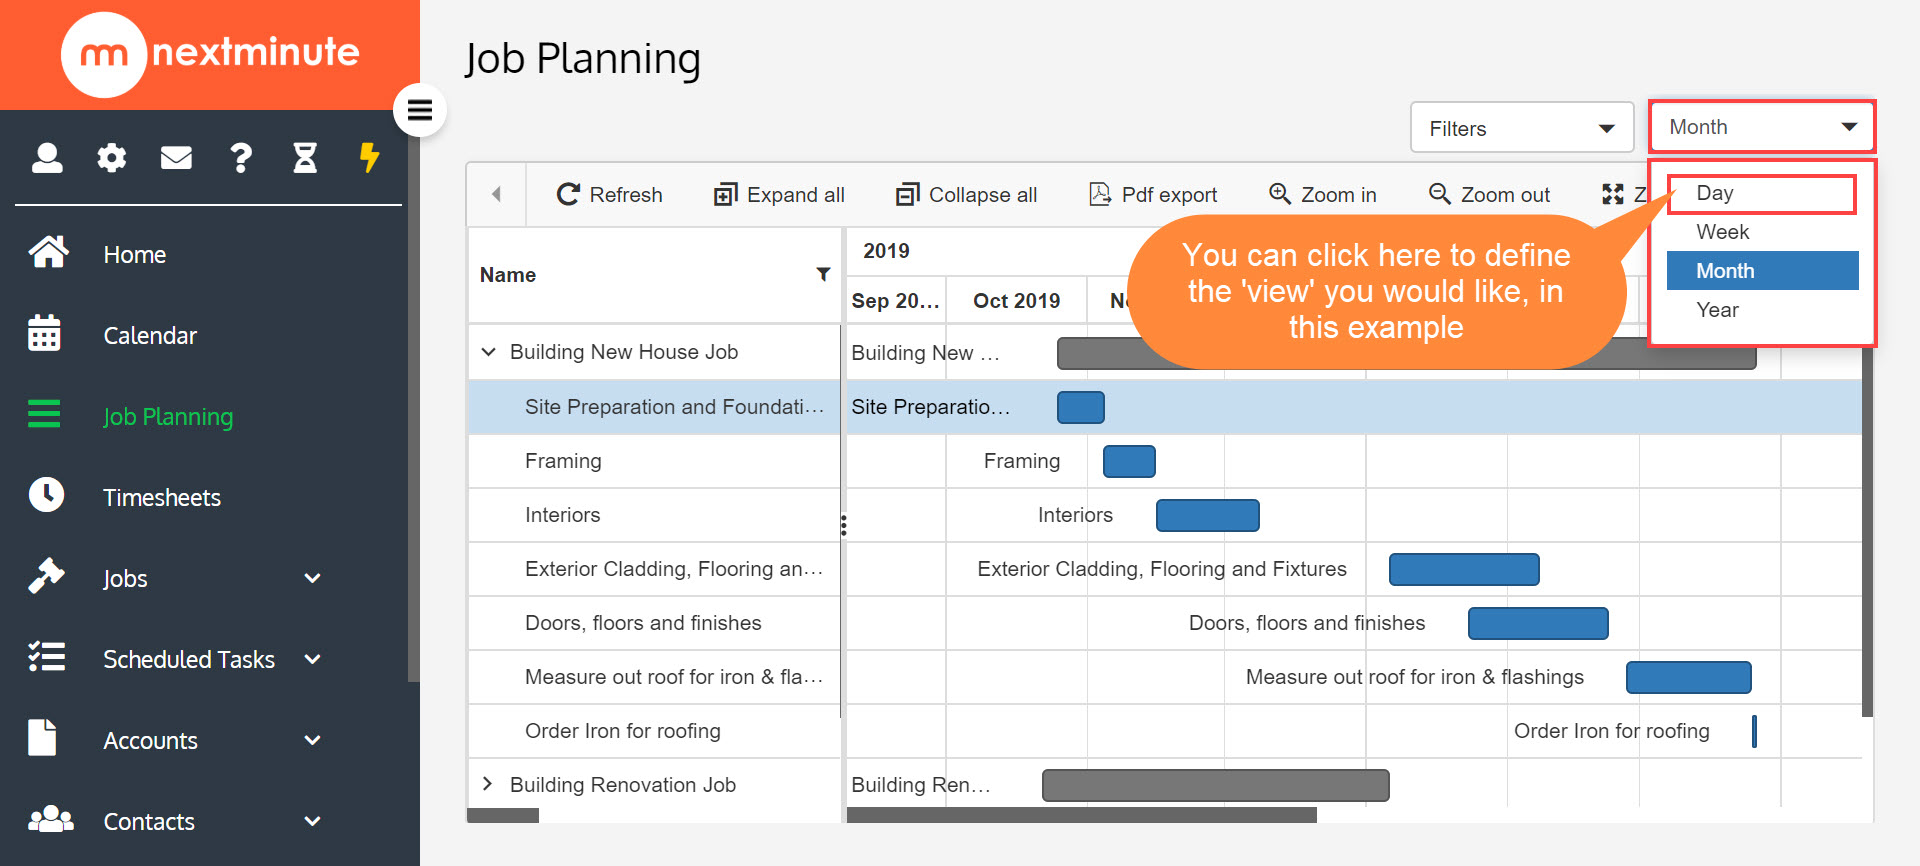
6A. Define the 'Job Planning' calendar view by Day, Week, Month or Year
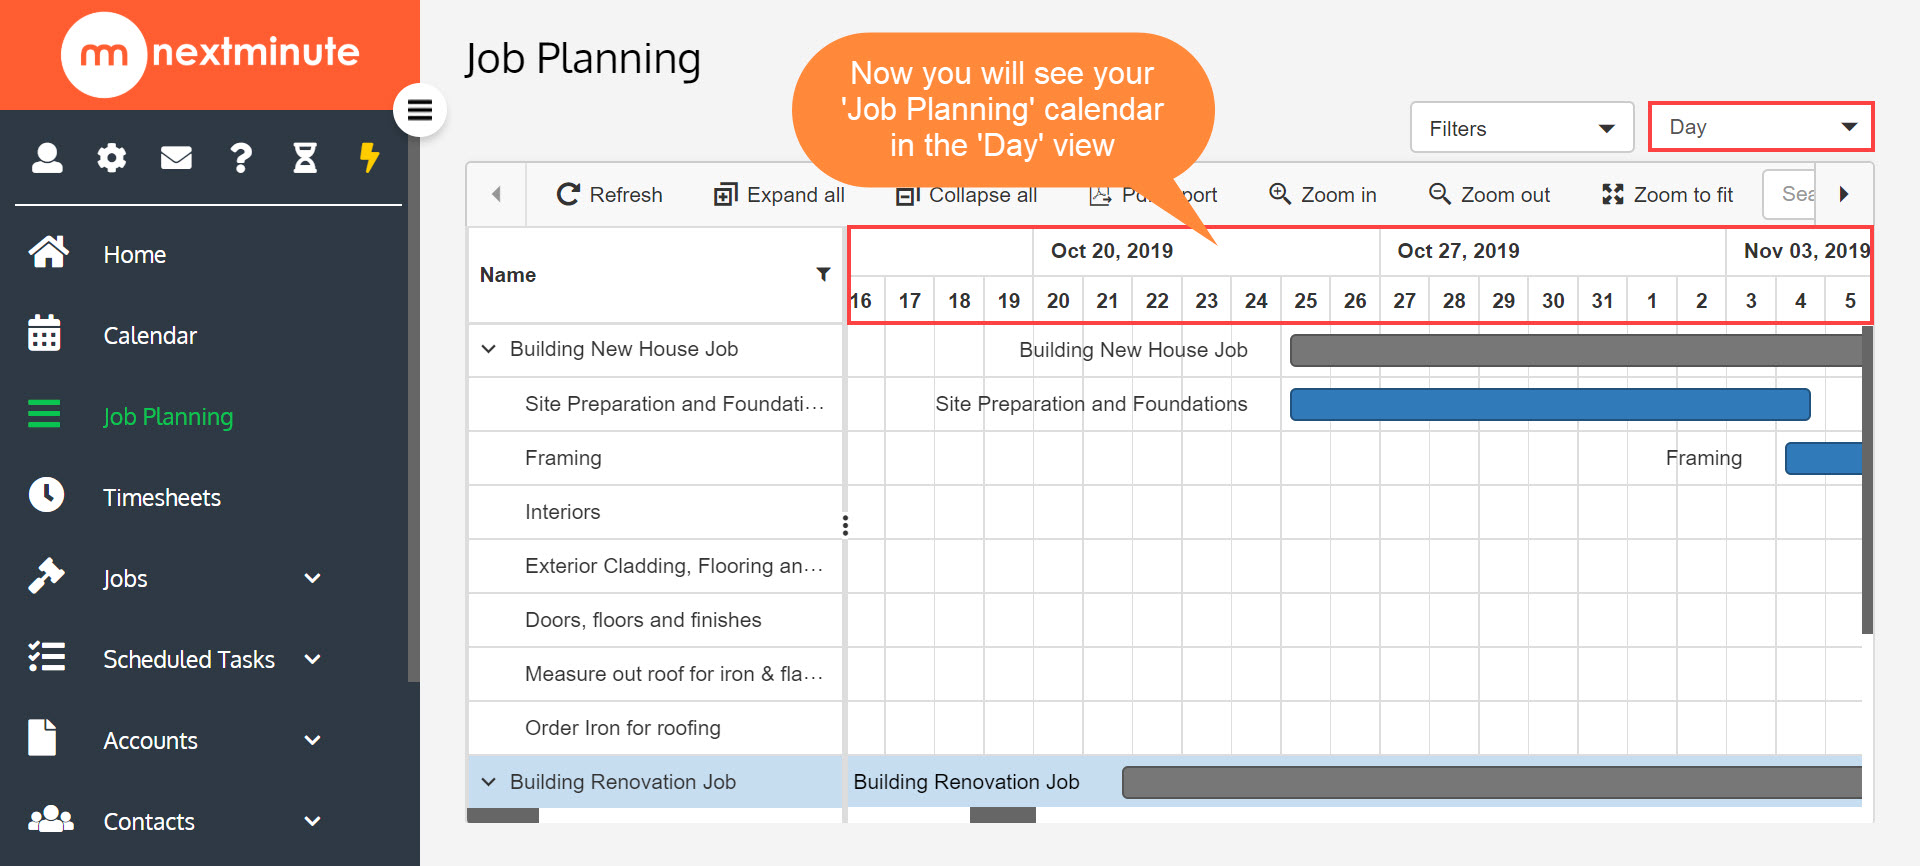
6B. Here's an example of how the 'Day' view would look
7. You can 'Filter' your 'Job Planning' calendar by either 'Job Status' or 'Job Types'
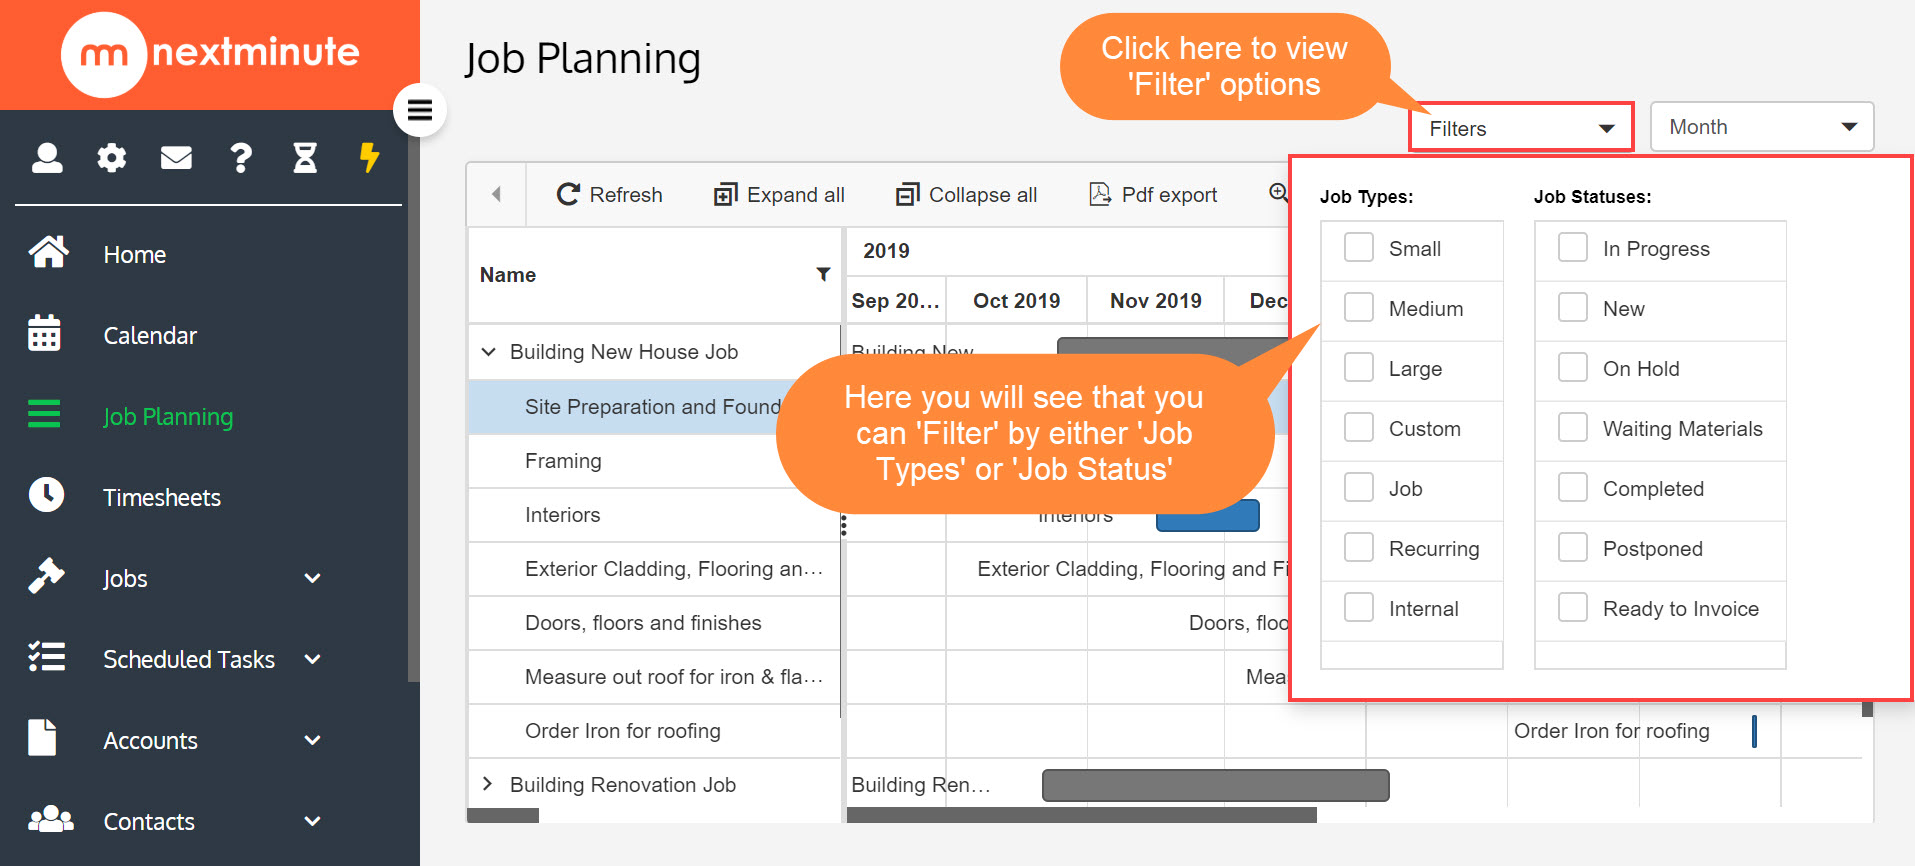
8. Some filters explained below, along with showing where the 'Scroll Bars' are so you can view more detail
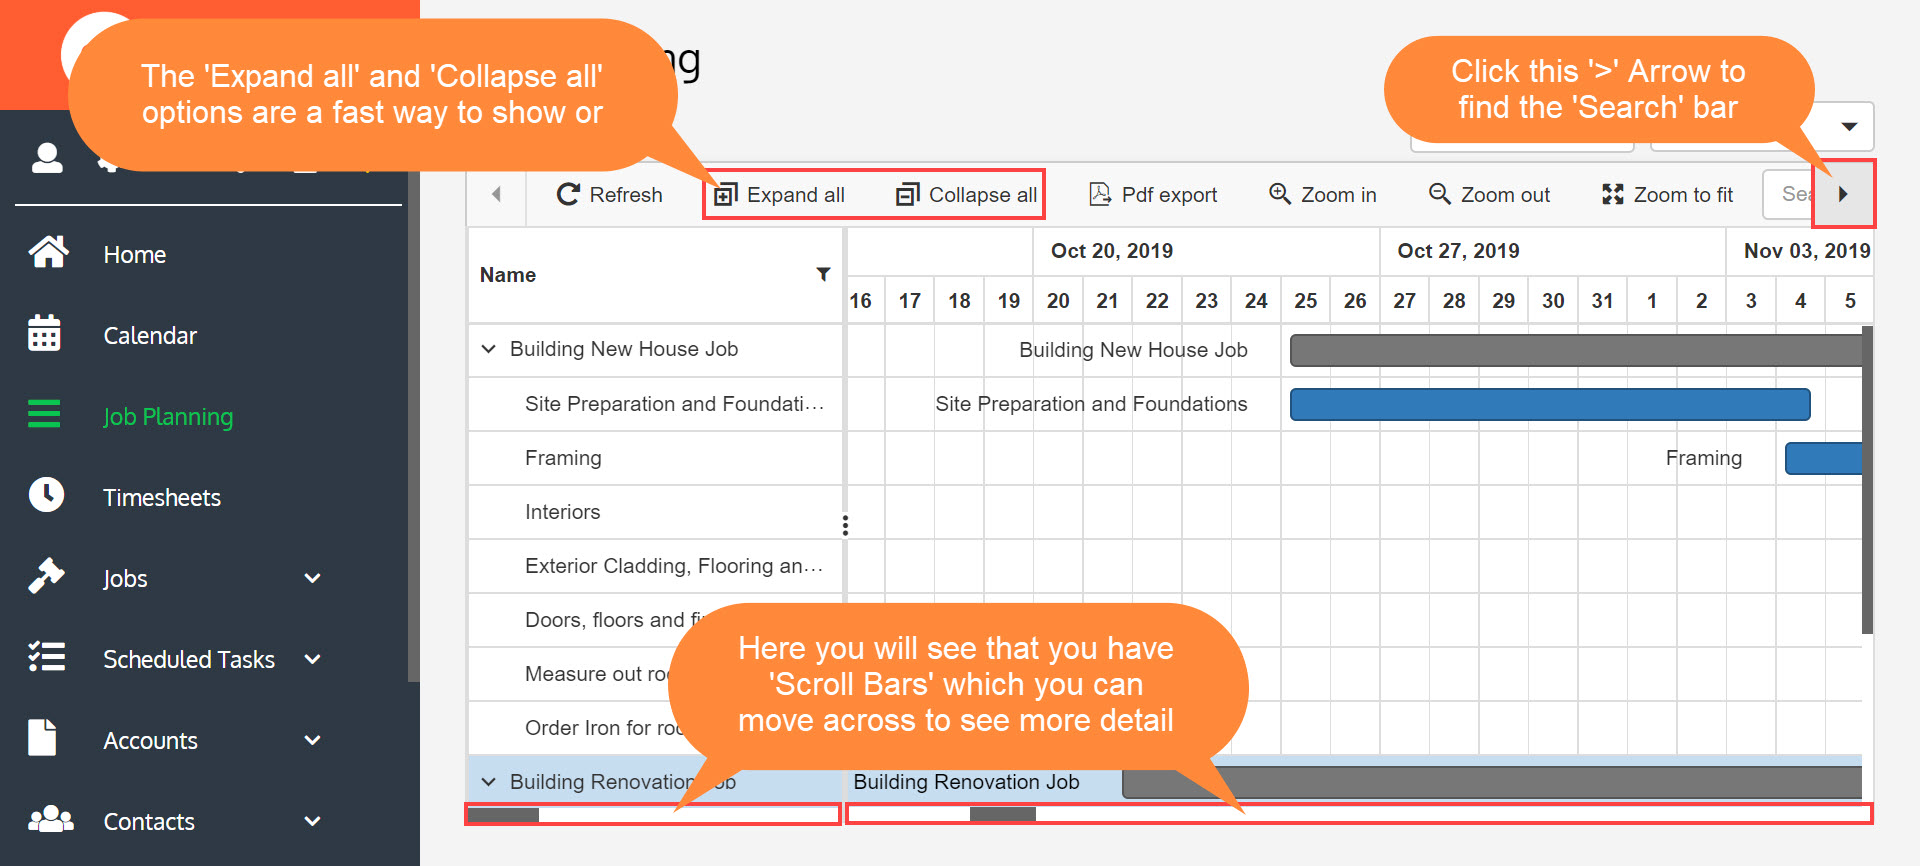
9A. There is a 'Scroll Bar' between the left pane and the right calendar view as shown below
You can move this 'Scroll Bar' to see more detail of the Jobs and Tasks (see following screenshots)
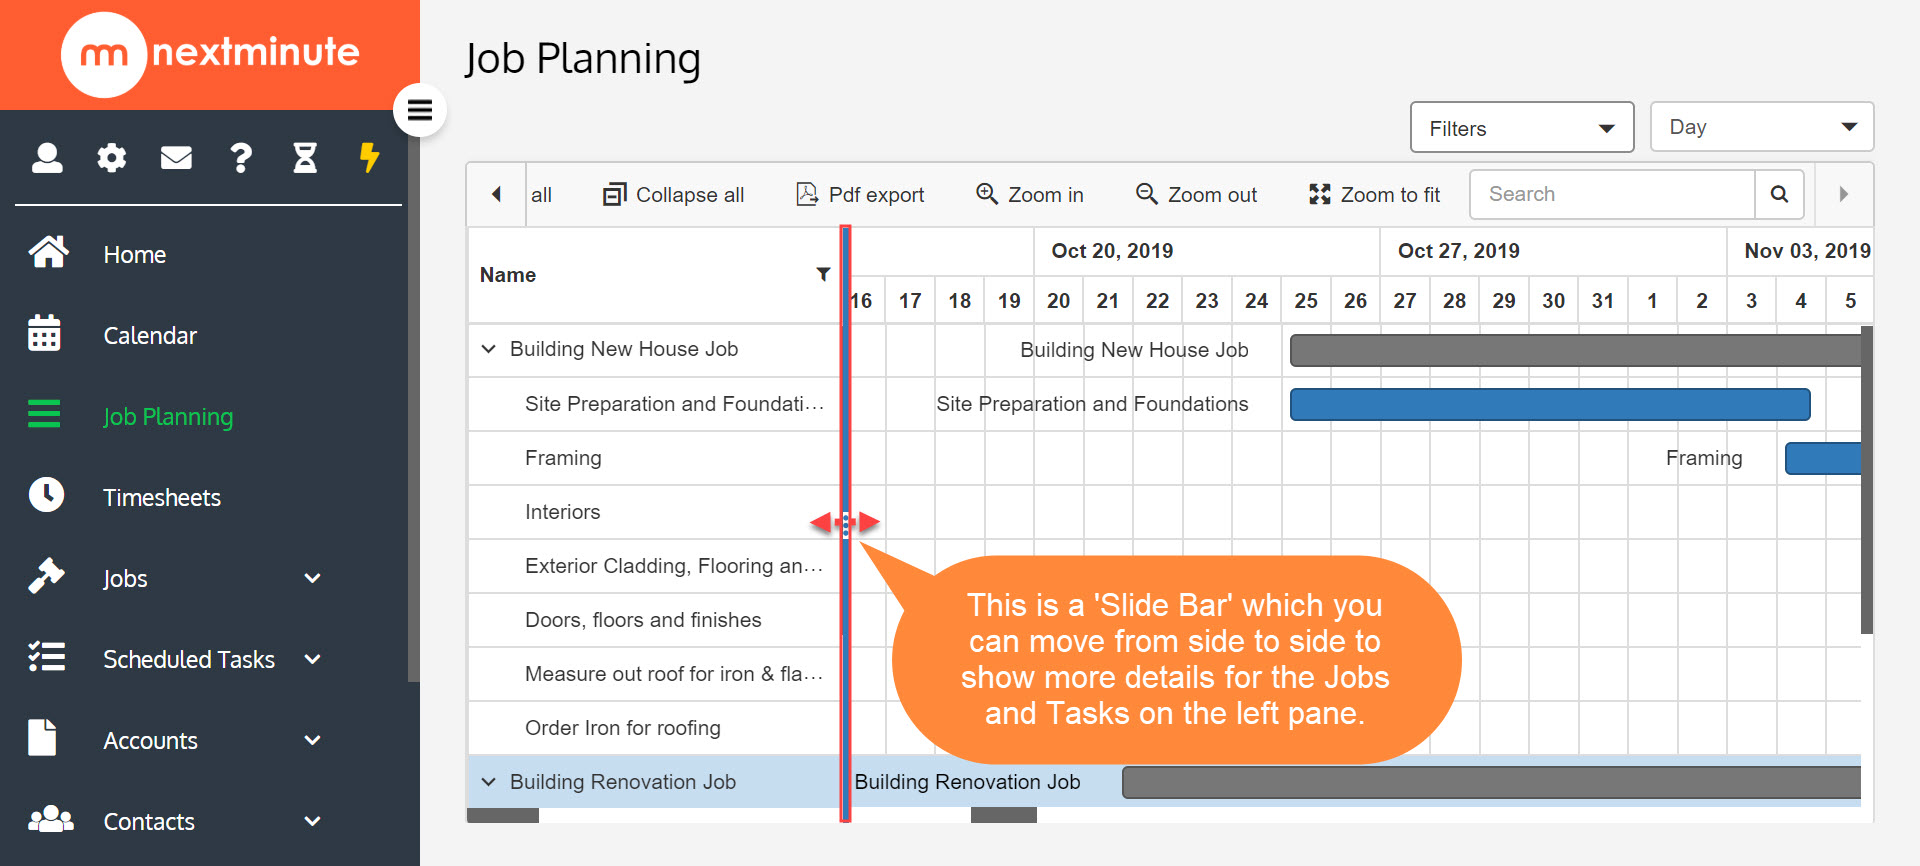
9B. Below is an example of some of the detail shown when you move the 'Scroll Bar' to the right

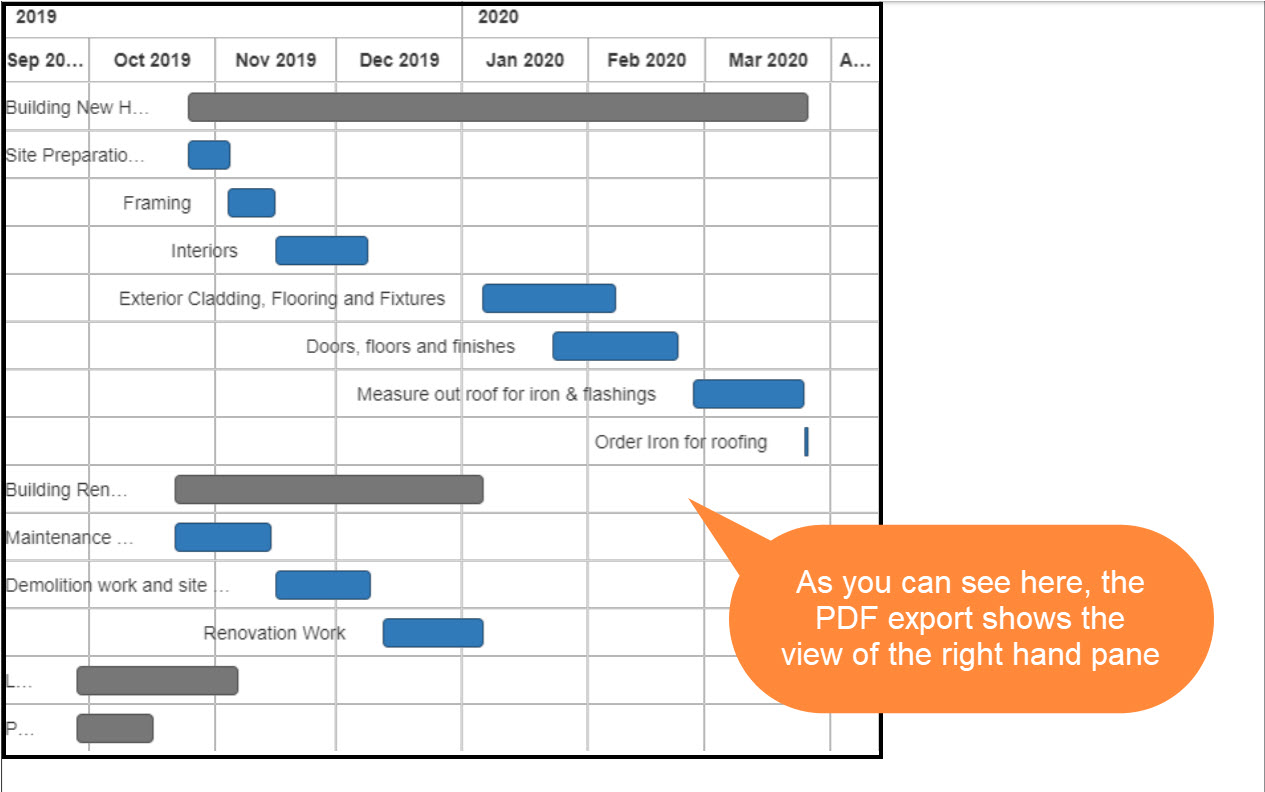
10A. Here's how to export the 'Job Planning' view to PDF
You can print this for your team to view!
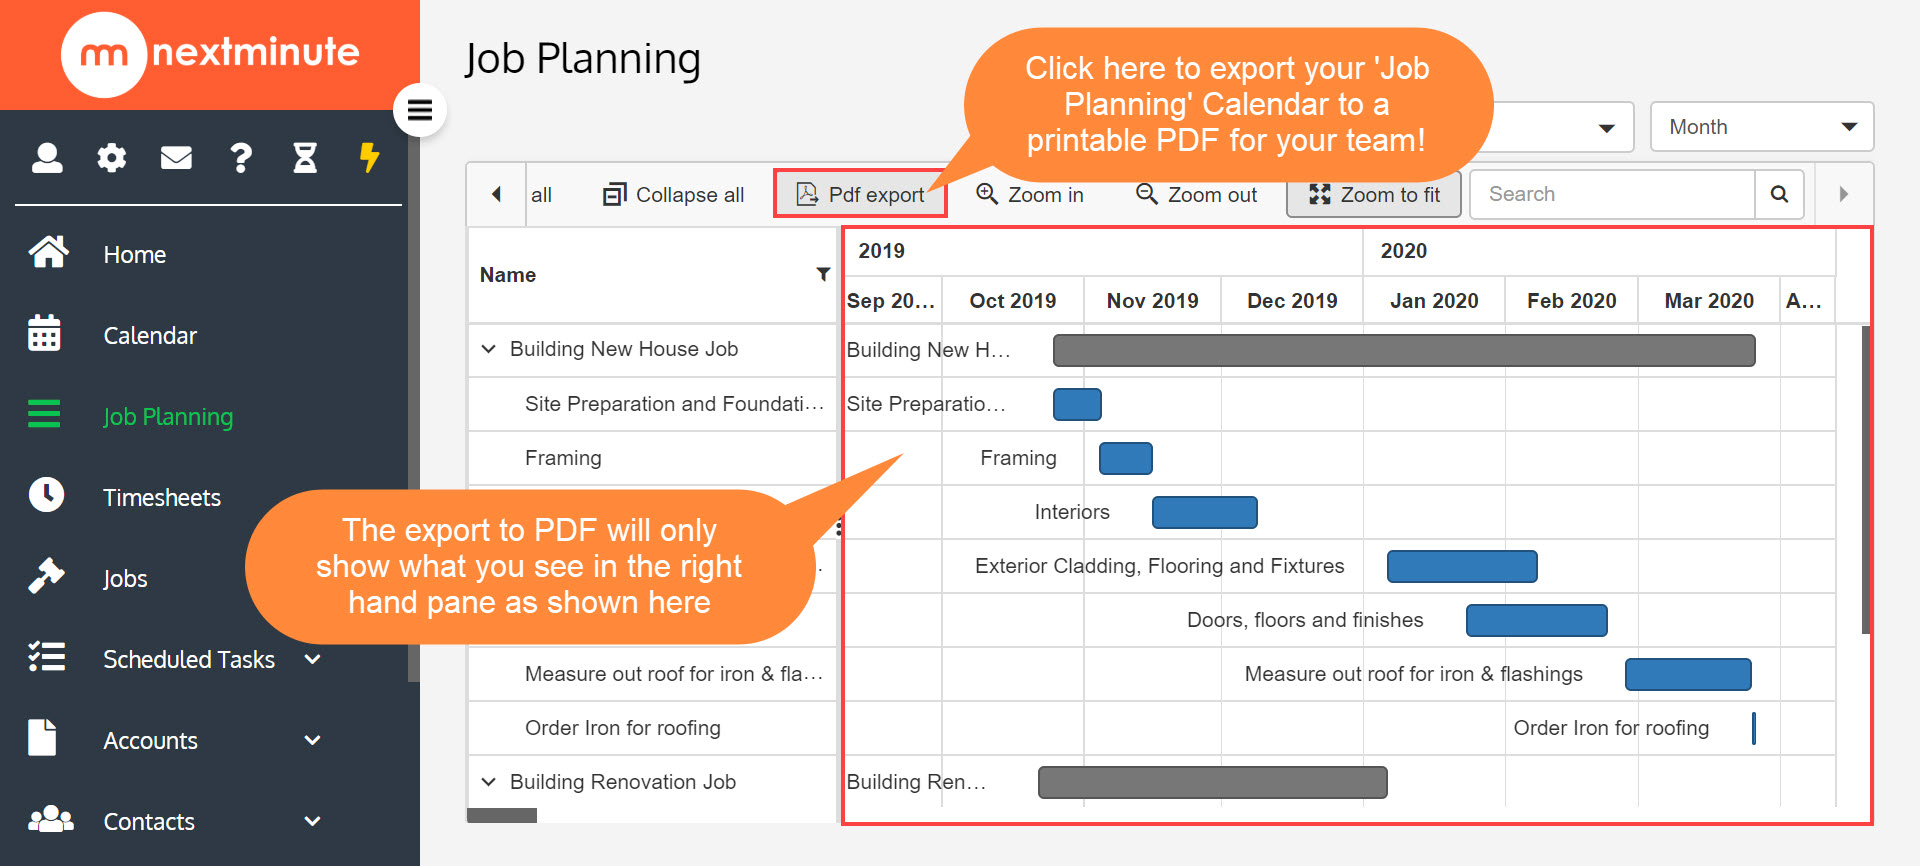
10B. Here's how the PDF would show once 'exported'