![NextMinute_Primary_White.svg]](https://support.nextminute.com/hubfs/NextMinute_Primary_White.svg)
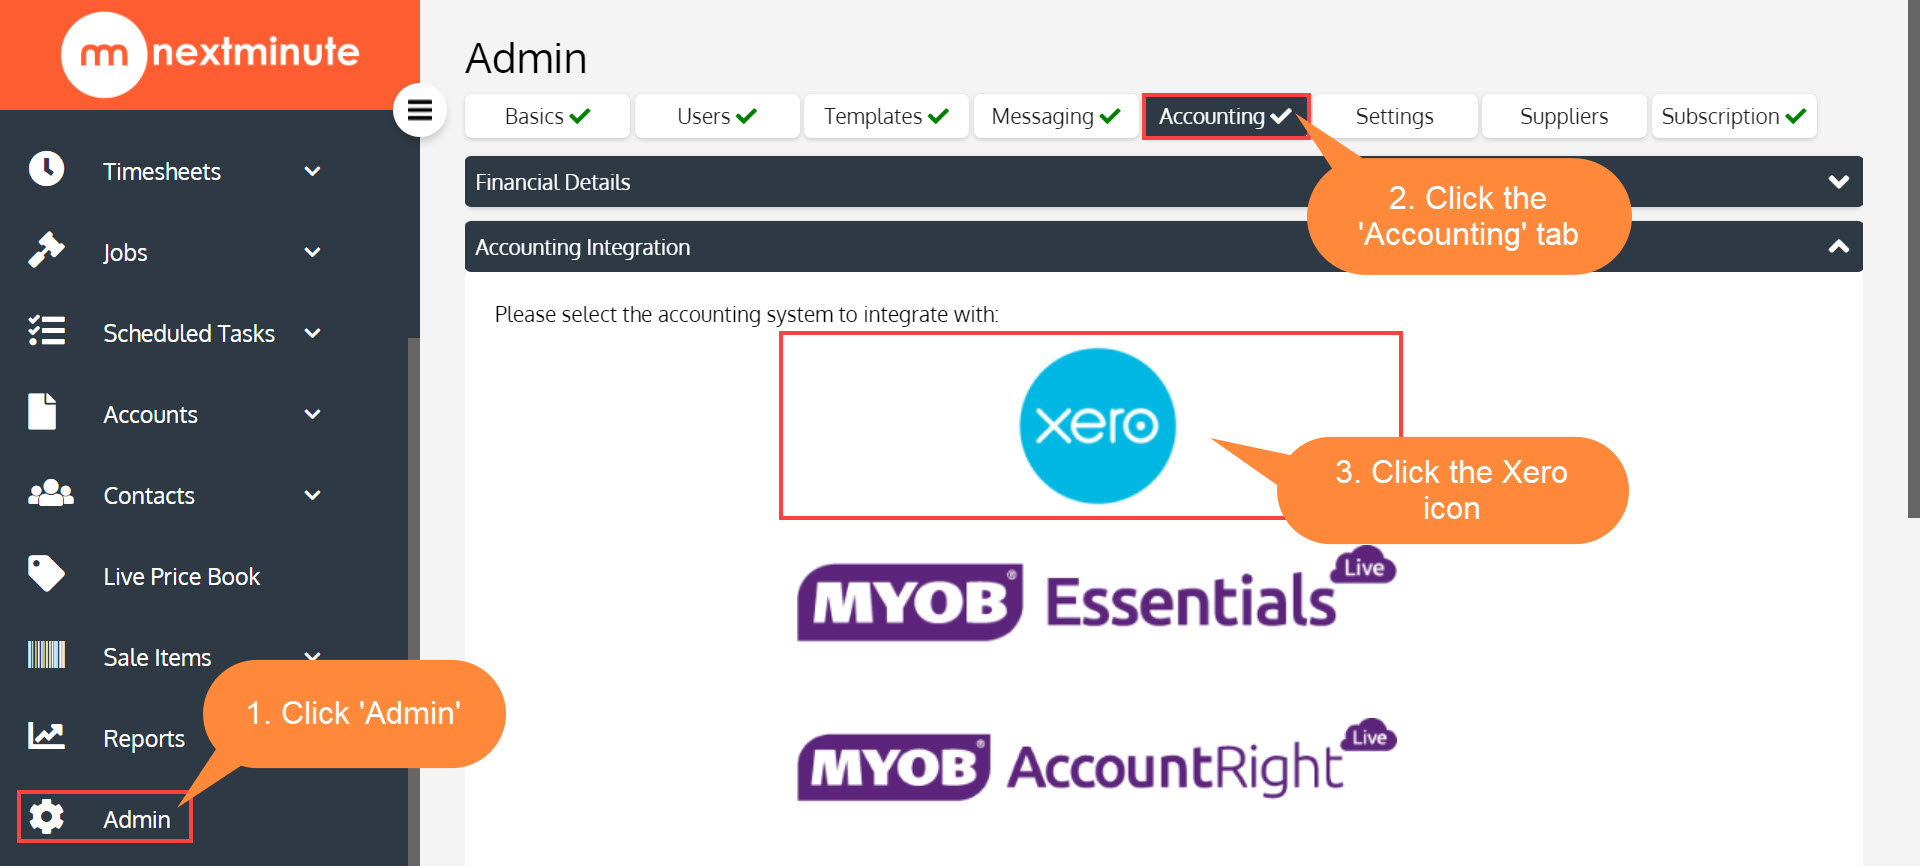
Step 1: Navigate to Admin > Accounting and select Xero
Step 2: Select 'Yes' or 'No' to connect your Xero Payroll (if applicable)
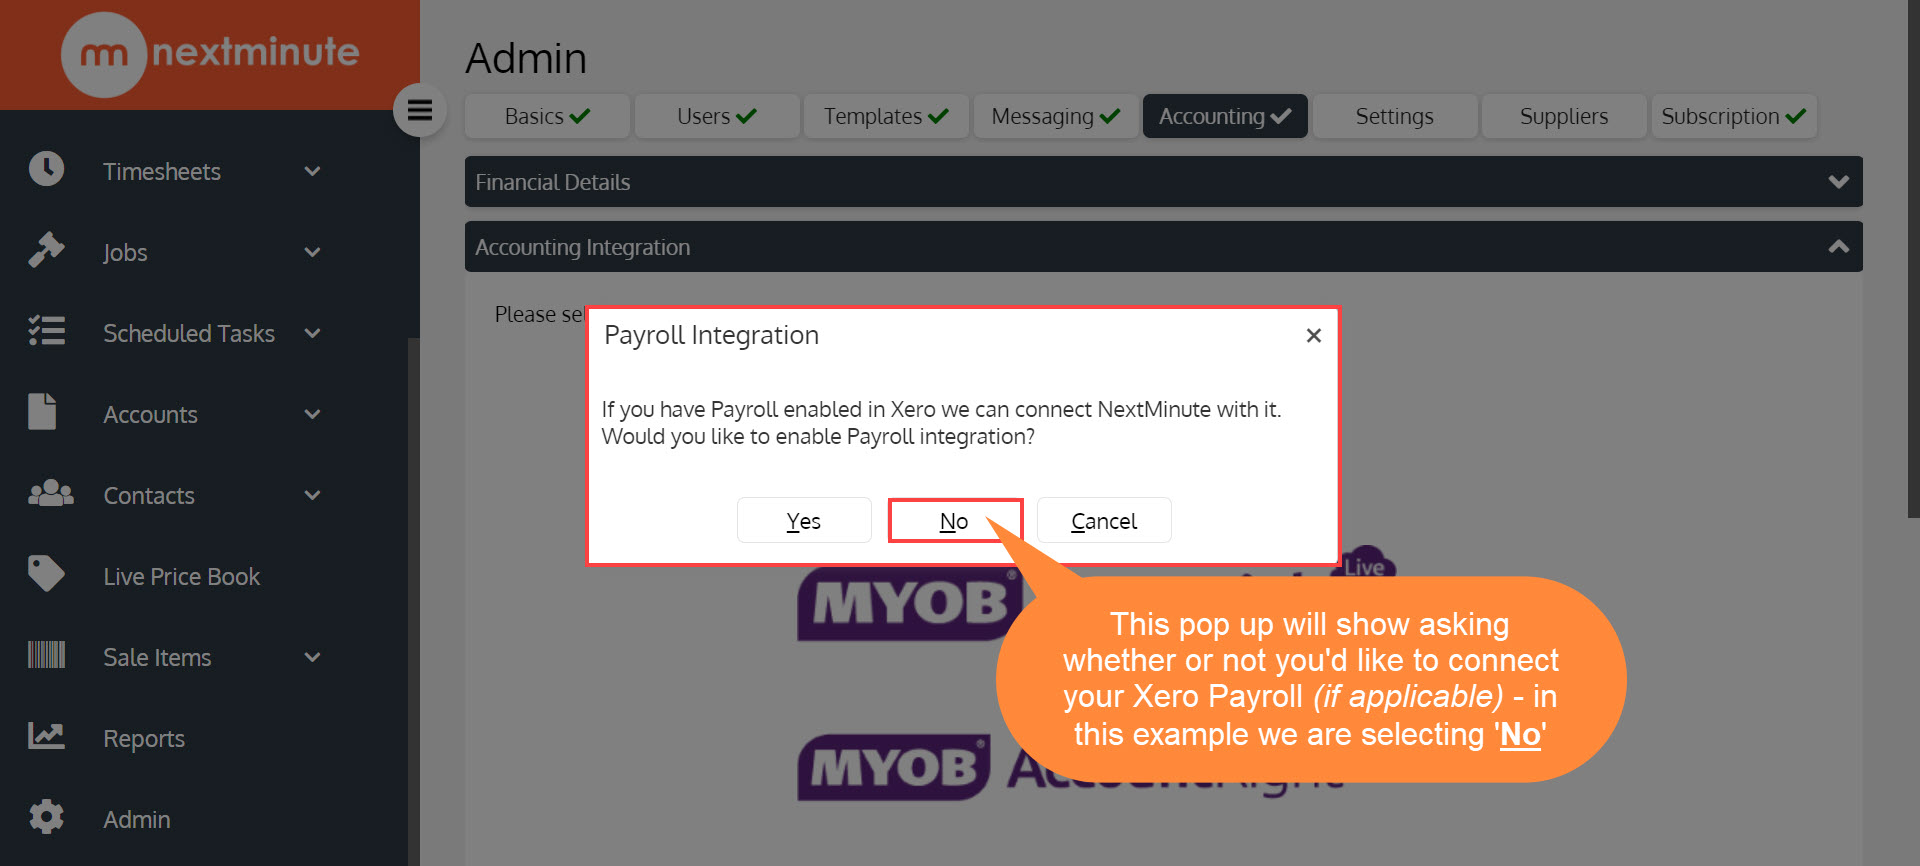
Note: You can connect your Xero Payroll at a later date if you like. You do not have to select 'Yes' at this stage if you're not ready to connect your Payroll.
Step 3: Log in to your Xero account

Step 4: Select the organization NextMinute can access and select Authorize
Notes: You may also need to authorize account via a 6-digit code if 2FA (two factor) authentication set up in Xero. Also, if you have already selected a Xero organization, all you need to do is click the 'Continue with 1 Organization' button in this step.

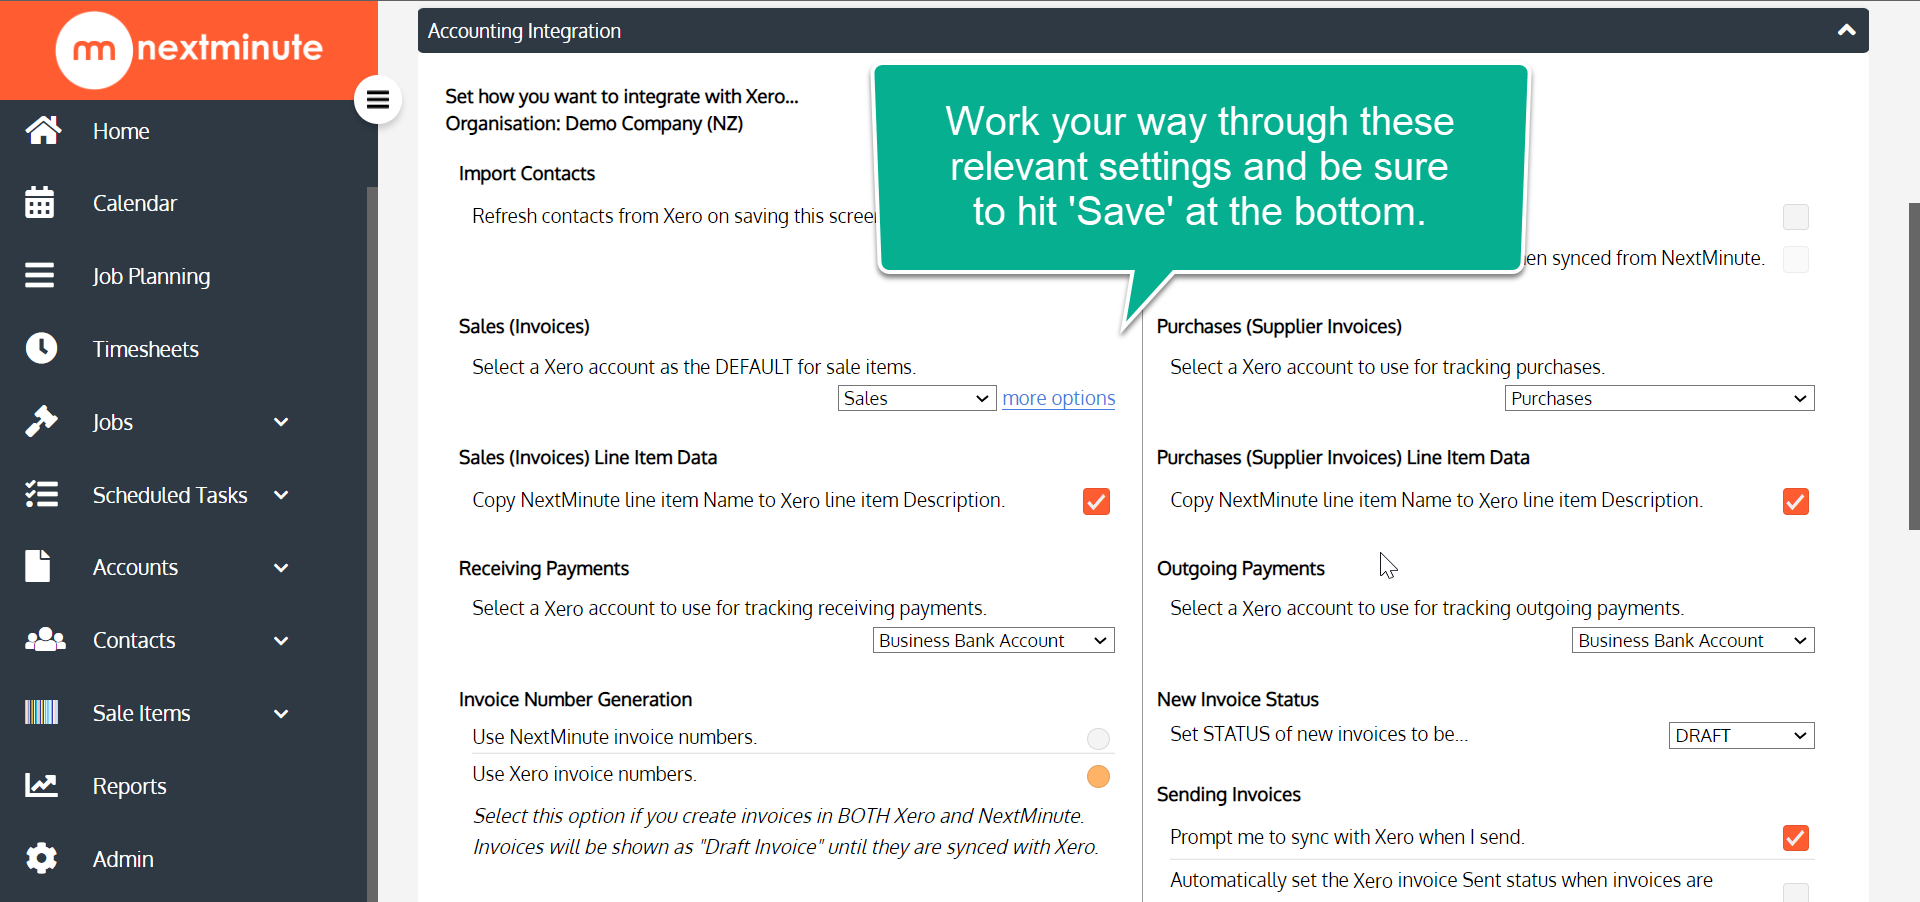
Step 5: Complete the Setup integration with Xero form and Save
Step 6: Select Sales and Purchases tax Rate Defaults

IMPORTANT: Each NextMinute account can be linked to only one Xero account. If your business uses multiple Xero accounts, you’ll need to set up a separate NextMinute account for each one.