![NextMinute_Primary_White.svg]](https://support.nextminute.com/hubfs/NextMinute_Primary_White.svg)
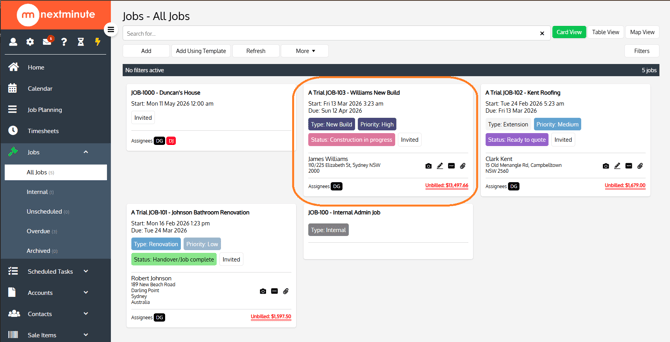
Step 1: Navigate to your jobs list and select the job you want to Invoice.
- Go to Jobs
- Select All Jobs
- Select the Job you'd like to invoice for
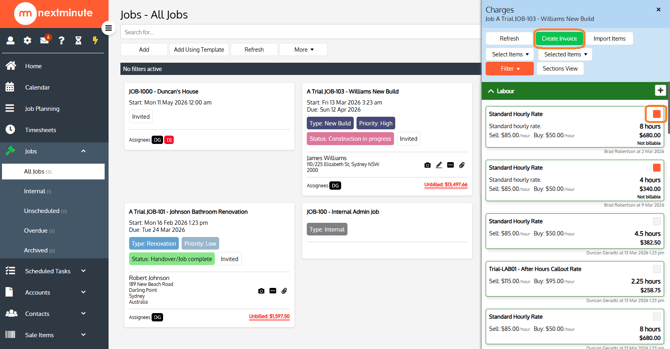
Step 2: Select Charges

Step 3: Review your Charges and hit Create invoice
- Select the Charges that you'd like to invoice for
- Select Create Invoice
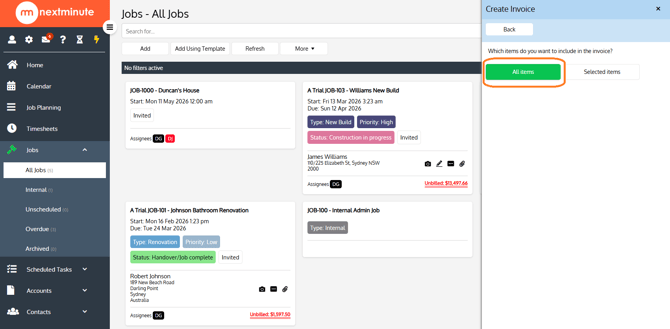
Step 4: Select to invoice All items or Selected items
- If you want to invoice for Selected Charges, you need to select the charges before clicking on Create Invoice
- If you want to invoice for all unbilled charges, select All Items
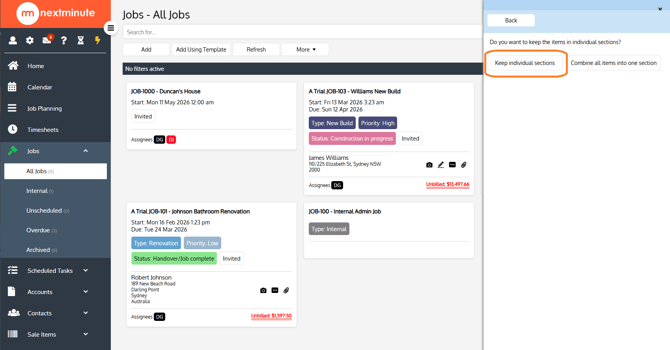
Step 5: Select to Keep individual sections or Combine all items into one section.
- Keep individual sections will keep the charges separated by date
- Combine all line items into one section will put all charges into a single section on the invoice
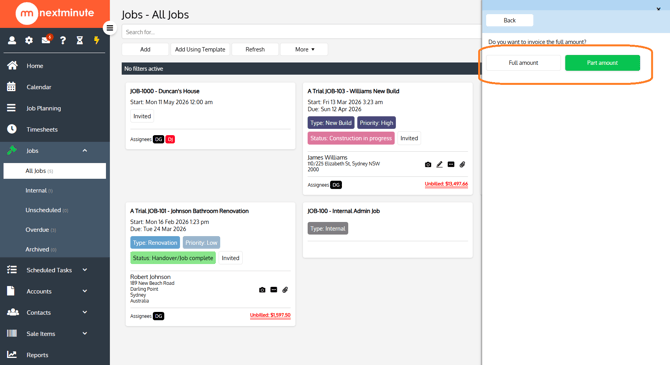
Step 6: Select to invoice Full or Part amount
- Full amount will invoice for the entire amount of the charges that are selected
- Part amount will let you choose what percentage of the charges you would like to invoice for. If you choose to invoice a 'Part Amount', select the amount you would like to invoice by entering the Percent amount or dollar amount and hit OK
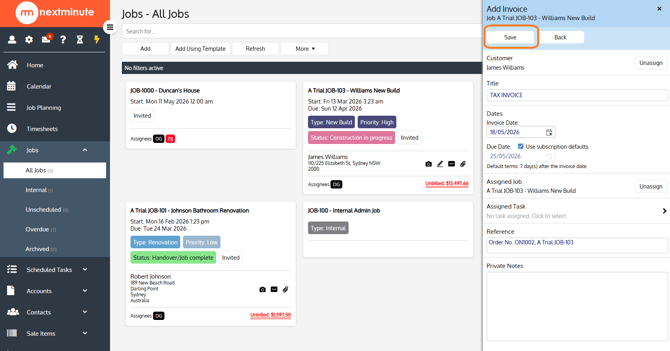
Step 7: Fill in the Add Invoice form
-
Edit the title, Invoice date and Due date, Assigned Job or task, Reference number and any Private Notes (Private Notes can't be seen by the customer).
- Hit Save