![NextMinute_Primary_White.svg]](https://support.nextminute.com/hubfs/NextMinute_Primary_White.svg)
The new Back Costing feature now allows you to break your quotes into sections and then create those sections into individual tasks… It allows you to turn your quote into a plan for assigning out the work and tracking your schedule, not to mention you can add costs to these tasks which in turn link all the way back to your quote. This is then wrapped up nicely in a Back Costing report so you track and manage the financial health of your quoted costs vs actuals costs in as much detail as you need!
Below will step you through how to get this new feature “activated” in your NextMinute subscription and main flows of how to use this feature to take your job management to the next level!
Activating the Back Costing Feature
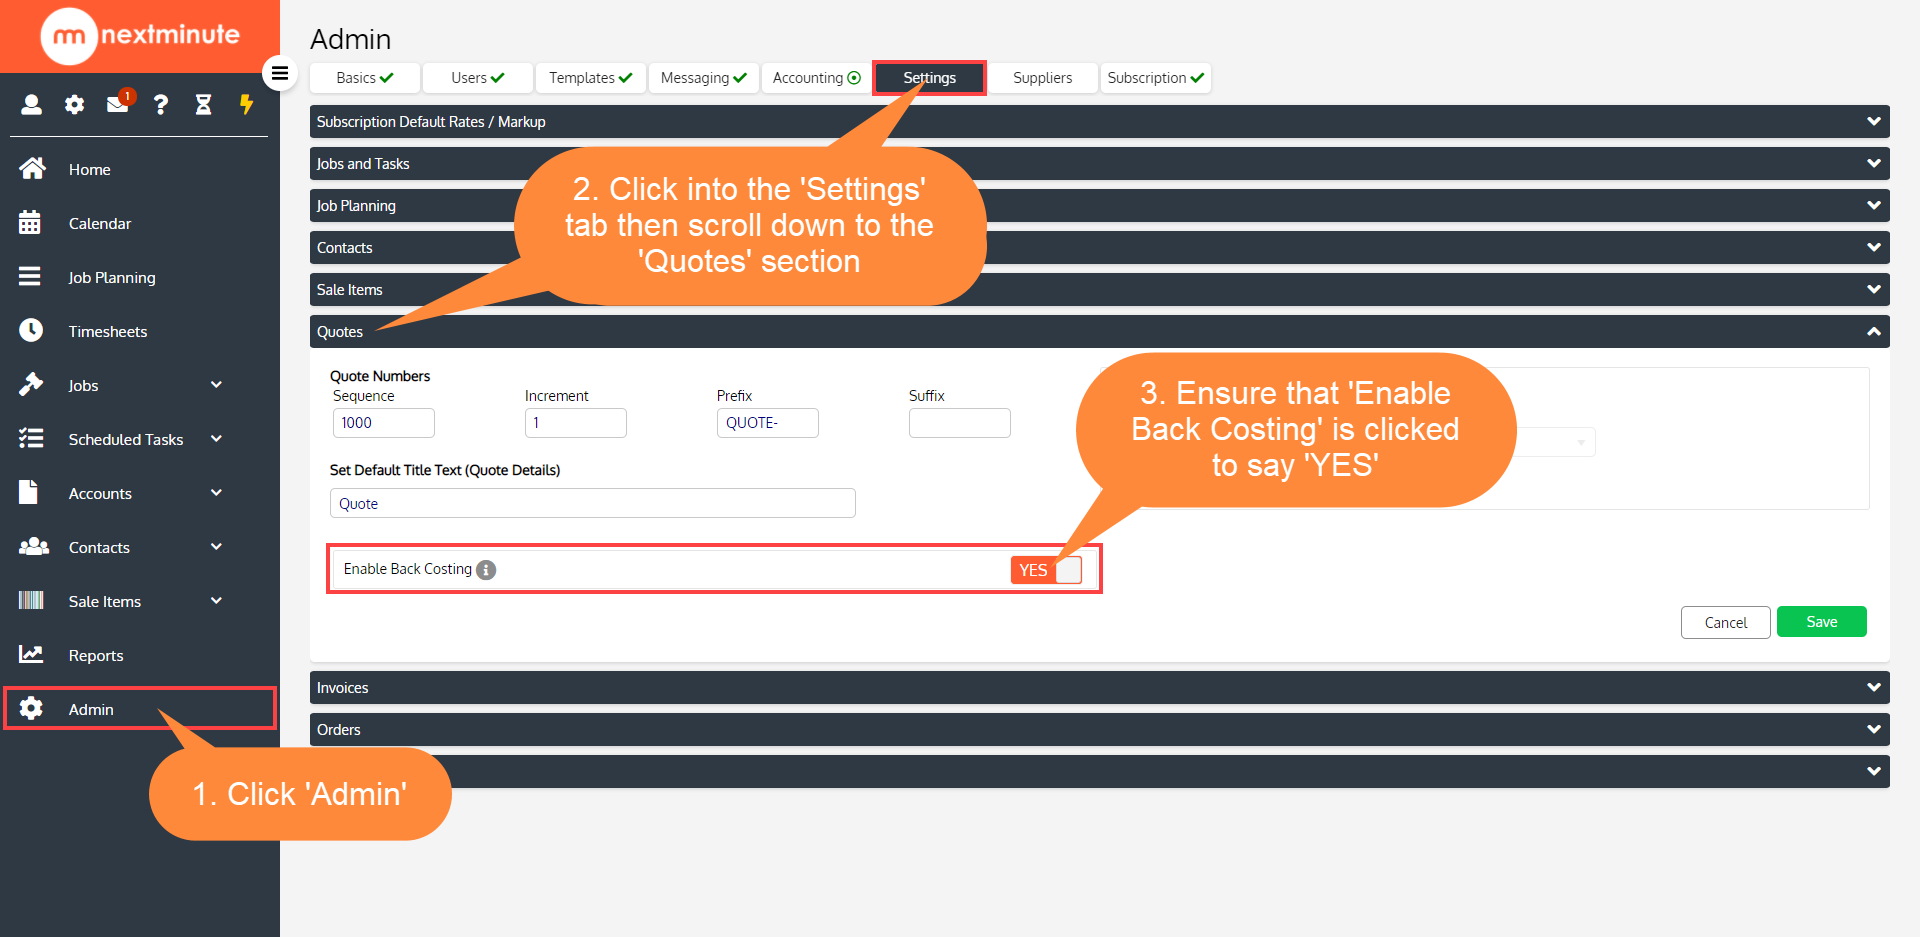
1. Click 'Admin' then click into the 'Settings' tab. Scroll down to the 'Quotes' section & ensure that 'Enable Back Costing' is clicked to display 'YES'
Creating Tasks from your Quote sections
Once you have created a quote and that quote is associated with a Job (you can either turn the quote into a Job OR you can create a Quote on a Job) you will then have the option to create the associated/linked tasks.
Please note: You can only create tasks for Sections in a quote not sub sections. Also note that these actions can only be performed on Desktop or Tablet.
First Method: Quote created, Accepted, then turning the Quote into a Job.
If you have created a quote first and are now turning that quote into a Job, you will be asked whether you would like to create the tasks at that point (so you effectively create the Job and all the sections into tasks with one click!). The job will automatically be set to have the “Timesheet & Timer entries must be added to tasks” set to Yes. You can change this by editing on the Job
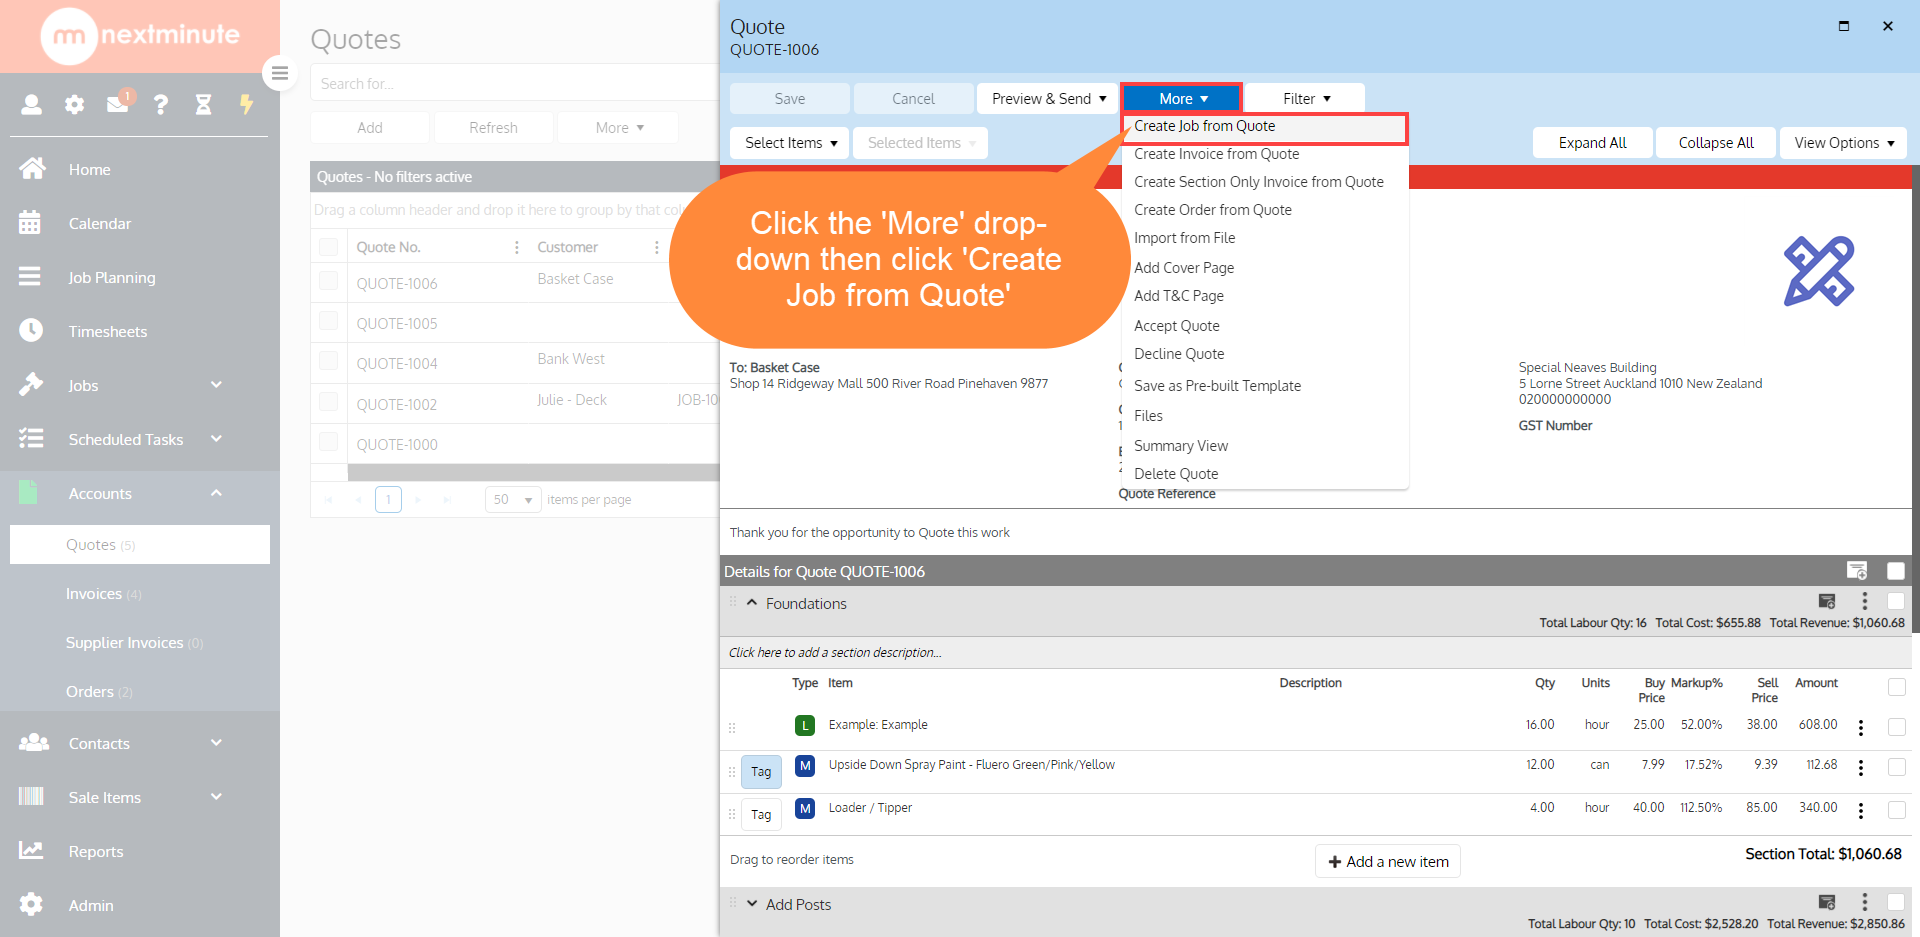
1. In your Quote, click the 'More' drop-down and select 'Create Job from Quote'
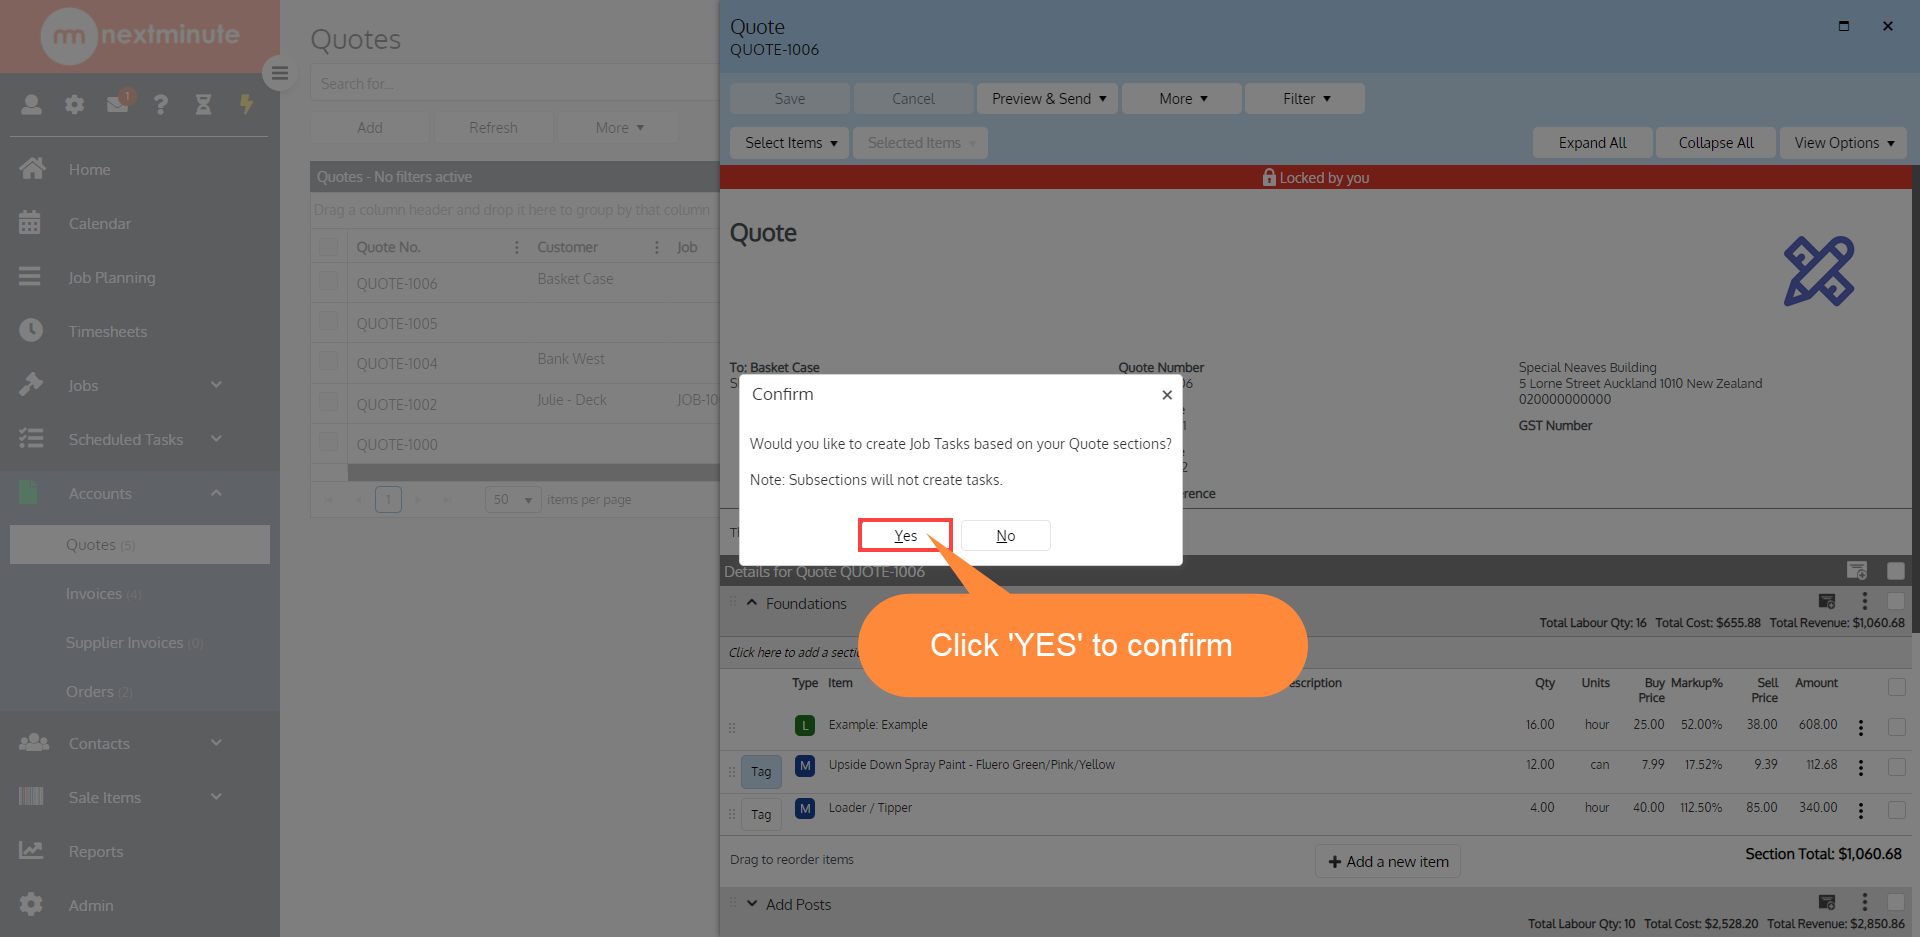
2. You'll now see this pop-up asking whether you'd like to create 'Tasks' from your Quote Sections, click 'YES' to confirm
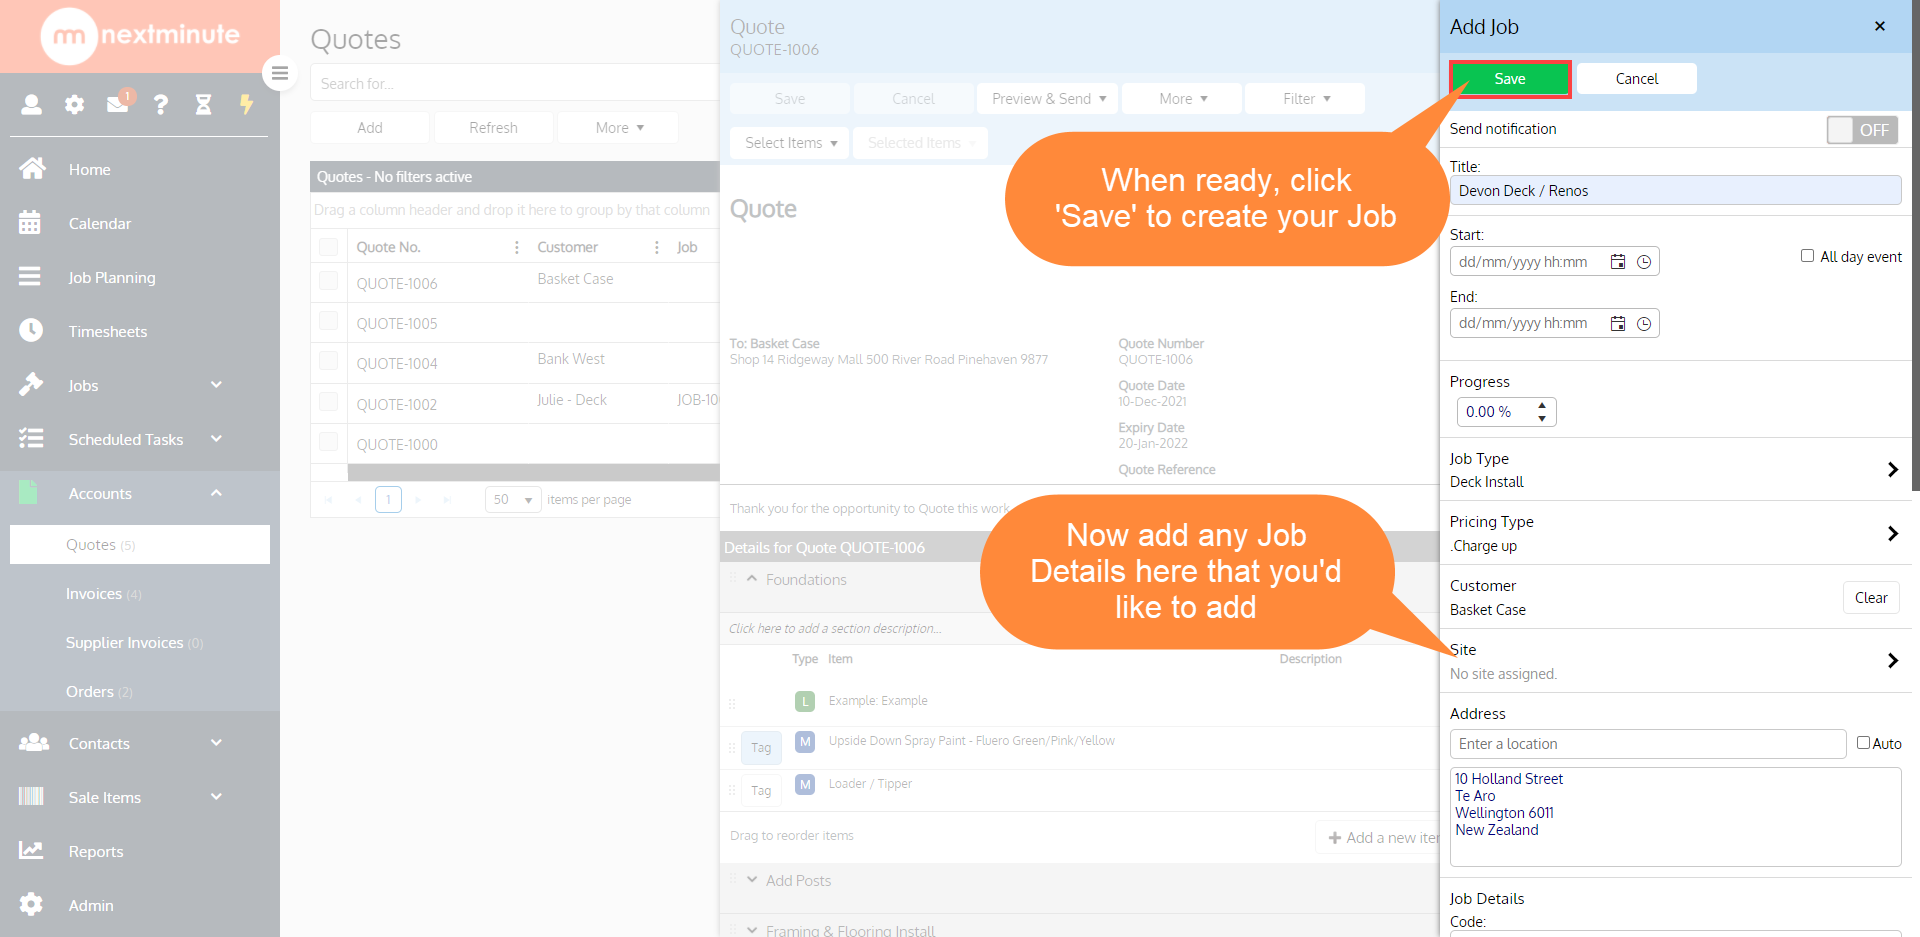
3. Add any Job details you'd like to Add, then when ready, click 'Save'
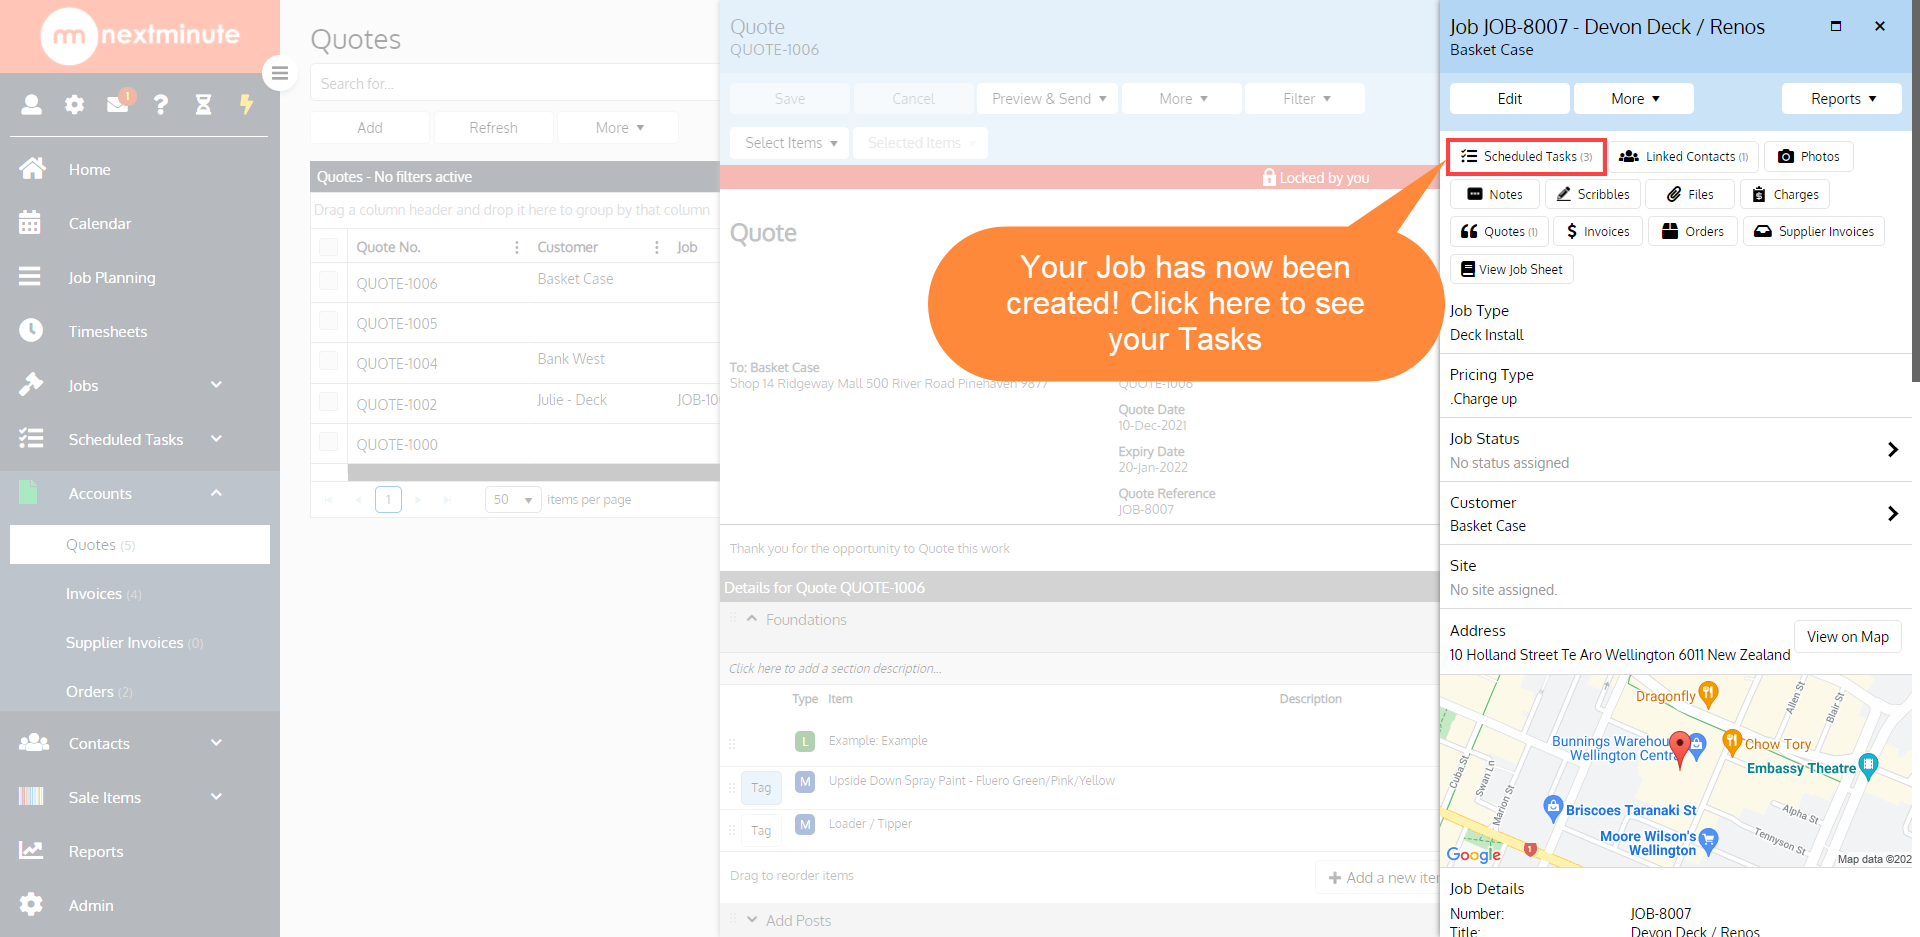
4. Now that your Job has been created, click the 'Scheduled Tasks' button to see the newly created Tasks
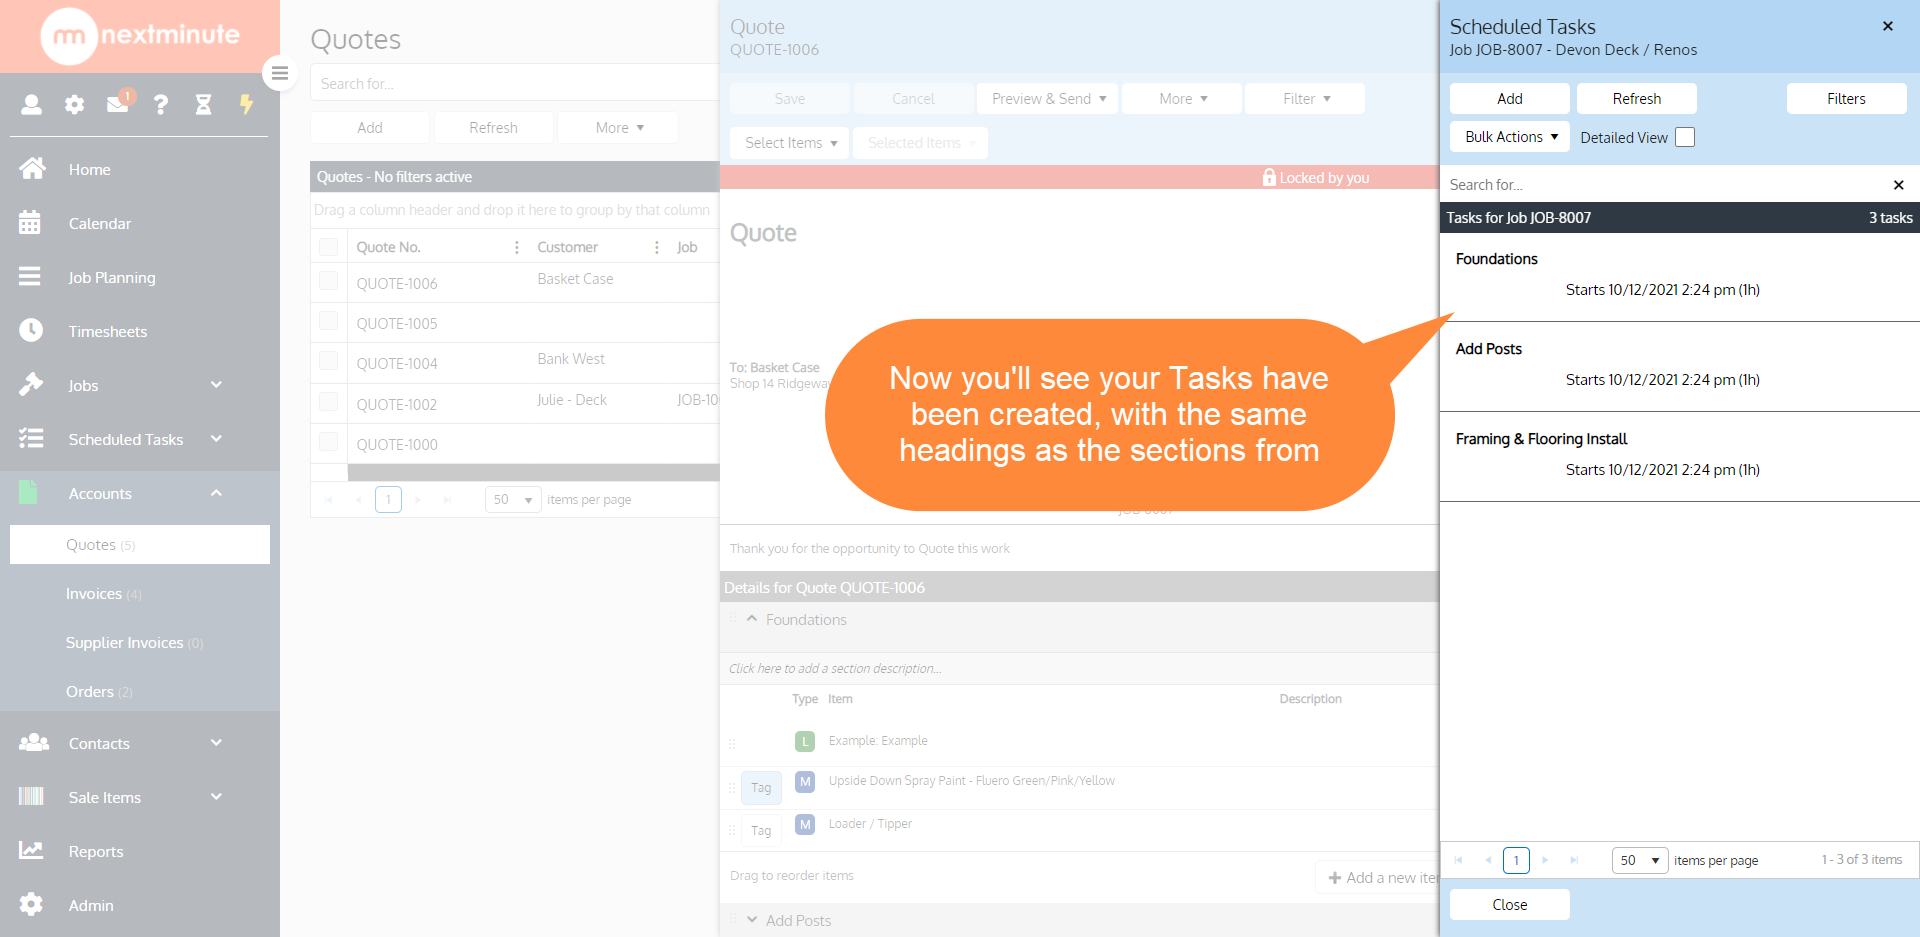
5. Now you'll see your Tasks have been created with the same 'Heading' / 'Title' as the 'Section Names' in your Quote!
Second Method: Job already created with the Quote added to the Job
If you have created the Job and added a quote to the Job, you can (when ready) create tasks for each of the sections by opening the quote, selecting More then selecting “create tasks for quote”.
Note - if you have select specific section you can create tasks just those selected ones OR you can create for All sections at this point
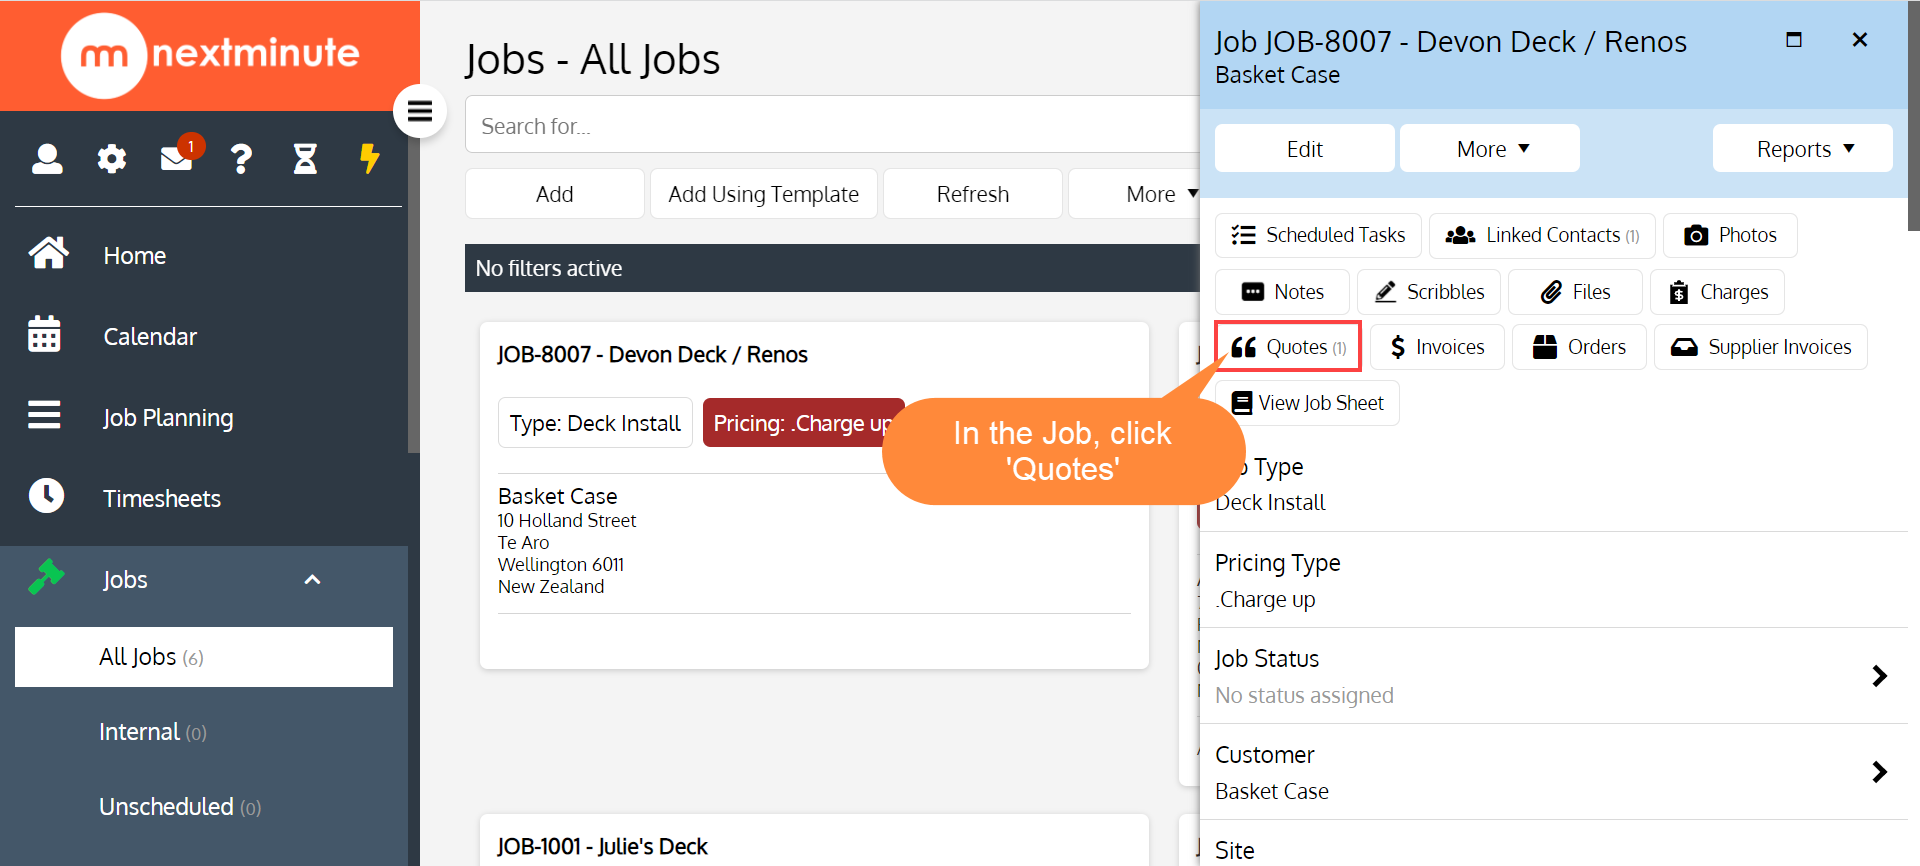
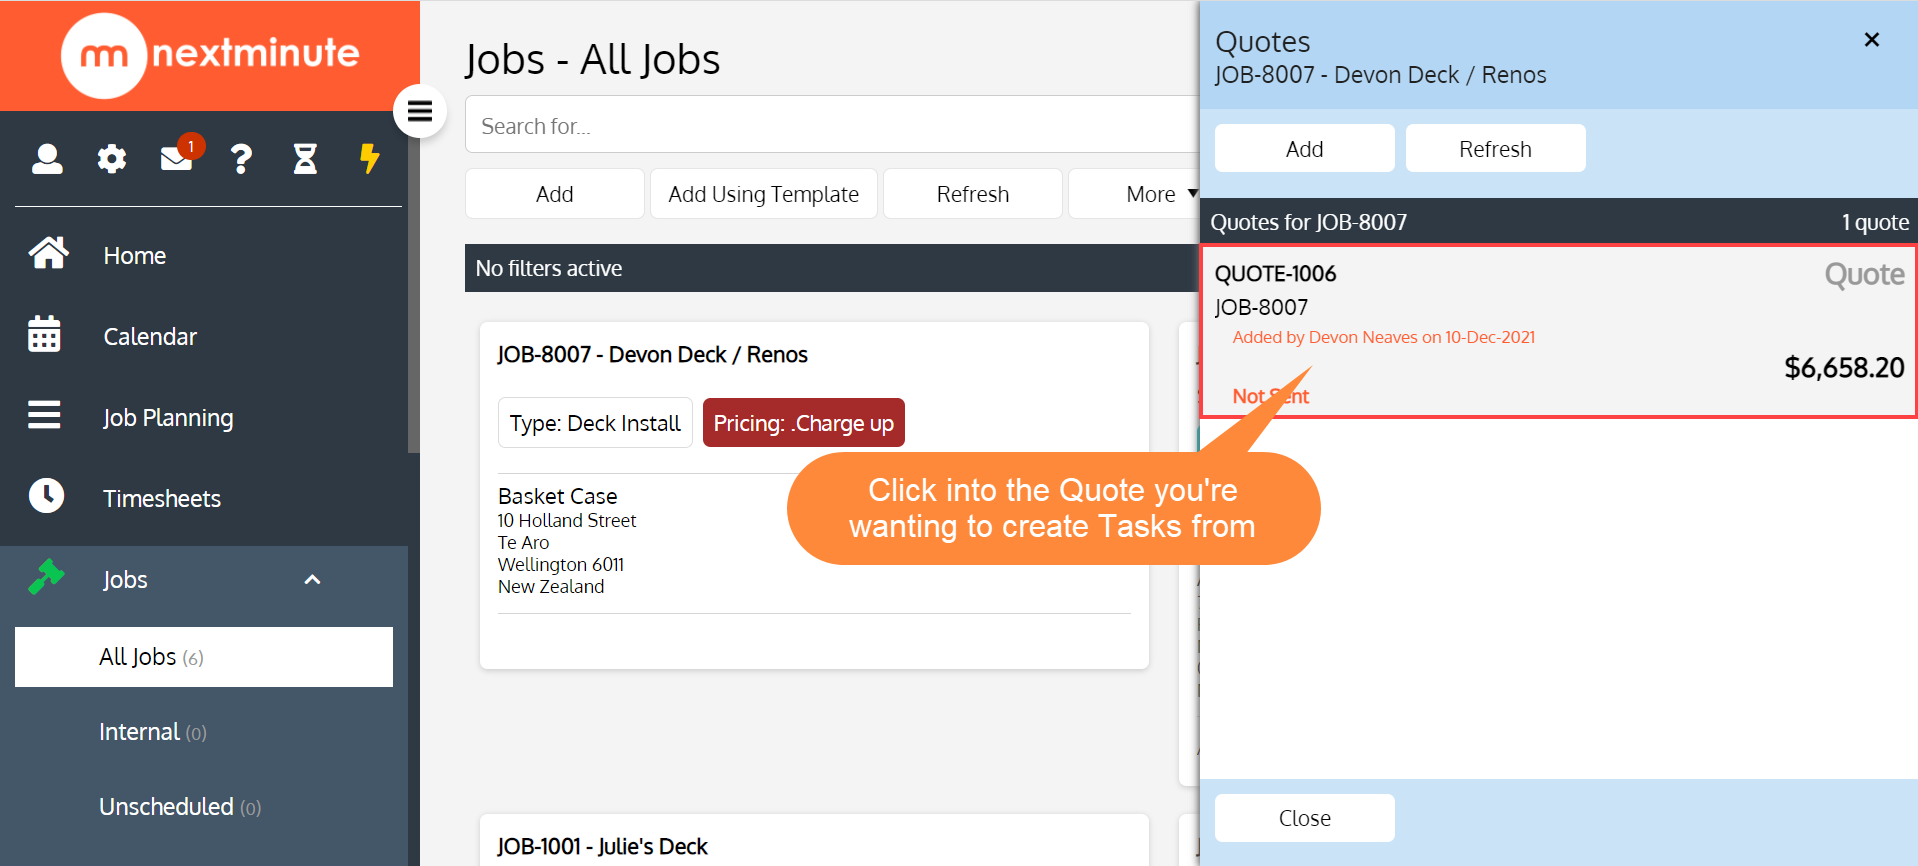
1. In the Job, click the 'Quotes' button
2. Click the Quote that you're wanting to create Tasks from
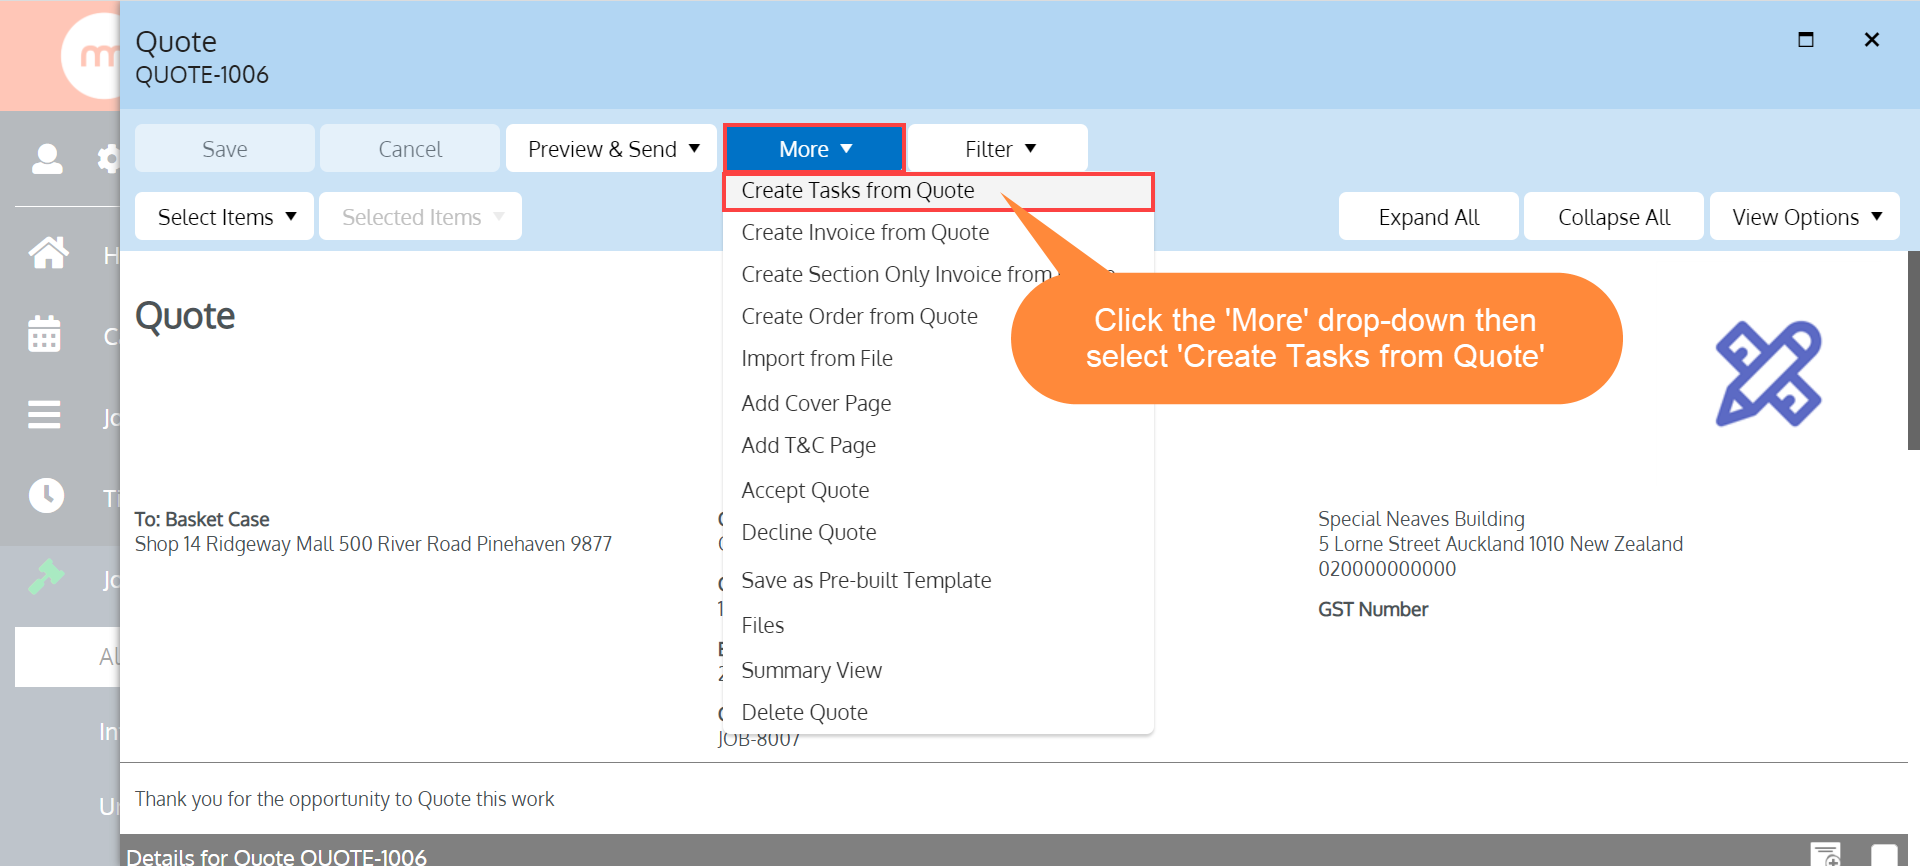
3. Click the 'More' drop-down then select 'Create Tasks from Quote'
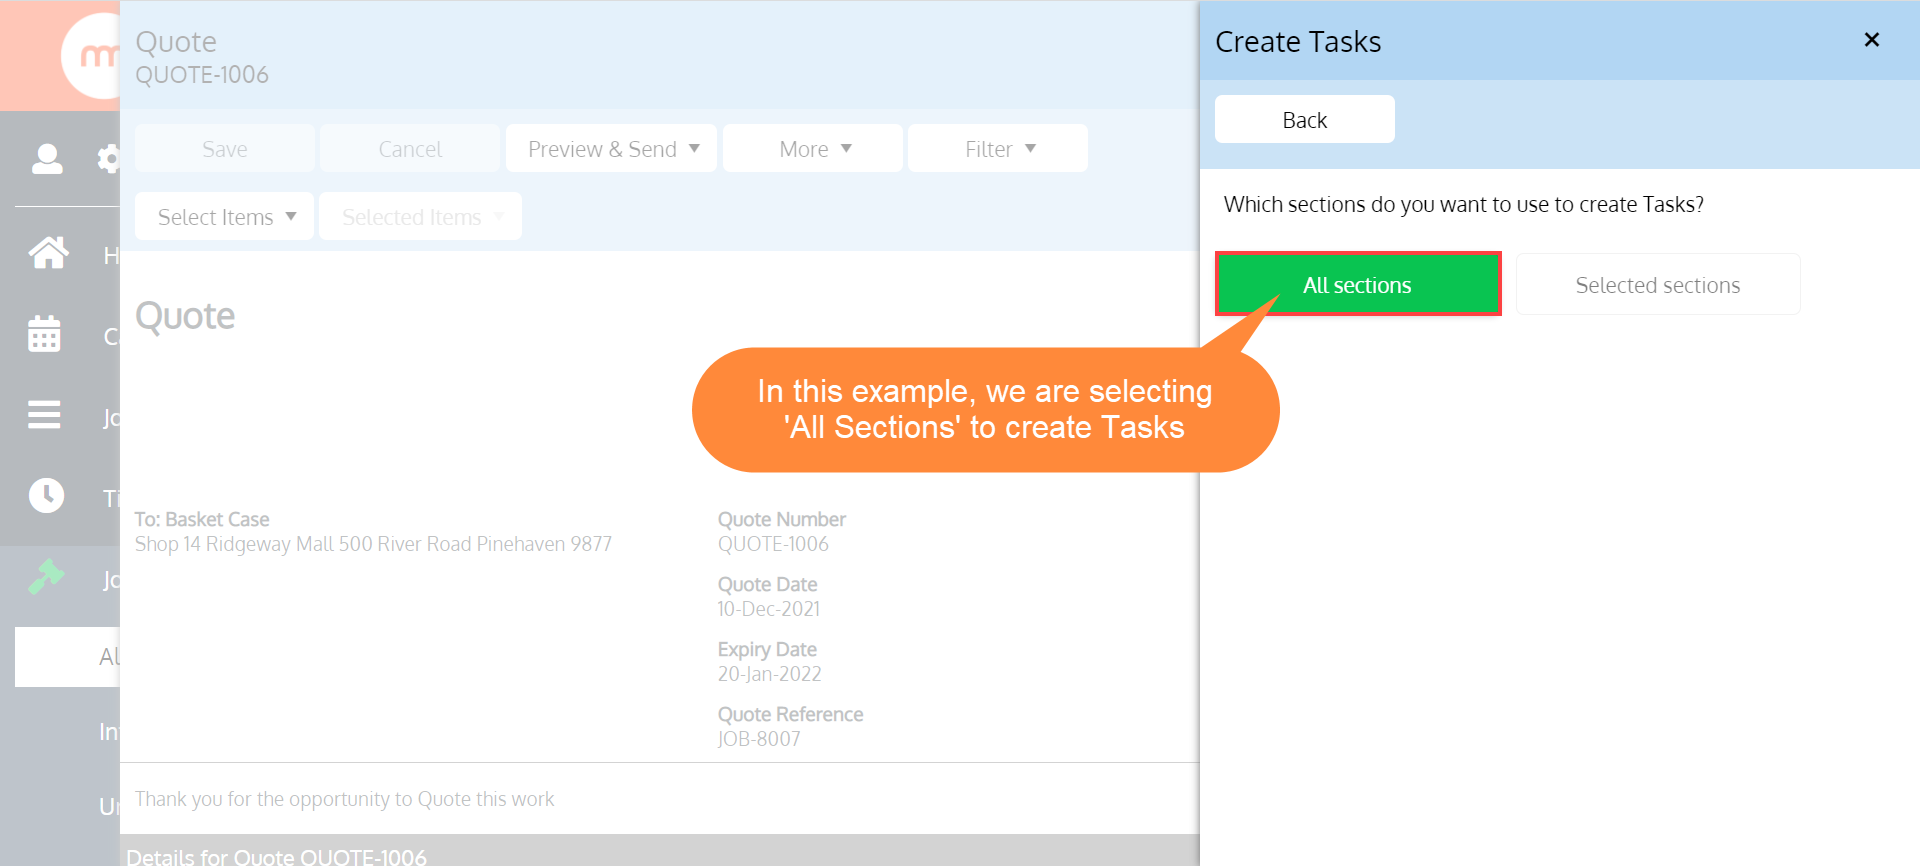
4. In this example, we will click 'All Sections' to create Tasks
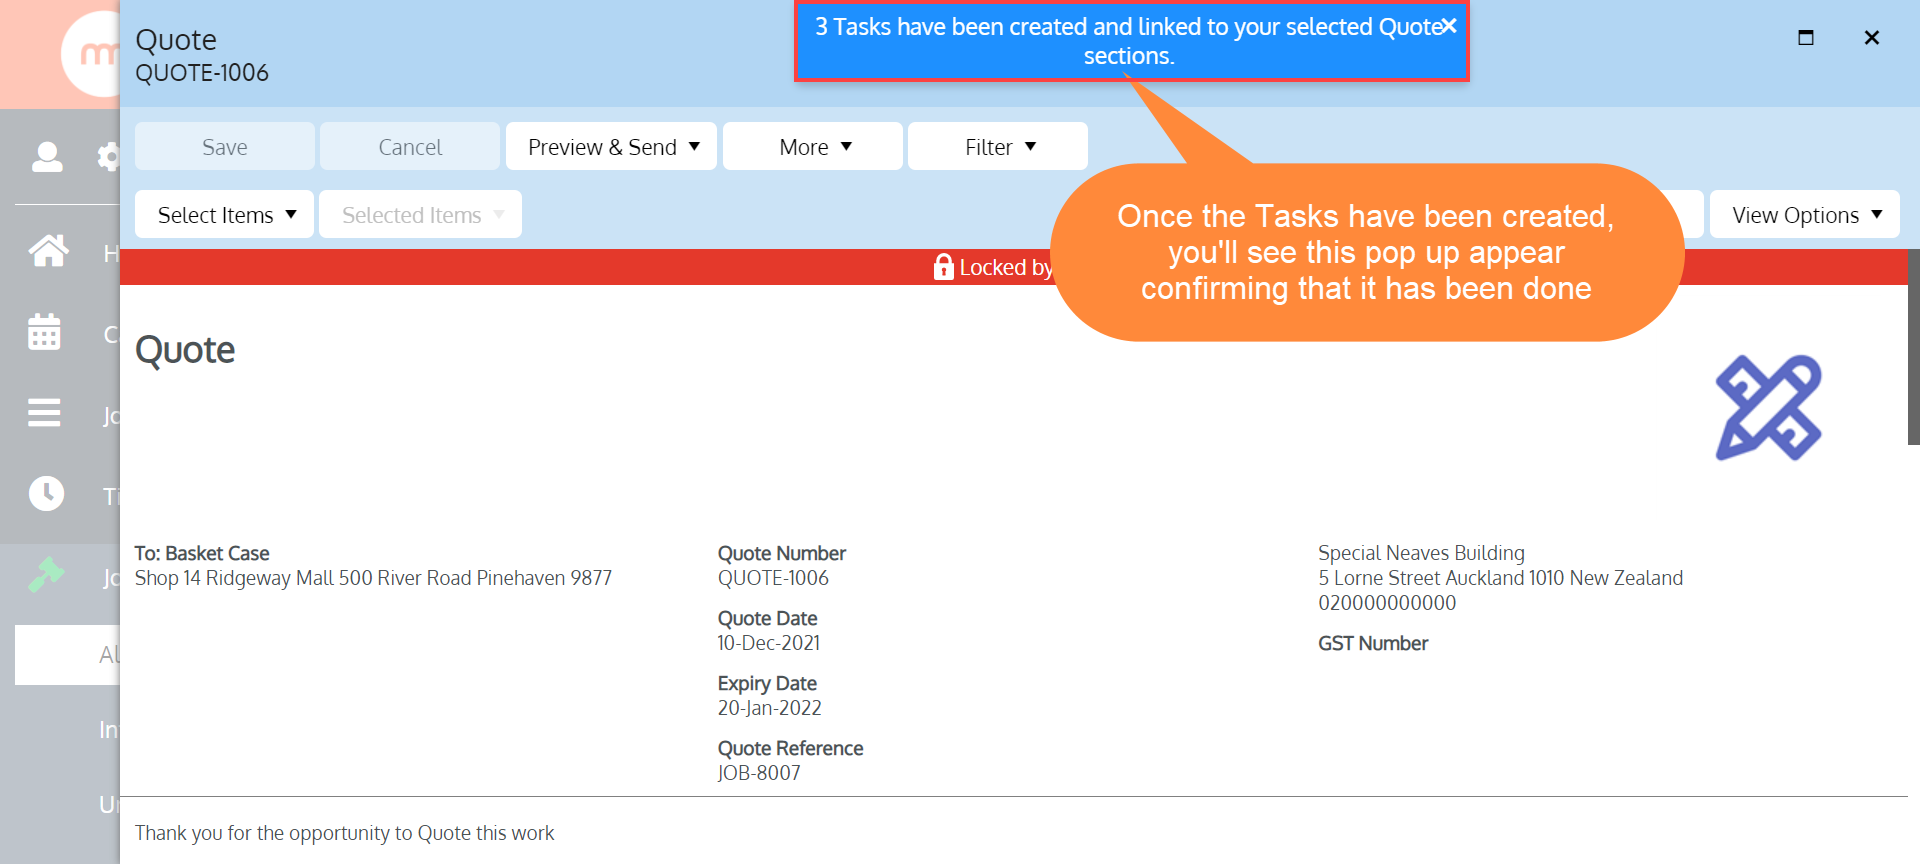
5. Once the Tasks have been created, you'll see this pop up appear confirming that it has been done
You will now notice that the Sections that were turned into Tasks from the Quote now display a 'linked' symbol as shown here
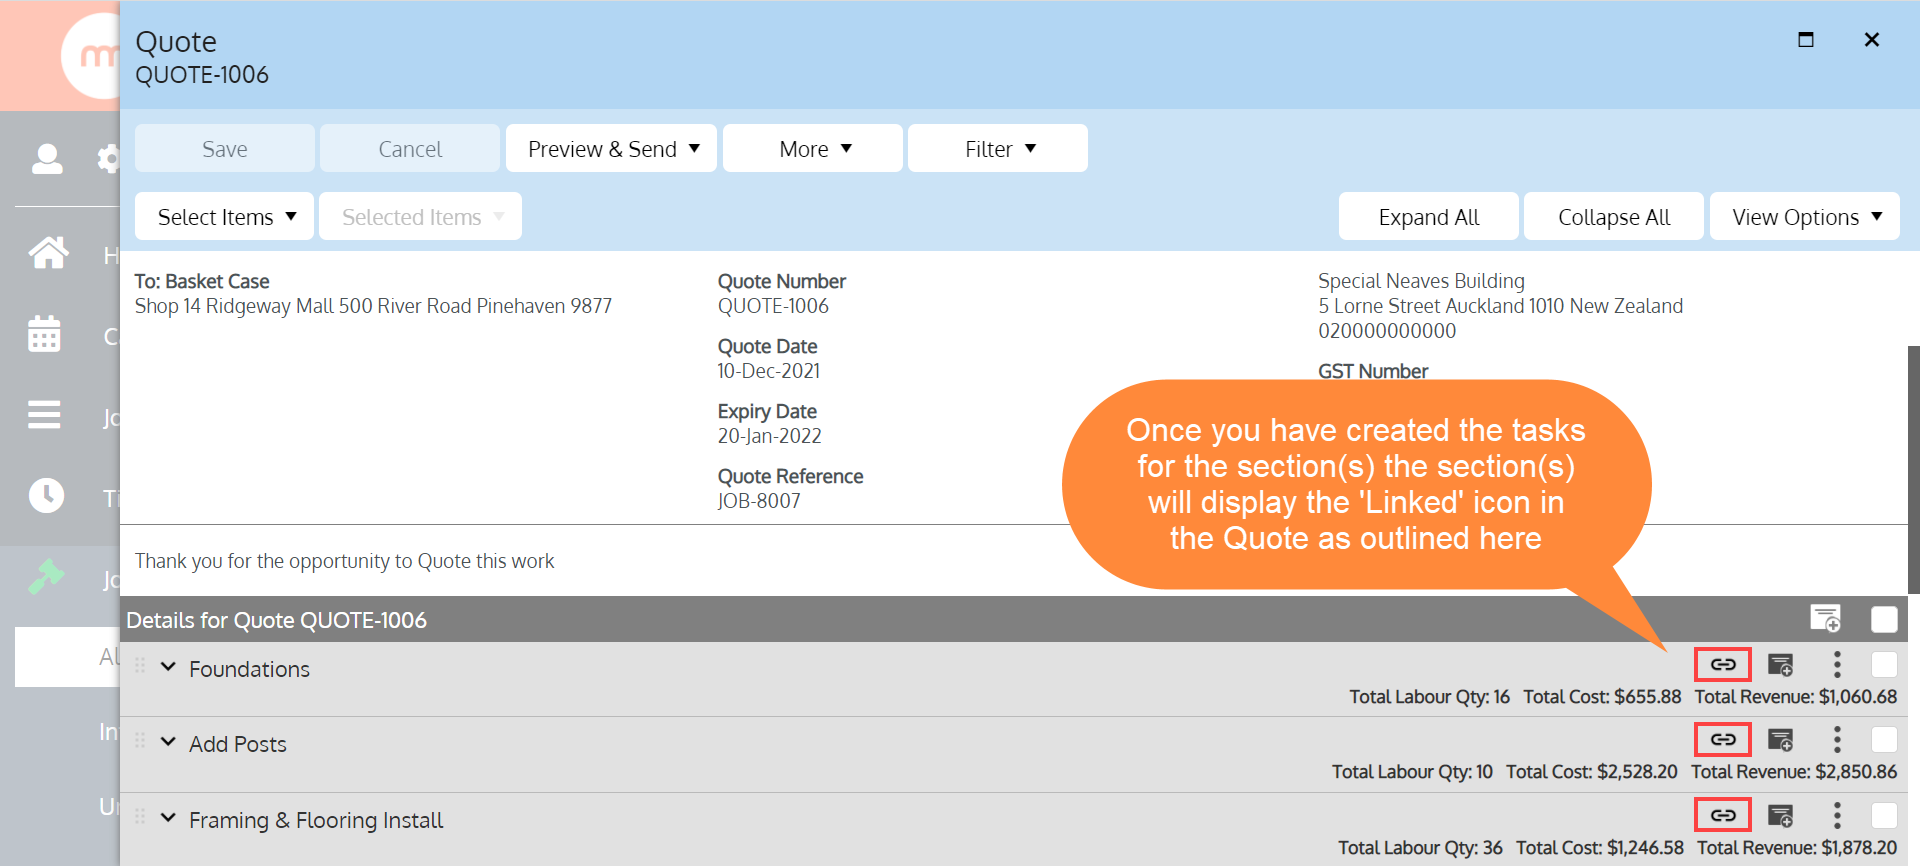
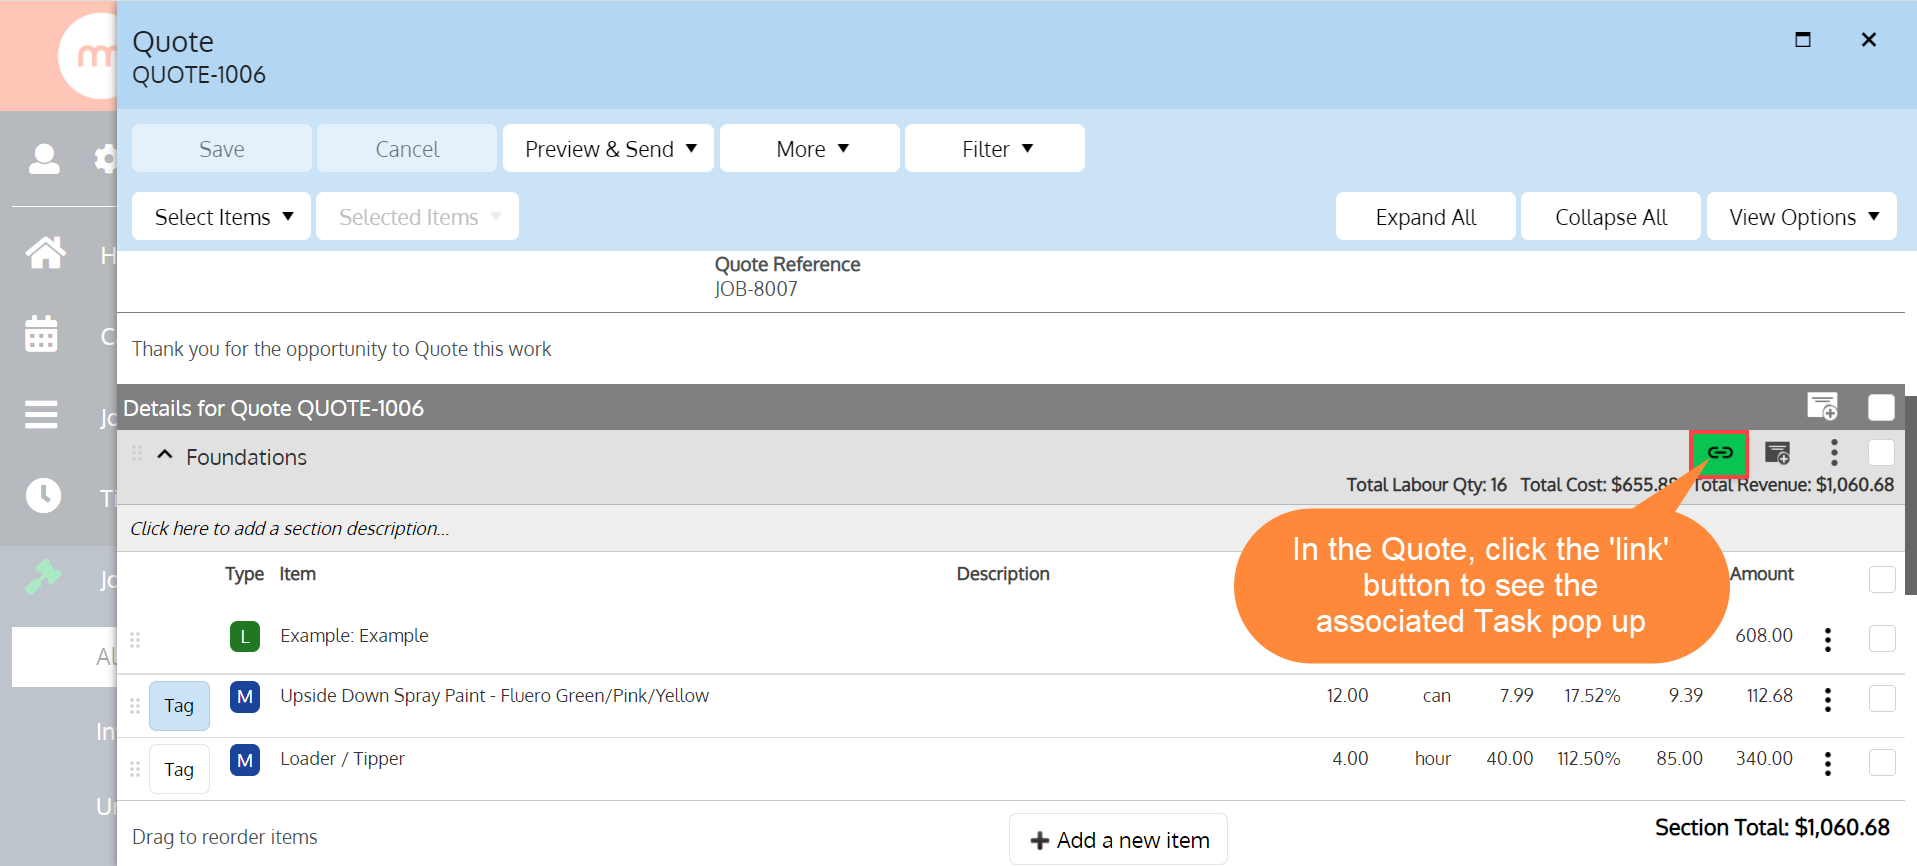
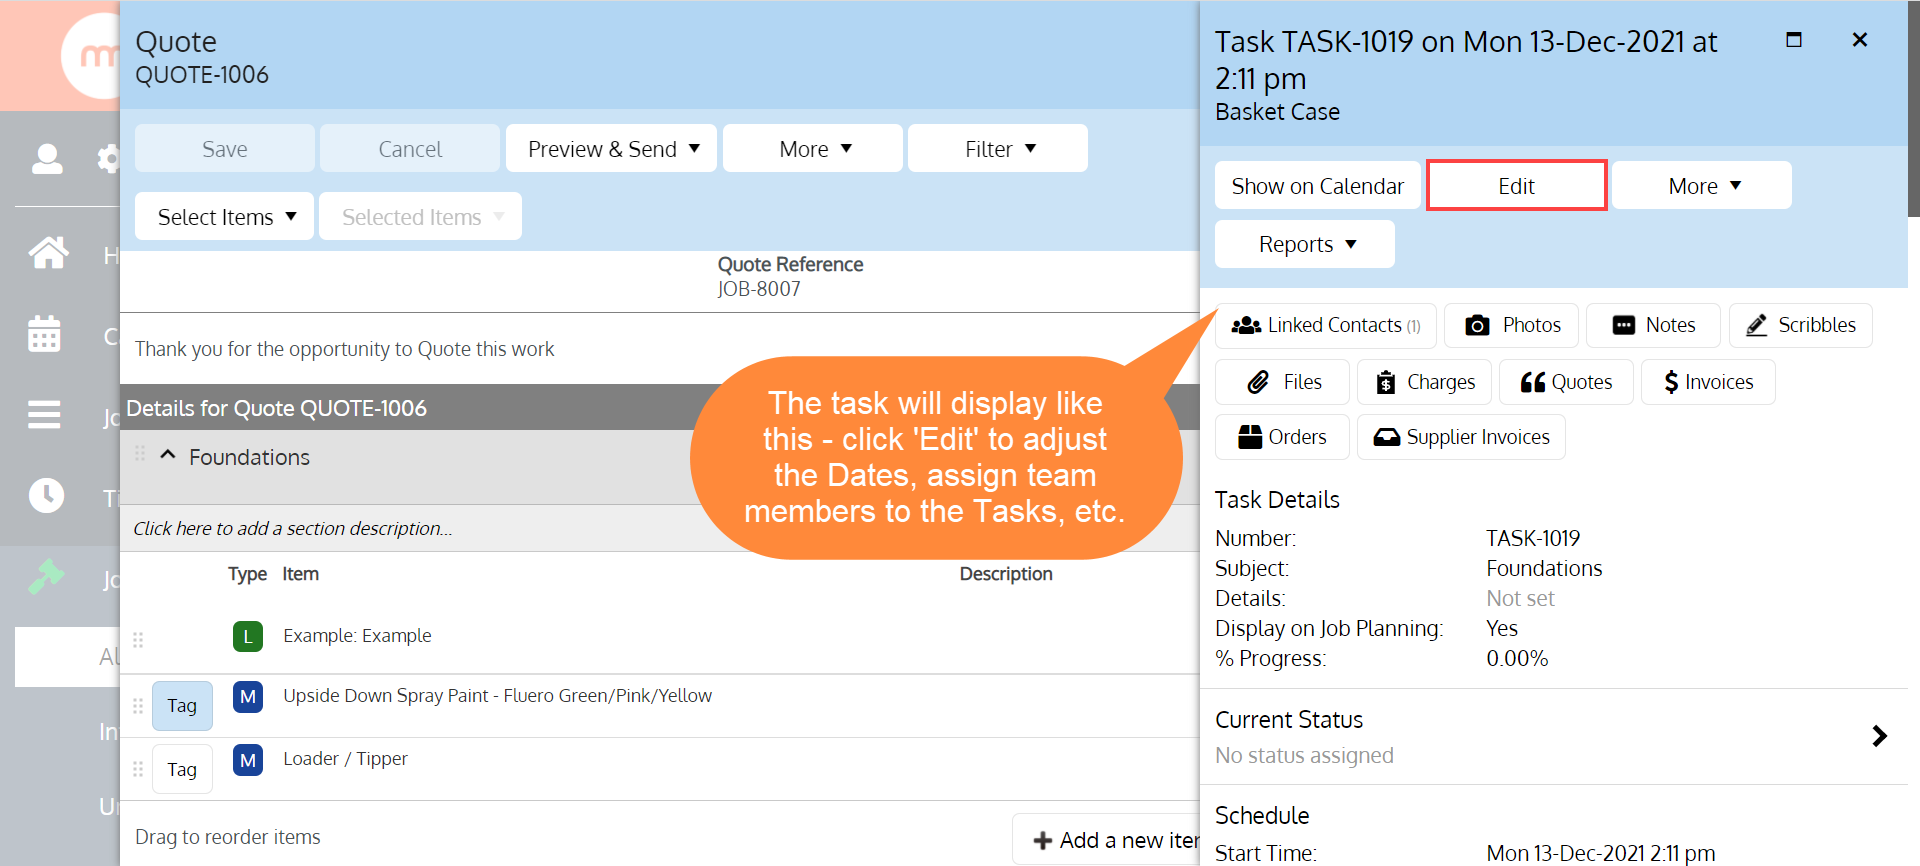
Once you have created the tasks for the section(s) the section will display the 'Linked' icon, which you can hover over to see and/or click on to view the task details. You can then edit the task (e.g.: changing the dates, assigning a team member etc.) if required.
Please note that all created tasks default to todays date
Job & Task - Cost Summary (Quotes vs Actuals) section
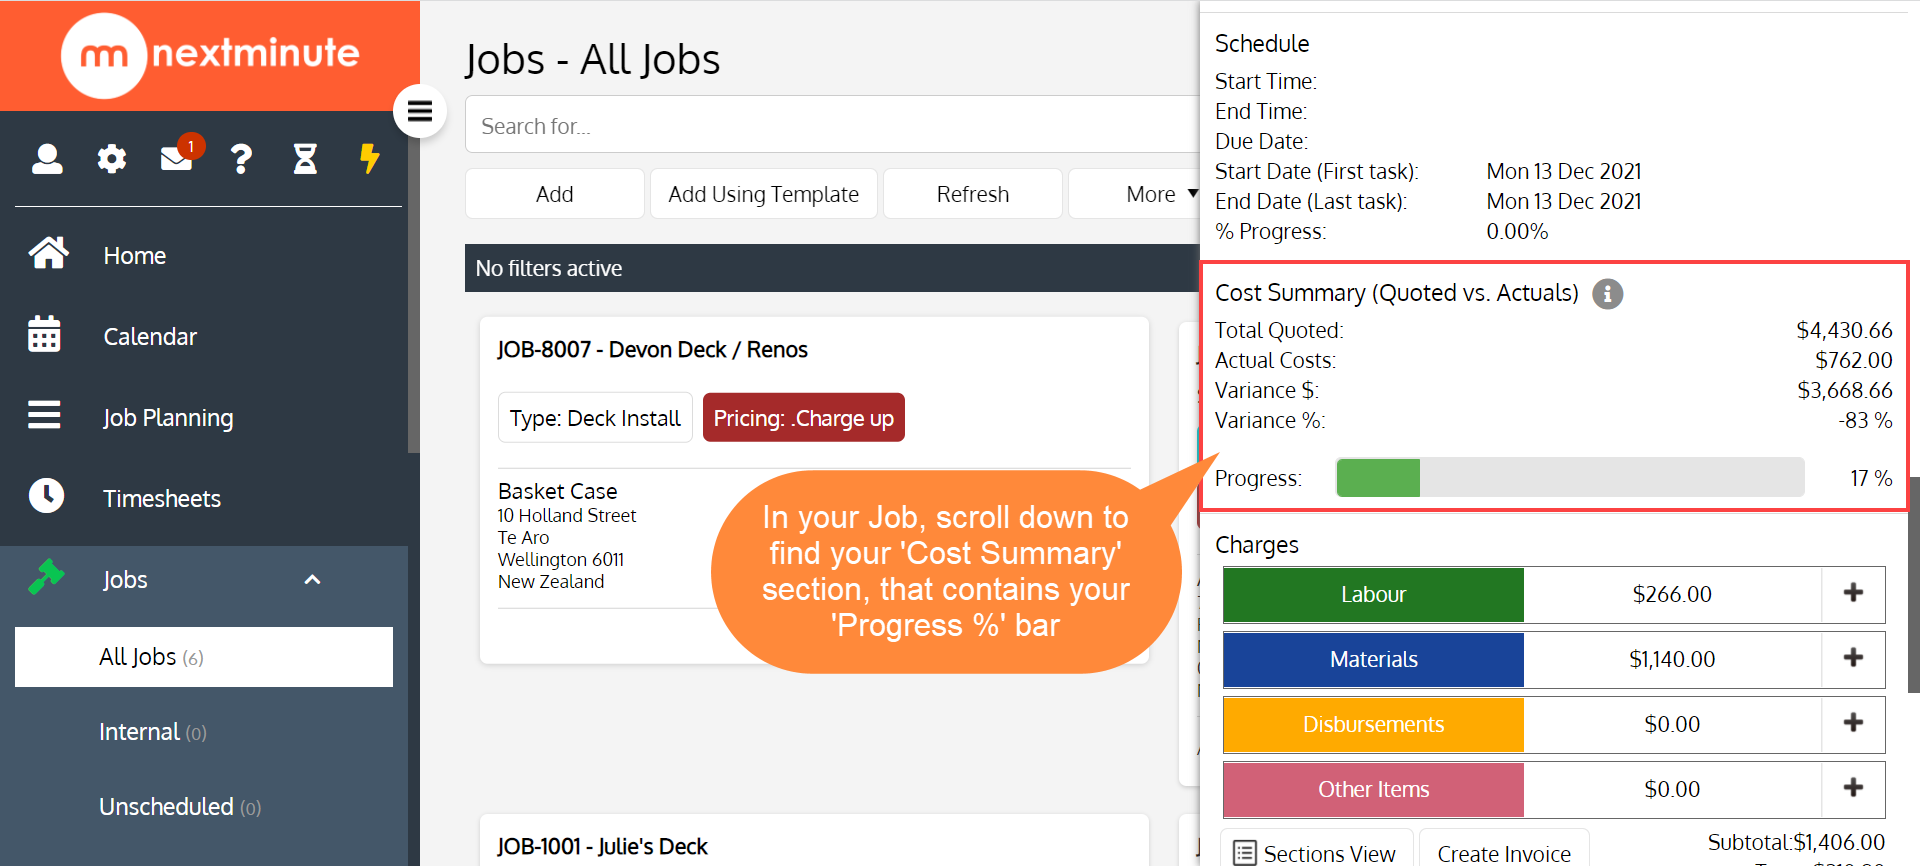
Once the setting has been activated, for Jobs and tasks a new section is displayed above the charges on the details screen. This section provides a topline summary against the tasks and also rolled up to the job level … this gives visibility whilst working on a job or task.
The progress bar relates to the Job/task financial progress (i.e.: how much of the quotes costs have currently been consumed)
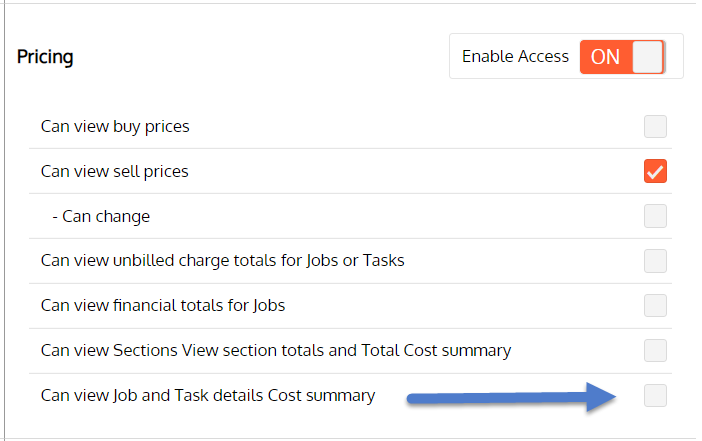
Please note: Access to this section is automatically assigned to Admin users … BUT it can also be assigned out to roles under the 'Pricing' tick boxes found in 'Role Permissions' if required. See below for reference.
Accruing cost to those tasks created (linked) to the quote
IN order to get your back-costing to provide the level of detail you are after, all costs should be attributed to each of the appropriate tasks that link through to the quote sections. Therefore when time-sheeting the user should enter their time against the task they were working on for it to 'back cost' to the quoted amount.
In addition, all other costs (Supplier invoices/bills), disbursement and other costs should be added to the specific tasks they relate to. This then all gets wrapped up into a Job level report so that you can monitor.
Adding Charges against the Job

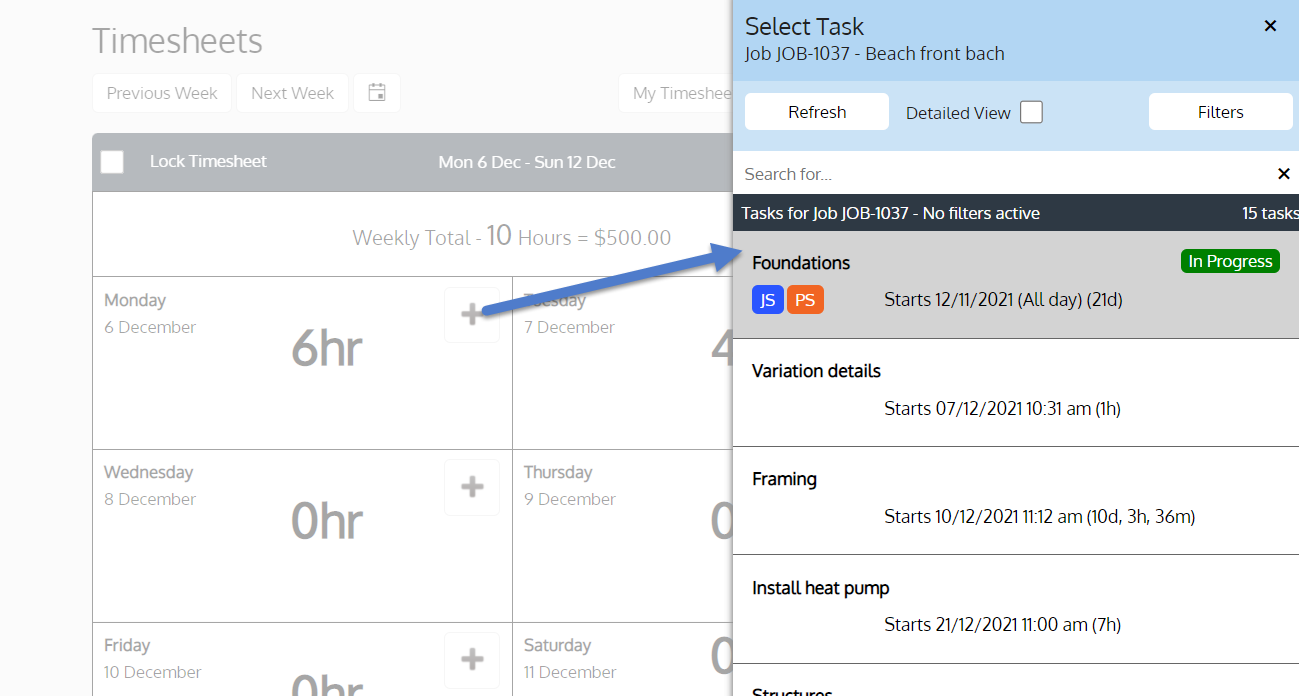
Adding time against Tasks via 'timesheets'
Invoicing from your Quote
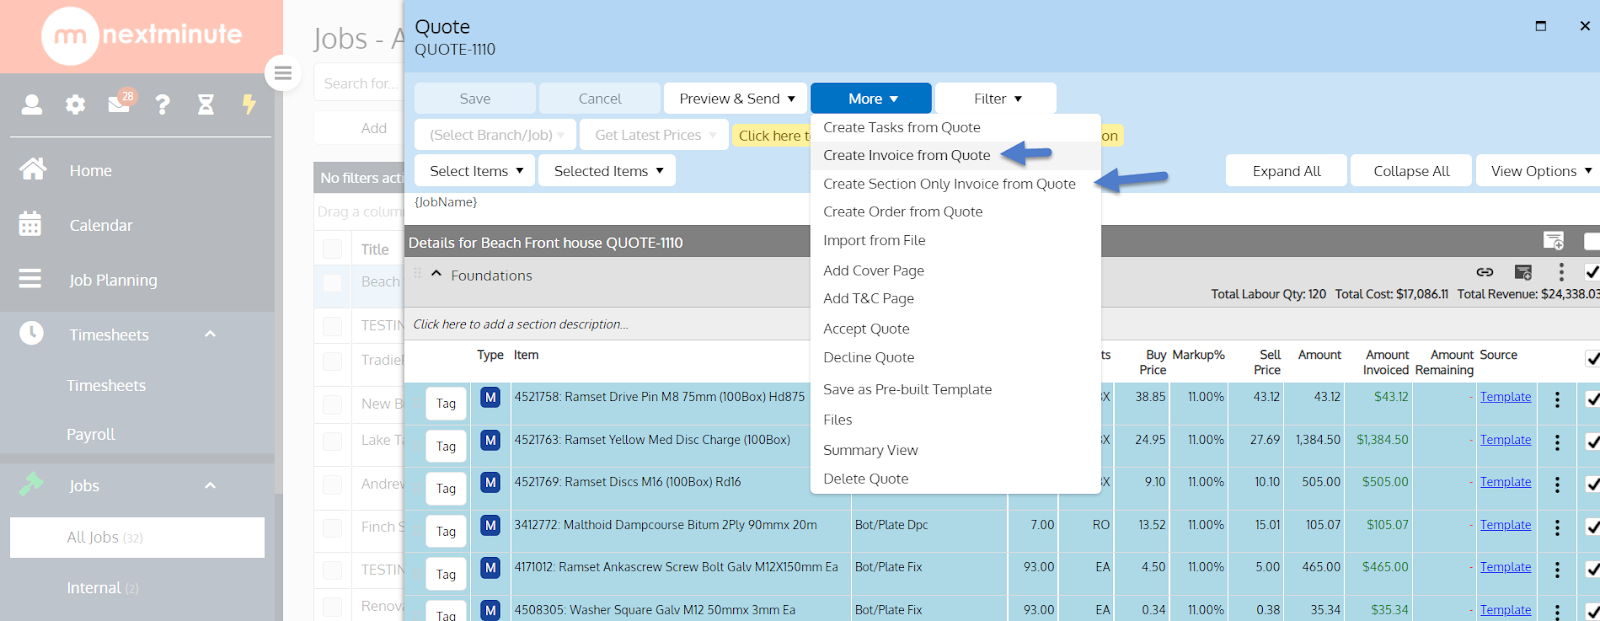
You can still create invoices directly from your quote, which generates and invoice that copies across the sections and line items associated with the sections OR you can create an invoice JUST using the sections and then add in the summary line items for invoicing that relate to the section.
This then links the revenue you are invoicing back to the original quoted “section” so that you can trace quoted costs, actual costs and invoiced amount.
Please note - If you create manual invoices not from the quote, then invoiced review will simply be added to the Job level view in the back costing report.
Back-Costing Report
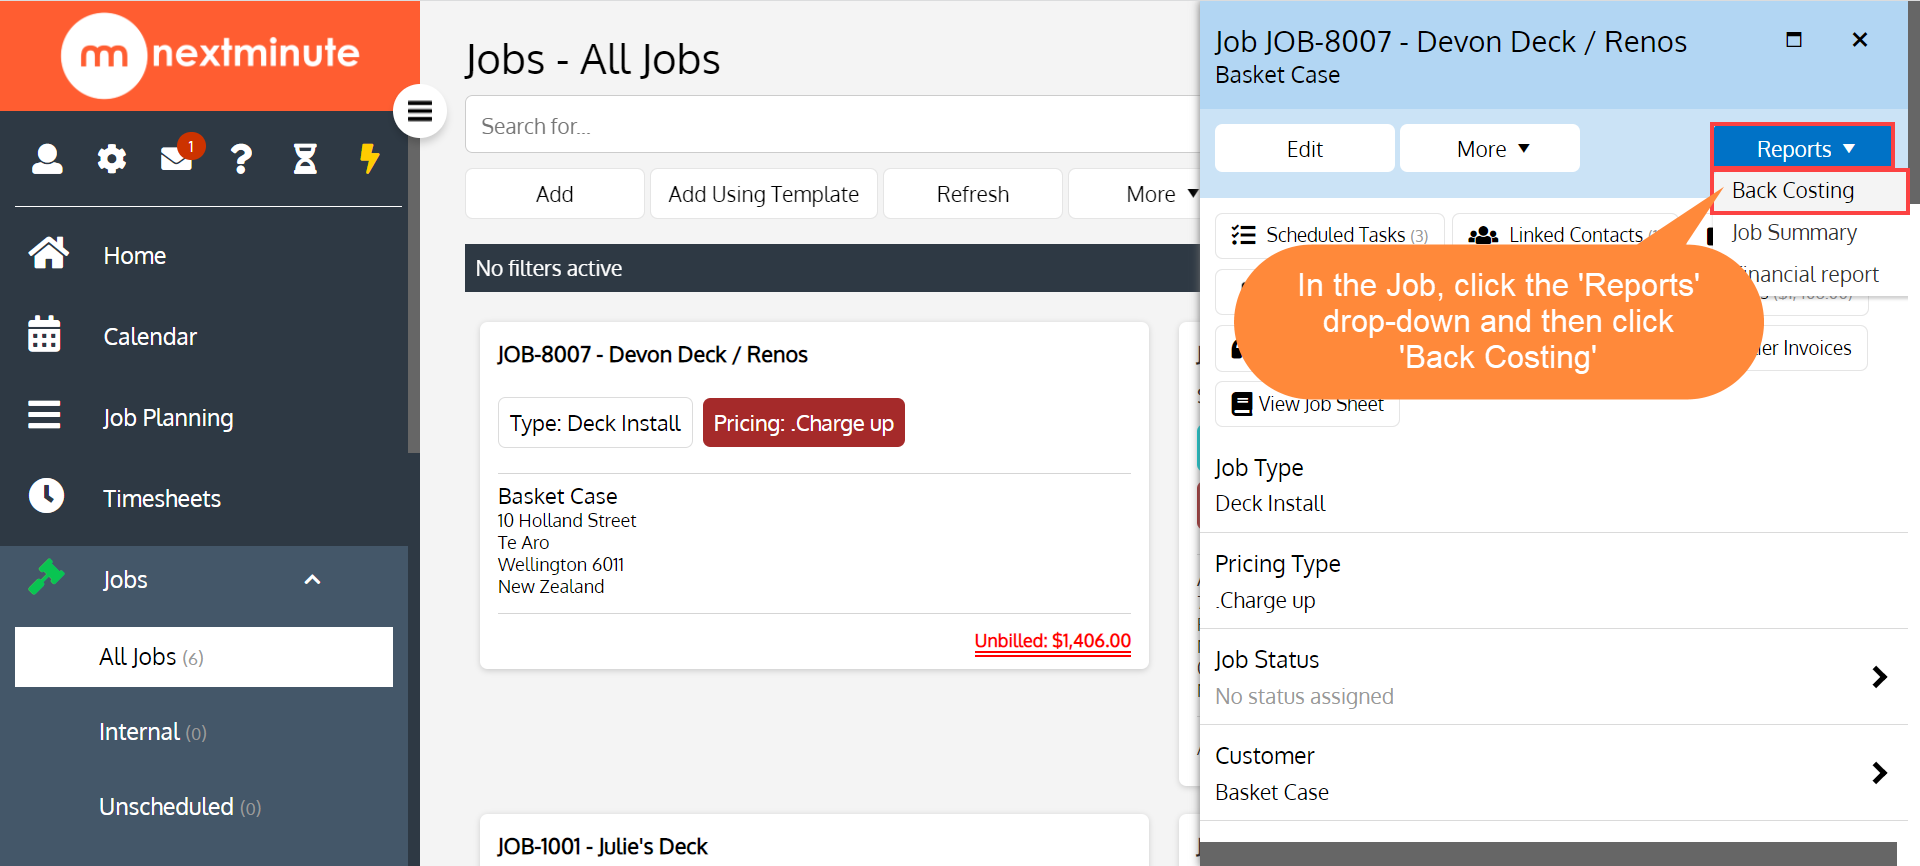
The Back costing report can be accessed against the Job under Reports OR it can be accessed from the Reports application.
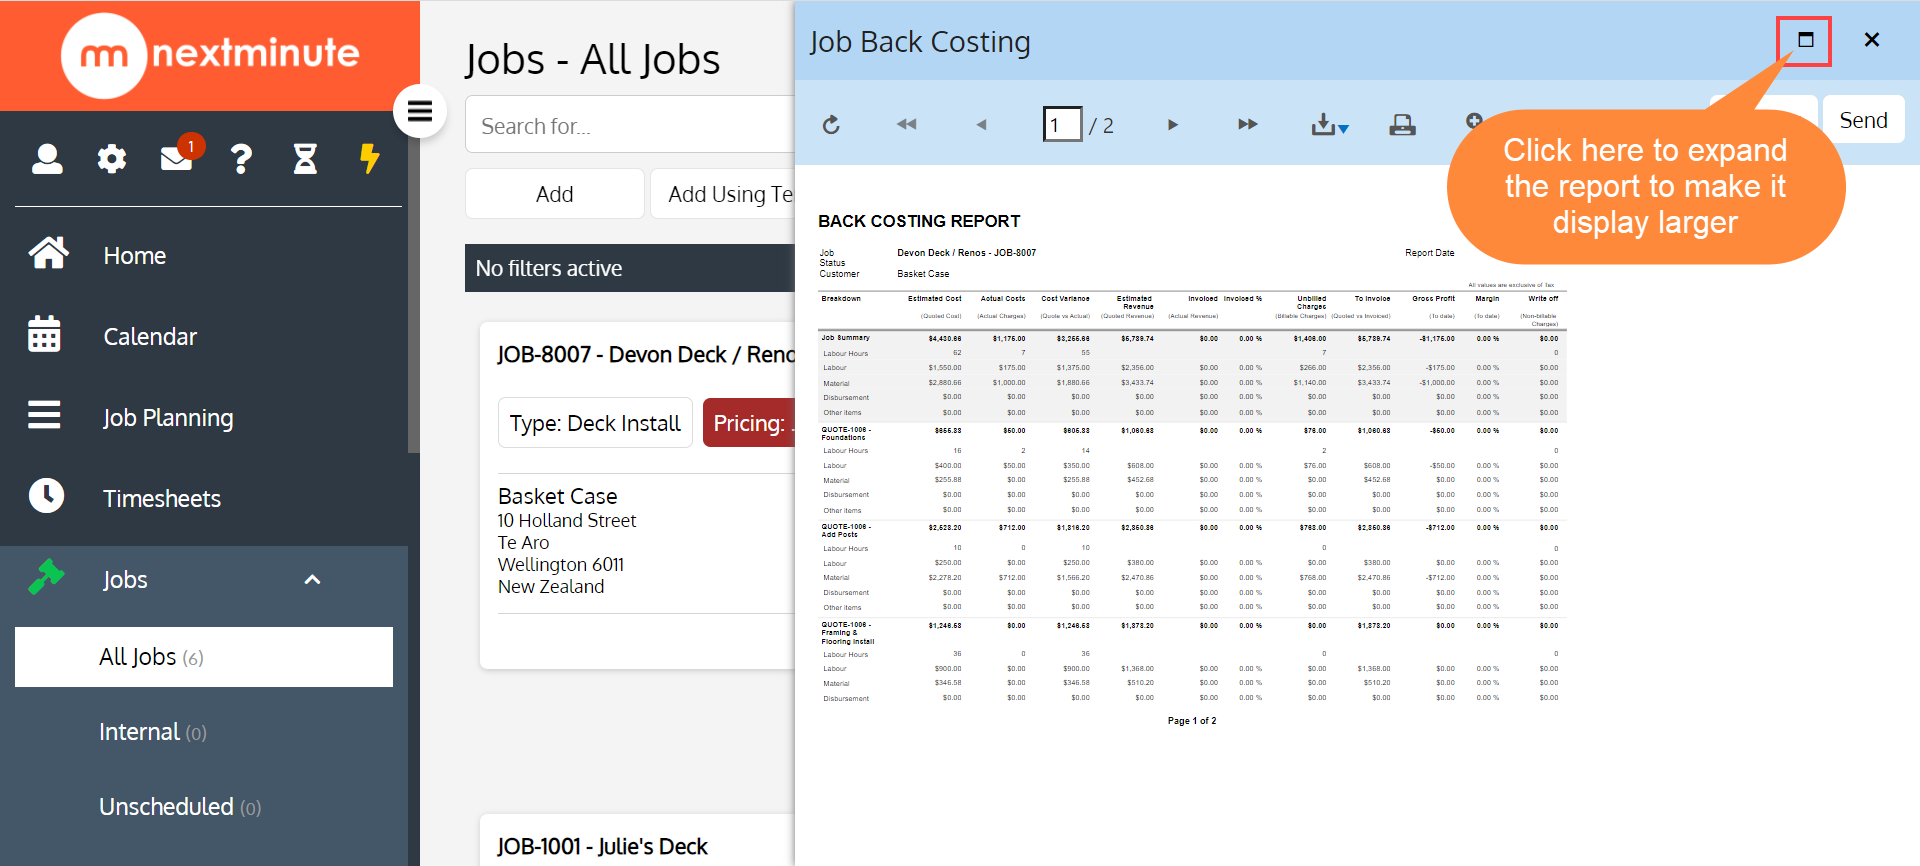
To view the back costing report for a Job, it is quickest to open the job, select back costing from reports and it will automatically run and provide full visibility across all your quoted and current actuals costs to date … along with some other useful data and calculations
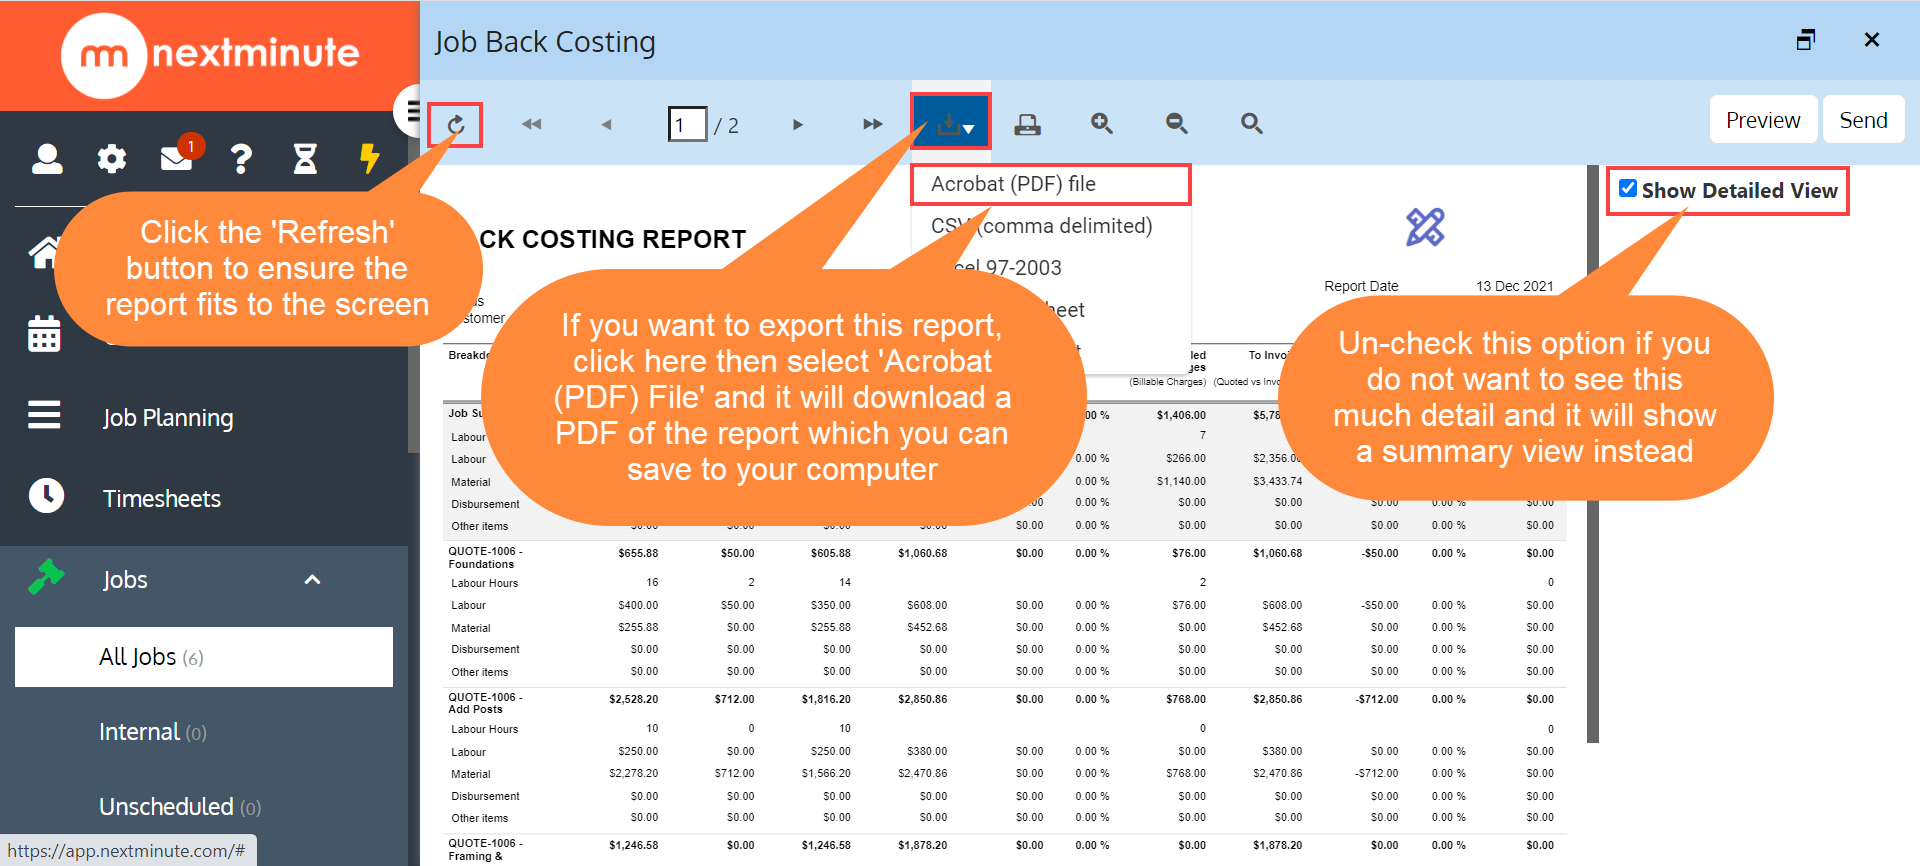
The report runs (hint - you can expand by select the expand icon shown in the screenshot below) and then zoom in to see the finer details / information
You can now access real time back costing data on the Job and all the associated costs broke down. If you wish you can hide off the detail (i.e.: the split of labour, disbursements, Materials, other) by unchecking the 'Show detailed view'