![NextMinute_Primary_White.svg]](https://support.nextminute.com/hubfs/NextMinute_Primary_White.svg)
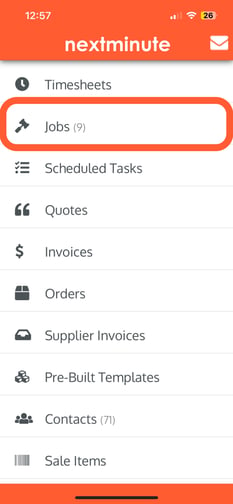
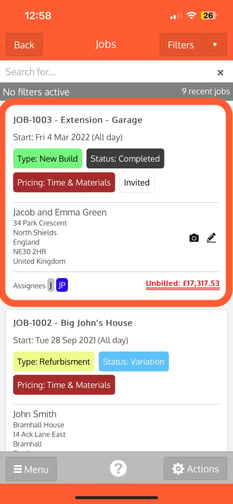
Step 1: Navigate to Jobs & Choose a Job you wish to add a timesheet entry to
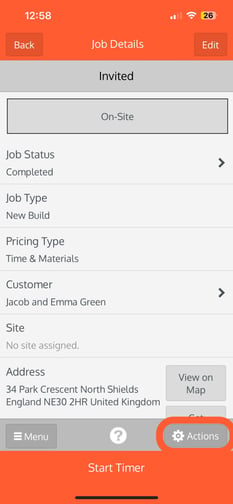
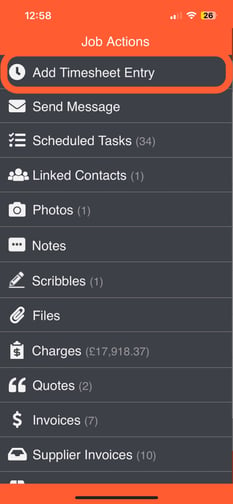
Step 2: Select Actions & Add timesheet entry
 .
. 
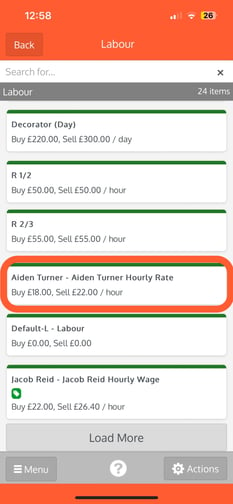
Step 3: Select the labour rate to apply to timesheet entry
Note: You will not see pricing if it has been switched off for you.
Step 4: Enter the Total hours or Time range and select Next
Duration
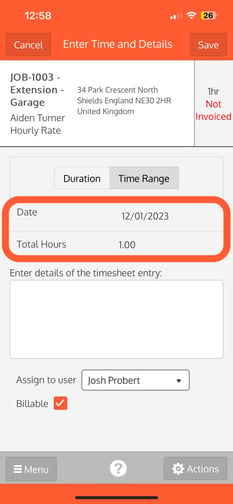
Time Range
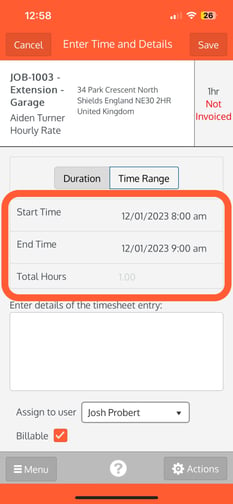
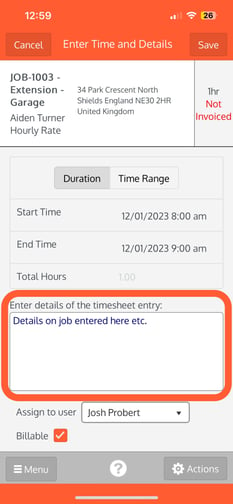
Step 5: Enter the timesheet entry details and select save
Note: You may have permissions to change the entry to not billable and/or assign it to another user/worker
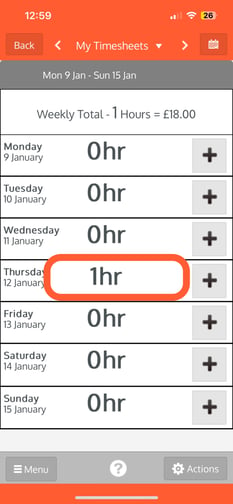
The Timesheet entry will show against the Job and your Timesheets.